Archos AV500 User Guide - Page 30
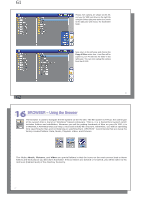
Zoom in/out, Magnifying Photos, Play a Slideshow, Photo Browser Settings > Picture Pause, methods - camera
 |
UPC - 690590506794
View all Archos AV500 manuals
Add to My Manuals
Save this manual to your list of manuals |
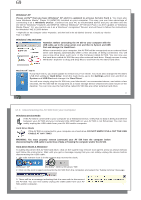
Page 30 highlights
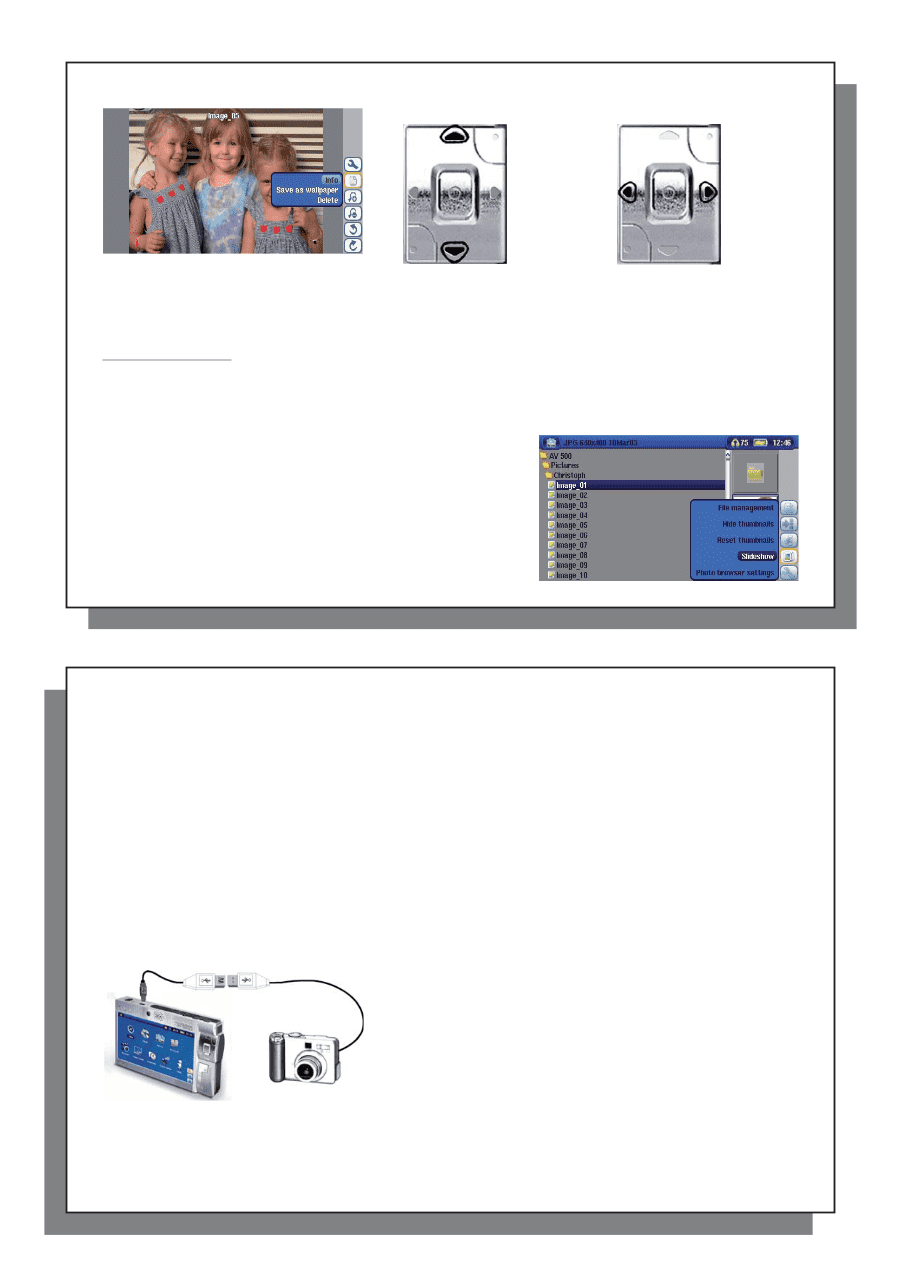
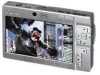
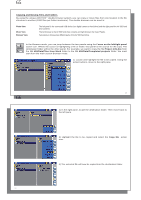
59 Rotate picture 90° left View previous/next photo Rotate picture 90° right • Move up the action icon menu to select a picture option. • Select the Zoom in/out action icon to change the number of photos in the carrousel view. Magnifying Photos Once the picture is displayed in full screen, selecting the Zoom in action icon will magnify the image up to two levels. Each successive click will magnify the picture one more level. You can use your direction buttons to move the picture around in order to see the desired magnified area. The small + signs on the bottom left of the screen indicate the level of magnification, either + or ++. Click on STOP/ESC to go back to an unmagnified view. 15.2 Viewing a slideshow By clicking on the action icon Play a Slideshow, the AV 500 will present each picture in the current folder for a set amount of time and then go on to the next picture. You can set the amount of time that each picture stays on the screen under the action icon Photo Browser Settings > Picture Pause. This parameter is the number of seconds each picture displays on the screen. 59 60 15.3 Transferring photos to your AV 500 The AV 500 is equipped with a USB host port. This port, along with the USB Host adapter cable will allow you to connect USB Mass Storage Class (MSC) devices to your AV 500 and transfer files from that device to your AV 500. Many cameras produced today are MSC type devices. Thus you can often plug your camera directly into the AV 500's USB Host port and copy your photos with the ARCHOS™ browser. If you do not have an MSC type camera, you can use a USB card reader and plug this into AV 500's USB host port (via the USB host adapter cable). Finally if neither of these solutions is available to you, you can always copy the photos to your computer and then copy them from your computer to the connected AV 500 (via USB 2). 3 methods to copy photos to your AV 500 1) Connect your Mass Storage Class camera to USB Host port (via USB host adapter cable). 2) Use a stand alone USB card reader with the USB host adapter cable. 3) Copy photos to your computer and then copy (or Sync with Windows Media® Player 10) to the AV 500 (via USB 2). Method 1 Once you plug an MSC type device into the USB host port (via the host adapter cable), the browser's left panel will show the contents of your external USB device, and the right panel will show the contents of your AV 500's hard drive. Navigate to the panel which contains your photos (in this example /DCIM/113CANON). Move to the right panel (action) and navigate to the folder you would like to save your photos to (you can create a new folder if you need to by selecting the corresponding action icon). See the screen images on the next page. 60
-
 1
1 -
2
-
3
-
4
-
5
-
6
-
7
-
8
-
9
-
10
-
11
-
12
-
13
-
14
-
15
-
16
-
17
-
18
-
19
-
20
-
21
-
22
-
23
-
24
-
 25
25 -
 26
26 -
 27
27 -
 28
28 -
 29
29 -
 30
30 -
 31
31 -
 32
32 -
 33
33 -
 34
34 -
 35
35 -
36
-
37
-
38
-
39
-
40
-
41
-
42
-
43
-
44
-
45
-
46
-
47
-
48
-
49
-
50
-
51
-
52
-
53
-
54
-
55
 |
 |