Asus P3C-LS P3C-LS User Manual - Page 27
Installing Memory Using an ASUS DIMM Riser
 |
View all Asus P3C-LS manuals
Add to My Manuals
Save this manual to your list of manuals |
Page 27 highlights
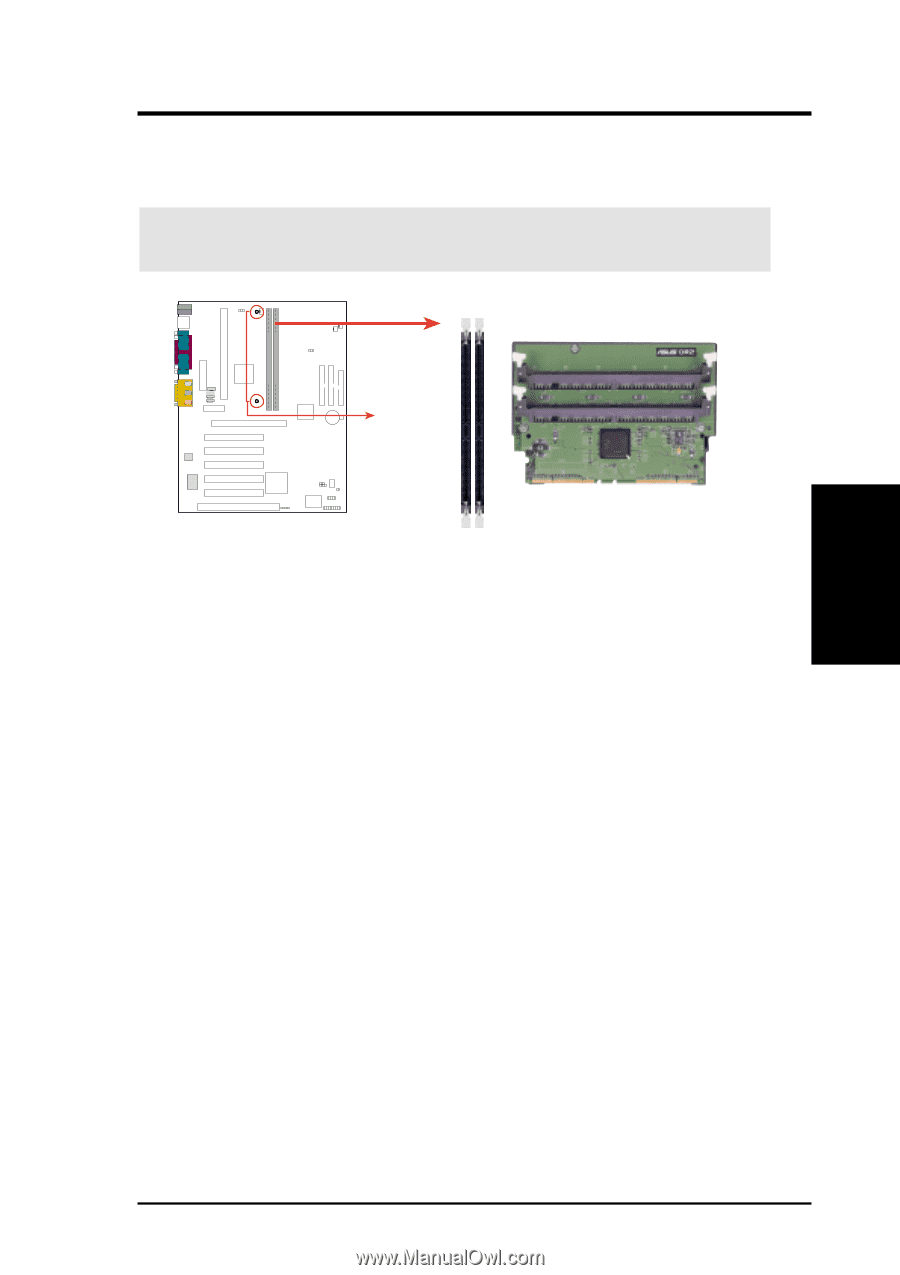
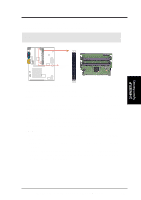
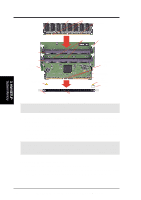
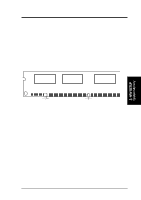
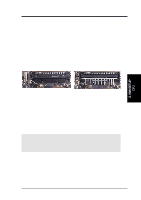
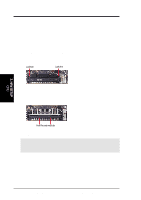
3. H/W SETUP System Memory 3. HARDWARE SETUP 3.5.2 Installing Memory Using an ASUS DIMM Riser The ASUS DIMM Riser will fit in only one orientation. IMPORTANT: Do not touch the riser's connectors. Handle the riser only by the edges. RIMM0 RIMM1 PARALLEL PORT OPTIONAL P3C-LS / L / S 1 2 3 4 ATTACH MOUNT BRIDGES ASUS DIMM Riser (DR2) P3C-LS/L/S 184-Pin RIMM Sockets 1. Remove the riser from its static-proof bag. NOTE: Hold the riser by its edges to avoid touching the connector or any delicate components on the riser. 2. Align the notch keys in the riser with the small ribs inside the RIMM sockets (see opposite page for locations of parts). 3. With the RIMM socket's ejectors in the open position, push down gently but firmly on the riser until it snaps into place. The guides on the socket's ejectors should go through the two mounting notches on the riser and the ejectors should close. If necessary, push the ejectors inward to secure the riser in place. NOTES: • Do not rock the riser side to side. Rocking the riser can damage the RIMM socket and the riser. • Do not force the riser in. If you meet a lot of resistance, pull the riser out and try again. • To see if the riser is properly connected, pull it gently. If it resists and stays in place, it is connected. Make sure that you do not pull the riser so much that you accidentally disconnect it. ASUS P3C-L / P3C-S / P3C-LS User's Manual 27
-
 1
1 -
2
-
3
-
4
-
5
-
6
-
7
-
8
-
9
-
10
-
11
-
12
-
13
-
14
-
15
-
16
-
17
-
18
-
19
-
20
-
21
-
 22
22 -
 23
23 -
 24
24 -
 25
25 -
 26
26 -
 27
27 -
 28
28 -
 29
29 -
 30
30 -
 31
31 -
 32
32 -
33
-
34
-
35
-
36
-
37
-
38
-
39
-
40
-
41
-
42
-
43
-
44
-
45
-
46
-
47
-
48
-
49
-
50
-
51
-
52
-
53
-
54
-
55
-
56
-
57
-
58
-
59
-
60
-
61
-
62
-
63
-
64
-
65
-
66
-
67
-
68
-
69
-
70
-
71
-
72
-
73
-
74
-
75
-
76
-
77
-
78
-
79
-
80
-
81
-
82
-
83
-
84
-
85
-
86
-
87
-
88
-
89
-
90
-
91
-
92
-
93
-
94
-
95
-
96
-
97
-
98
-
99
-
100
-
101
-
102
-
103
-
104
-
105
-
106
-
107
-
108
-
109
-
110
-
111
-
112
-
113
-
114
 |
 |