Asus TUWE-M TUWE-M User Manual - Page 23
Central Processing Unit CPU
 |
View all Asus TUWE-M manuals
Add to My Manuals
Save this manual to your list of manuals |
Page 23 highlights
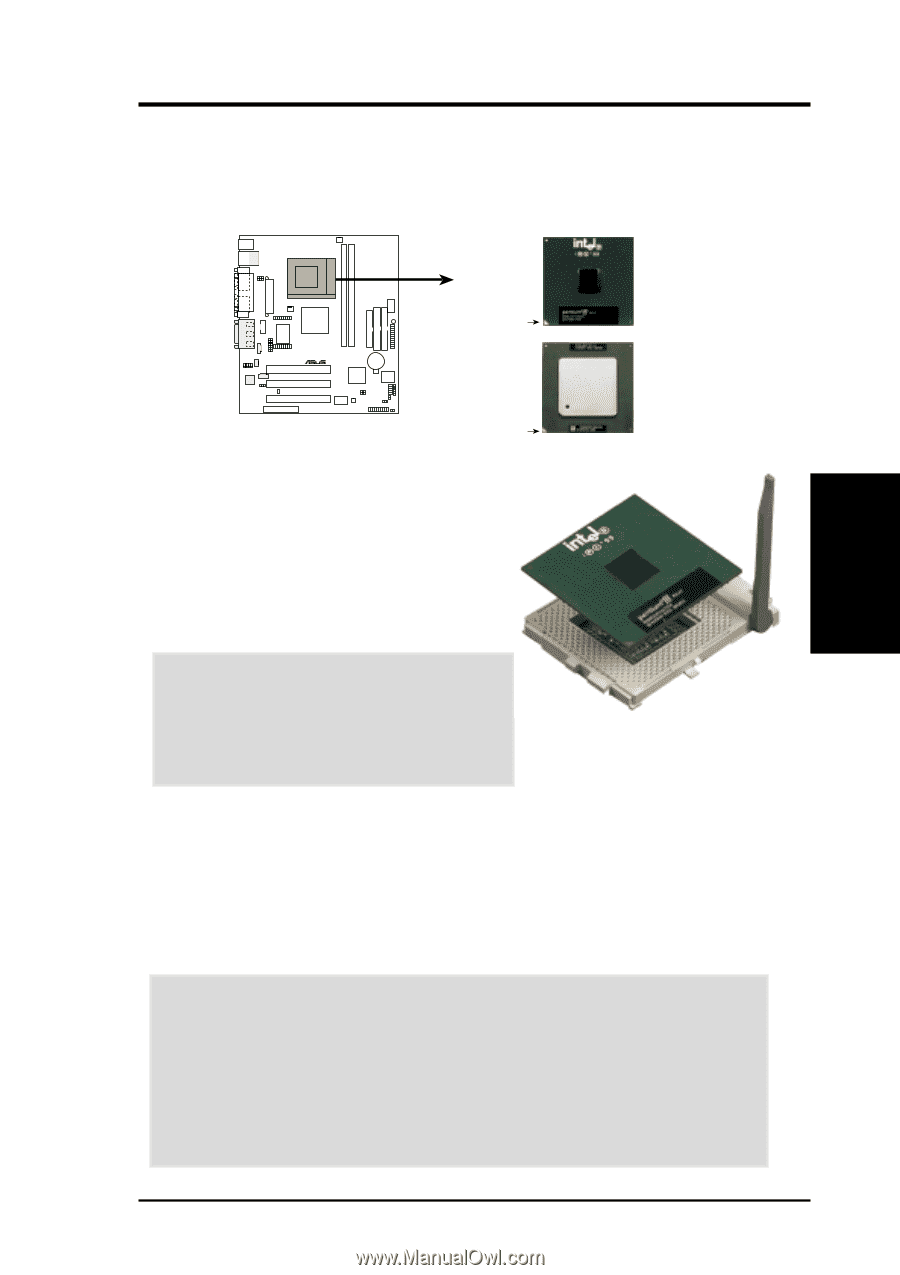
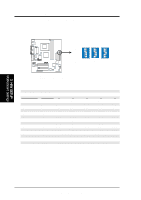
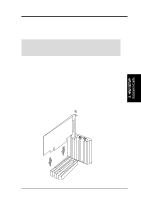
3. H/W SETUP CPU 3. HARDWARE SETUP 3.6 Central Processing Unit (CPU) The motherboard provides a ZIF Socket 370, for CPU installation. A fan and heatsink should be attached to the CPU to prevent overheating. Purchase and install a fan and heatsink before turning on the system. Pentium III Celeron (Coppermine) FC-PGA ® TUWE-M Gold Arrow Pentium III (Tualatin) FC-PGA2 TUWE-M Socket 370 Gold Arrow 1. Locate the Socket 370 and open it by pulling the lever gently sideways away from the socket. Then lift the lever upwards. The socket lever must be fully opened (90 to 100 degrees). 2. Insert the CPU with the correct orientation. The gold arrow of the CPU must be oriented toward the outer corner of the socket base nearest to the tip of the lever handle. CAUTION! The CPU fits in one orientation and should drop easily into place. Do not force the CPU into the socket to avoid bending the pins. If the CPU does not fit, check its alignment and look for bent pins. 3. Once completely inserted, press the CPU firmly and close the socket lever until it snaps into its locked position. 4. Install an Intel fan heatsink. The heatsink should entirely cover the CPU. Carefully attach the heatsink locking brace to the plastic clips on the socket base. With the added weight of the CPU fan and heatsink locking brace, no extra force is required to keep the CPU in place. Connect the CPU fan cable to the fan connector (See 3.1 Motherboard Layout / 3.8 Connectors). CAUTION! Take care not to scrape the motherboard surface when mounting a clamp-style processor fan, or else damage may occur. When mounting a heatsink onto your CPU, make sure that exposed CPU capacitors do not touch the heatsink, or else damage may occur! Refer to heatsink/CPU documentation. NOTE: Do not forget to set the correct Bus Frequency and Multiple (frequency multiple setting is available only on unlocked processors) for your Socket 370 processor or else boot-up may not be possible. Socket 370 processors provide internal thermal sensing: a socket mounted thermal resistor is not needed. ASUS TUWE-M User's Manual 23
-
 1
1 -
2
-
3
-
4
-
5
-
6
-
7
-
8
-
9
-
10
-
11
-
12
-
13
-
14
-
15
-
16
-
17
-
 18
18 -
 19
19 -
 20
20 -
 21
21 -
 22
22 -
 23
23 -
 24
24 -
 25
25 -
 26
26 -
 27
27 -
 28
28 -
29
-
30
-
31
-
32
-
33
-
34
-
35
-
36
-
37
-
38
-
39
-
40
-
41
-
42
-
43
-
44
-
45
-
46
-
47
-
48
-
49
-
50
-
51
-
52
-
53
-
54
-
55
-
56
-
57
-
58
-
59
-
60
-
61
-
62
-
63
-
64
-
65
-
66
-
67
-
68
-
69
-
70
-
71
-
72
-
73
-
74
-
75
-
76
-
77
-
78
-
79
-
80
-
81
-
82
-
83
-
84
-
85
-
86
-
87
-
88
-
89
-
90
 |
 |