Beko HII64430GT User Manual - Page 16
Using, Control, panel
 |
View all Beko HII64430GT manuals
Add to My Manuals
Save this manual to your list of manuals |
Page 16 highlights
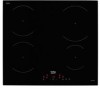
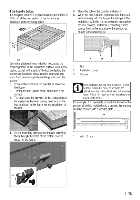
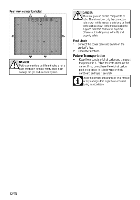
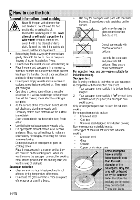
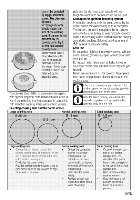
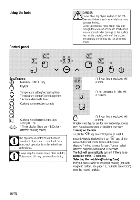
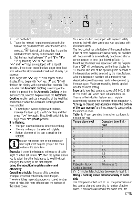
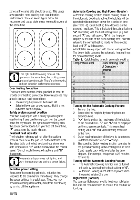
Using the hobs Control panel AA,I DANGER: I Do not allow any object to drop on the hob. • n small objects such as a saltshaker may damage the hob. Do not use cracked hobs. Water may leak through these cracks and cause short circuit. In case of any kind of damage on the surface (eg., visible cracks), switch off the product immediately to minimize the risk of electric shock. Specifications Main key - ON/OFF key Keylock /\ Temperature setting/Increasing timer Ni Temperature setting/Decreasing timer * Activate/deactivate timer Cooking zone selection controls 0 (*) If your hob is equipped with a timer. (*) Not contained in hobs with 3 burners. Cooking zone display (temperature setting 0 ... 9) * Timer display (there are 4 LEDs for 4 different cooking zones) This appliance is controlled via the touch control unit. If your touch control unit has a mer, each operation is confirmed with an audio signal. ways keep the control panels clean and dry. Moisture and dirt may cause malfunctioning. (*) If your hob is equipped with a timer. Graphics and figures are for informational purposes only. Actual appearance or functions may vary. Turning on the hob Touch the "0" key on control panel at least 1 second.Hotplate displays light up. "g " and all the relevant decimal points flash in all hotplate displays.The hob is ready for use . You can select different hotplates within next 10 seconds. The hob will automatically turn off if there is no operation within 10 seconds. Selecting the Hotplates(Cooking Zone) Put your pan suitable for induction-cooking (pan with magnetic bottom, see page 12, "suitable pan choice") onto the related hotplate. 16/EN
-
 1
1 -
2
-
3
-
4
-
5
-
6
-
7
-
8
-
9
-
10
-
 11
11 -
 12
12 -
 13
13 -
 14
14 -
 15
15 -
 16
16 -
 17
17 -
 18
18 -
 19
19 -
 20
20 -
 21
21 -
22
-
23
-
24
-
25
-
26
-
27
-
28
 |
 |
