Belkin F5D6060 User Manual - Page 22
Ad-Hoc Channel
 |
View all Belkin F5D6060 manuals
Add to My Manuals
Save this manual to your list of manuals |
Page 22 highlights
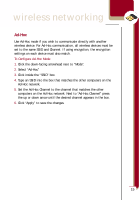
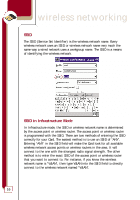
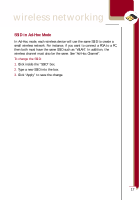
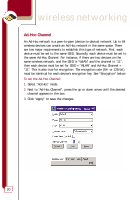
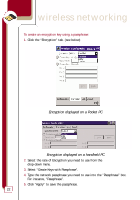
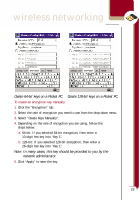
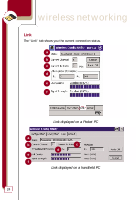
wireless networking Ad-Hoc Channel An Ad-Hoc network is a peer-to-peer (device-to-device) network. Up to 64 wireless devices can create an Ad-Hoc network in the same space. There are two major requirements to establish this type of network. First, each device must be set to the same SSID. Secondly, each device must be set to the same Ad-Hoc Channel. For instance, if there are two devices on the same wireless network, and the SSID is "WLAN" and the channel is "11", then each device must be set for SSID = "WLAN" and Ad-Hoc Channel = "11". This is also true for encryption. The encryption rate (64- or 128-bit) must be identical for each device's encryption key. See "Encryption" below. To set the Ad-Hoc Channel: 1. Select "Ad-Hoc" mode. 2. Next to "Ad-Hoc Channel", press the up or down arrow until the desired channel appears in the box. 3. Click "Apply" to save the changes. 20
-
 1
1 -
2
-
3
-
4
-
5
-
6
-
7
-
8
-
9
-
10
-
11
-
12
-
13
-
14
-
15
-
16
-
 17
17 -
 18
18 -
 19
19 -
 20
20 -
 21
21 -
 22
22 -
 23
23 -
 24
24 -
 25
25 -
 26
26 -
 27
27 -
28
-
29
-
30
-
31
-
32
-
33
-
34
-
35
-
36
-
37
 |
 |
