Beretta PICO 380 Instruction Manual - Page 38
Chassis Disassembly / Reassembly
 |
View all Beretta PICO 380 manuals
Add to My Manuals
Save this manual to your list of manuals |
Page 38 highlights
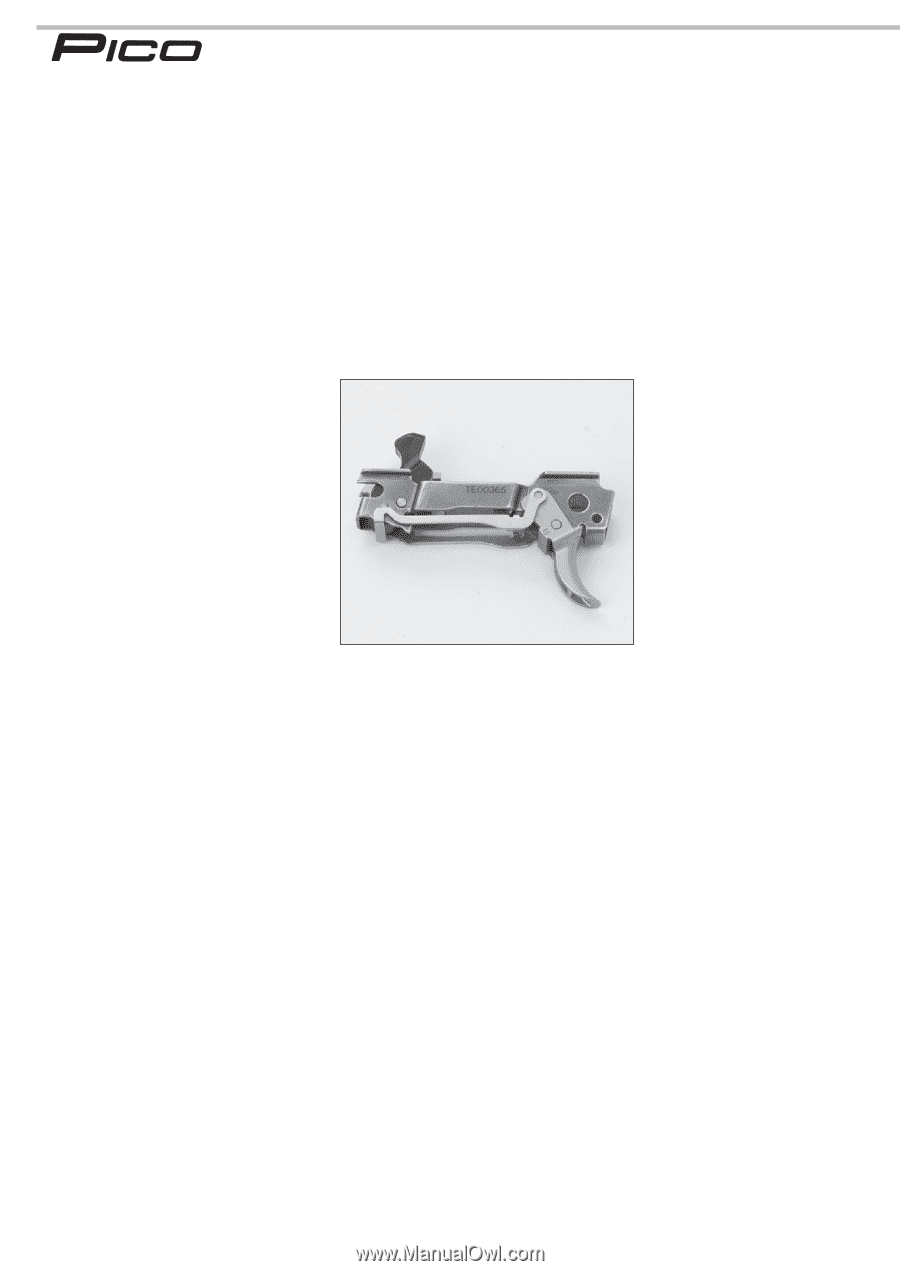
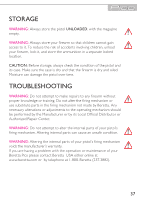
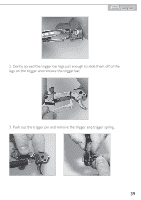
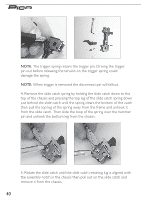
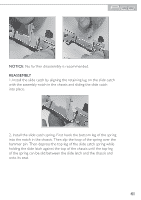
NOTICE: PAGES 38-49 CONTAIN INFORMATION THAT IS NOT NEEDED FOR NORMAL MAINTENANCE. IT IS PROVIDED TO ALLOW YOU TO PERFORM MORE ADVANCED MAINTENANCE. IF YOU ARE NOT CONFIDENT TO PERFORM THE OPERATIONS DESCRIBED, BERETTA RECOMMENDS TAKING YOUR PISTOL TO A COMPETENT GUNSMITH FOR SERVICE. CHASSIS DISASSEMBLY / REASSEMBLY NOTE: The chassis does not need to be disassembled for normal maintenance. NOTE: Read this section completely before proceeding. The parts contained in the chassis assembly have been designed to interlock so that when the chassis is removed from the frame parts do not fall off and get lost. Because the parts interlock, the order of disassembly and reassembly is important. DISASSEMBLY 1. Unhook the legs of the trigger spring from their seats on the trigger bar and allow them to rest against the disconnect pin. 38
-
 1
1 -
2
-
3
-
4
-
5
-
6
-
7
-
8
-
9
-
10
-
11
-
12
-
13
-
14
-
15
-
16
-
17
-
18
-
19
-
20
-
21
-
22
-
23
-
24
-
25
-
26
-
27
-
28
-
29
-
30
-
31
-
32
-
 33
33 -
 34
34 -
 35
35 -
 36
36 -
 37
37 -
 38
38 -
 39
39 -
 40
40 -
 41
41 -
 42
42 -
 43
43 -
44
-
45
-
46
-
47
-
48
-
49
-
50
-
51
-
52
-
53
-
54
-
55
-
56
-
57
-
58
-
59
-
60
 |
 |