Brother International CB3-B917 Service Manual - Page 29
point of entry
 |
View all Brother International CB3-B917 manuals
Add to My Manuals
Save this manual to your list of manuals |
Page 29 highlights
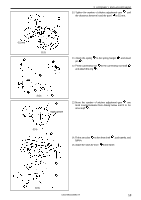
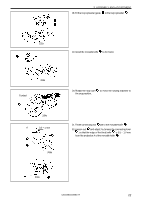
3. ASSEMBLY AND ADJUSTMENT 23. Attach the needle plate to the frame. 24. Temporarily attach the feed plate . to the feed bracket 337s 338s 25. Put the sewing machine in the stop position, or align the arrow mark on the vertical feed adjustment lever to the (2 hole) position. 26. Loosen the nut and adjust the indicator plate to the 3.5 mark on the feed bracket . 27. Align the arrow mark on the vertical feed adjustment lever to the 3.5 mark 339s 318s 28. Attach the needle. 29. Rotate the stop cam and adjust the feed plate so that the needle will pass through at the four corners of the square hole of the feed plate equally 30. Remove the needle. Needle's first point of entry 341s 23 CB3-B916A/B917A
-
 1
1 -
2
-
3
-
4
-
5
-
6
-
7
-
8
-
9
-
10
-
11
-
12
-
13
-
14
-
15
-
16
-
17
-
18
-
19
-
20
-
21
-
22
-
23
-
 24
24 -
 25
25 -
 26
26 -
 27
27 -
 28
28 -
 29
29 -
 30
30 -
 31
31 -
 32
32 -
 33
33 -
 34
34 -
35
-
36
-
37
-
38
-
39
-
40
-
41
-
42
-
43
-
44
-
45
-
46
-
47
-
48
-
49
-
50
-
51
-
52
-
53
-
54
-
55
-
56
 |
 |
3. ASSEMBLY AND ADJUSTMENT
CB3-B916A/B917A
23
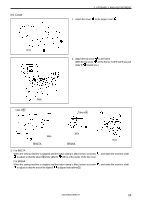
23. Attach the needle plate
to the frame.
24. Temporarily attach the feed plate
to the feed bracket
.
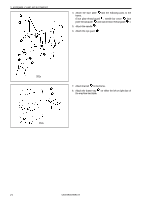
25.Put the sewing machine in the stop position, or align the
arrow mark on the vertical feed adjustment lever
to the
(2 hole) position.
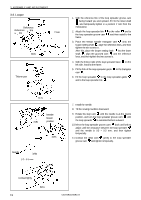
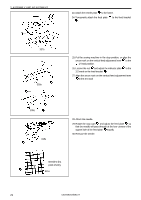
26. Loosen the nut
and adjust the indicator plate
to the
3.5 mark on the feed bracket
.
27. Align the arrow mark on the vertical feed adjustment lever
to the 3.5 mark
337s
338s
339s
318s
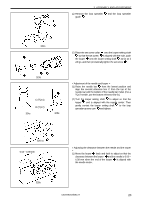
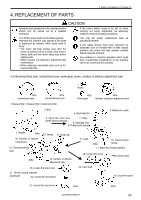
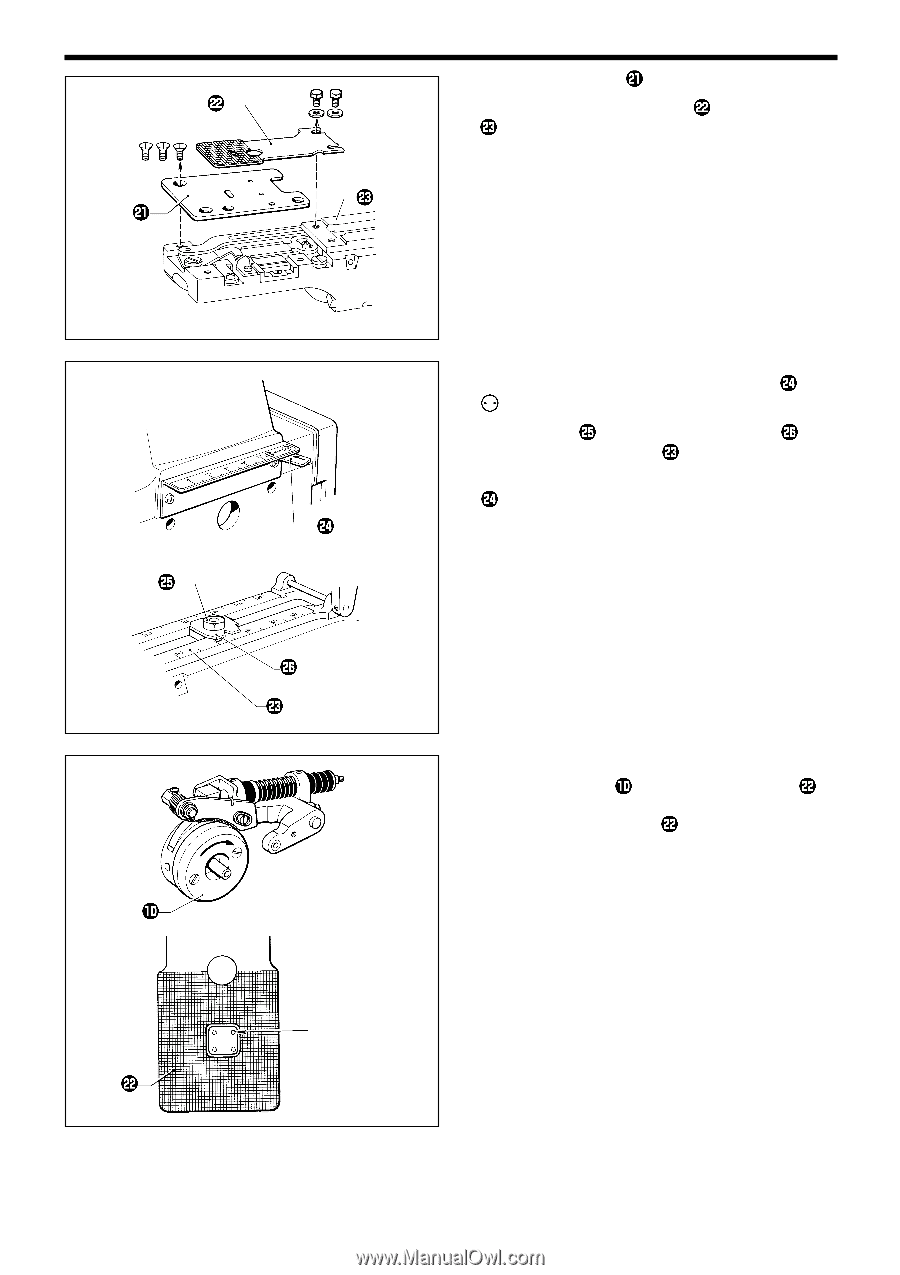
Needle’s first
point of entry
341s
28. Attach the needle.
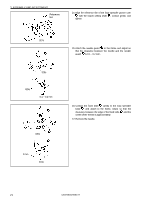
29. Rotate the stop cam
and adjust the feed plate
so
that the needle will pass through at the four corners of the
square hole of the feed plate
equally
30. Remove the needle.