Brother International CS-8072 Users Manual - English - Page 33
STITCH WIDTH AND LENGTH, Adjusting the stitch width, CAUTION - instruction manual
 |
View all Brother International CS-8072 manuals
Add to My Manuals
Save this manual to your list of manuals |
Page 33 highlights
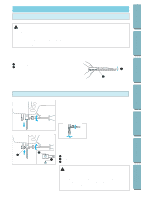
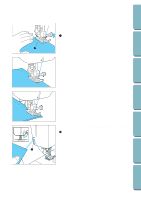
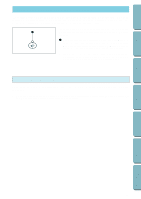
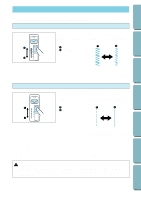
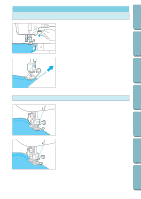
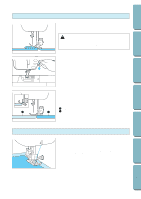
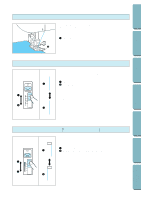
CONTENTS BEFORE USE SEWING UTILITY STITCHES STITCH WIDTH AND LENGTH Generally suitable stitch width and length values are set automatically when a stitch is selected. If you prefer to use other values, follow the instructions below to change the values. Adjusting the stitch width Press the stitch width manual change key. The LED lamp will light up. Move the stitch width adjustment lever up or down. Moving the lever up increases the stitch width, and moving the lever down decreases the stitch width. 1 1 Up: Wider 1 2 2 Down: Narrower 2 To return to the default settings (or to cancel the manual adjustments), press the stitch width manual change key to turn off the LED lamp. Adjusting the stitch length 1 2 Press the stitch length manual change key. The LED lamp will light up. Move the stitch length adjustment lever up or down. Moving the lever up increases the stitch length, and moving the lever down decreases the stitch length. 1 Up: Longer 1 2 2 Down: Shorter To return to the default settings (or to cancel the manual adjustments), press the stitch length manual change key to turn off the LED lamp. In the following cases, the stitch width manual change key and the stitch length manual change key's LED lamps will be off, and the stitch width and length will return to the default values * When the main power switch is turned to ON. * When a different pattern is selected after the manual settings have been made. CAUTION If the stitches get bunched together, lengthen the stitch length and continue sewing. Do not continue sewing without lengthening the stitch length, otherwise the needle may break and cause injury. MAINTENANCE SEWING CHART PATTERNS (PROGRAMMED IN MACHINE) 30
-
 1
1 -
2
-
3
-
4
-
5
-
6
-
7
-
8
-
9
-
10
-
11
-
12
-
13
-
14
-
15
-
16
-
17
-
18
-
19
-
20
-
21
-
22
-
23
-
24
-
25
-
26
-
27
-
 28
28 -
 29
29 -
 30
30 -
 31
31 -
 32
32 -
 33
33 -
 34
34 -
 35
35 -
 36
36 -
 37
37 -
 38
38 -
39
-
40
-
41
-
42
-
43
-
44
-
45
-
46
-
47
-
48
-
49
-
50
-
51
-
52
-
53
-
54
-
55
-
56
-
57
-
58
-
59
-
60
-
61
-
62
-
63
-
64
-
65
-
66
-
67
-
68
-
69
-
70
-
71
-
72
-
73
-
74
-
75
-
76
-
77
-
78
-
79
-
80
-
81
-
82
 |
 |
