Brother International DCP-130C Quick Setup Guide - English - Page 17
For USB Interface Users, For Mac OS, X 10.2.4 or greater - driver mac
 |
UPC - 012502615699
View all Brother International DCP-130C manuals
Add to My Manuals
Save this manual to your list of manuals |
Page 17 highlights
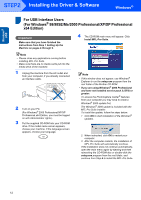
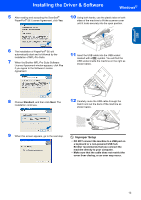
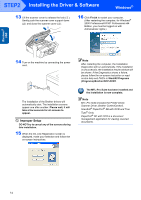
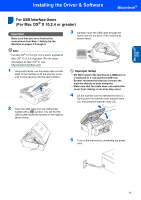
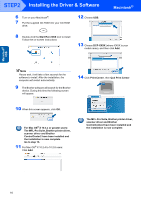
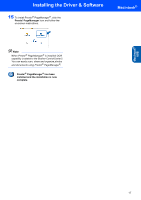
Macintosh® USB Installing the Driver & Software Macintosh® For USB Interface Users (For Mac OS® X 10.2.4 or greater) Important Make sure that you have finished the instructions from Step 1 Setting Up the Machine on pages 4 through 9. 3 Carefully route the USB cable through the trench and out the back of the machine as shown below. Note For Mac OS® X 10.2.0 to 10.2.3 users, upgrade to Mac OS® X 10.2.4 or greater. (For the latest information for Mac OS® X, visit http://solutions.brother.com) 1 Using both hands, use the plastic tabs on both sides of the machine to lift the scanner cover until it locks securely into the open position. 2 Insert the USB cable into the USB socket marked with a symbol. You will find the USB socket inside the machine on the right as shown below. Improper Setup • DO NOT connect the machine to a USB port on a keyboard or a non-powered USB hub. Brother recommends that you connect the machine directly to your computer. • Make sure that the cable does not restrict the cover from closing, or an error may occur. 4 Lift the scanner cover to release the lock ( ). Gently push the scanner cover support down ( ) and close the scanner cover ( ). 5 Turn on the machine by connecting the power cord. 15
-
 1
1 -
2
-
3
-
4
-
5
-
6
-
7
-
8
-
9
-
10
-
11
-
 12
12 -
 13
13 -
 14
14 -
 15
15 -
 16
16 -
 17
17 -
 18
18 -
 19
19 -
 20
20 -
 21
21 -
 22
22
 |
 |