Brother International DS-620 BR-Receipts Users Guide Windows - Page 14
List View, Image View, Zoom In or Zoom Out
 |
View all Brother International DS-620 manuals
Add to My Manuals
Save this manual to your list of manuals |
Page 14 highlights
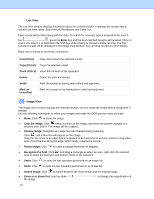
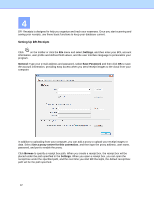
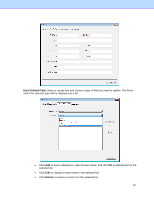
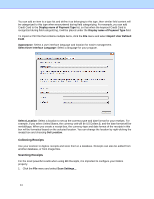
List View The List View window displays information about the selected folder. It displays the receipt data in columns as three totals: Total Amount, Reimburse, and Sales Tax. Each receipt will be listed along with the data. To search for a receipt, type a keyword in the search bar , press the Enter key and the best-matched receipts will be listed. Click on a record to select it, or hold down the Shift key while clicking to choose multiple records. The first selected receipt will be displayed in the image view window. You can drag receipts to other folders. Right-click a receipt to see these commands: Cut (Ctrl+X) Copy and remove the selected receipt. Copy (Ctrl+C) Copy the selected receipt. Paste (Ctrl+V) Insert the contents of the clipboard. Delete Delete the selected receipt. Verify Mark the receipt as having been edited and approved. Mark as Unverified Mark the receipt as not having been edited and approved. Image View The Image View window displays the selected receipt. You can rotate the image before recognition, if needed. Use the following commands to refine your images and make the OCR process more accurate: • Move: Click to move the image. • Crop the image: Click , select a portion of the image, and when the pointer changes to a scissors icon, click it. The image will be cropped. • Deskew image: Straighten an image that was skewed during scanning. Click and a blue line will appear on the image. Drag the line close to an edge that is supposed to be horizontal or vertical, and then drag either side of the blue line along the edge. When ready, release the mouse. • Rotate image: Click to rotate an image clockwise 90 degrees. • Recognize the field: Click and drag a rectangle to select an area, right-click the selected area to select the field type and perform OCR on the selection. • Undo: Click to undo the last operation performed on an image file. • Redo: Click to redo the last operation performed on an image file. • Switch Image: Click to switch between the clean image and the original image. • Zoom In or Zoom Out: Use the slider the image. to change the magnification of 10
-
 1
1 -
2
-
3
-
4
-
5
-
6
-
7
-
8
-
 9
9 -
 10
10 -
 11
11 -
 12
12 -
 13
13 -
 14
14 -
 15
15 -
 16
16 -
 17
17 -
 18
18 -
 19
19 -
20
-
21
-
22
-
23
-
24
-
25
-
26
-
27
-
28
-
29
-
30
-
31
-
32
-
33
 |
 |