Brother International DS-620 BR-Receipts Users Guide Windows - Page 7
Overview, Header Language - scanner
 |
View all Brother International DS-620 manuals
Add to My Manuals
Save this manual to your list of manuals |
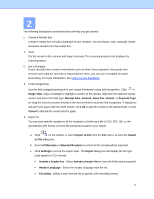
Page 7 highlights
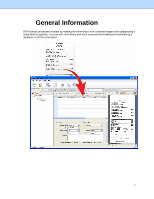
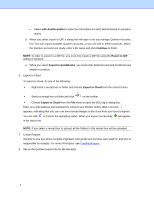
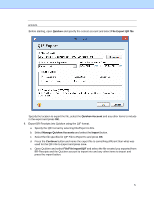
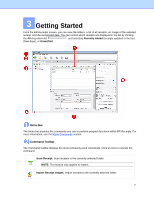
2 Overview The following descriptions and instructions will help you get started: 1. Create a Receipt Box Create a receipt box to build a database of your receipts. You can import, scan, manually create, and paste receipts into the receipt box. 2. Scan Put the receipt in the scanner and begin scanning. The scanning progress bar displays the scanning status. 3. Use a Template If your receipts have common information such as where they originated, how goods and services were paid for, and who is responsible for them, you can use a template for batch processing. For more information, see Using Receipt Templates. 4. Field Categorizing Use the field categorizing feature to sort receipt information using field recognition. Click in Image View, drag a rectangle to highlight a section of the receipt, right-click the selected receipt section and select the field type: Receipt Date, Amount, Sales Tax, Vendor, or Payment Type (or drag the selected section directly to the desired field) to activate field recognition. A dialog box will ask if you agree with the OCR results. Click OK to add the results to the desired field, or click Cancel to discard the results and try again. 5. Export To You can save specific receipts or all the receipts in a folder as a file in CSV, PDF, QIF, or the QuickBooks (IIF) format. Use the file format best suited to your needs. a. Click on the toolbar, or select Export to File from the File menu, to open the Export to File dialog box. b. Select All Receipts or Selected Receipts to control which receipts will be exported. c. Click Settings to set up the export style. The Export dialog box will display the file type (only applies to CSV format). • Include a header line - Select Include a header line to have the field names exported. • Header Language - Select the header language from the list. • Encoding - Select a type from the list to specify a file encoding format. 3
-
 1
1 -
 2
2 -
 3
3 -
 4
4 -
 5
5 -
 6
6 -
 7
7 -
 8
8 -
 9
9 -
 10
10 -
 11
11 -
 12
12 -
13
-
14
-
15
-
16
-
17
-
18
-
19
-
20
-
21
-
22
-
23
-
24
-
25
-
26
-
27
-
28
-
29
-
30
-
31
-
32
-
33
 |
 |