Brother International Entrepreneur Pro PR-1000 Kit 1 Instruction Manual - Engl - Page 15
press the start/stop button to embroider the, then press
 |
View all Brother International Entrepreneur Pro PR-1000 manuals
Add to My Manuals
Save this manual to your list of manuals |
Page 15 highlights
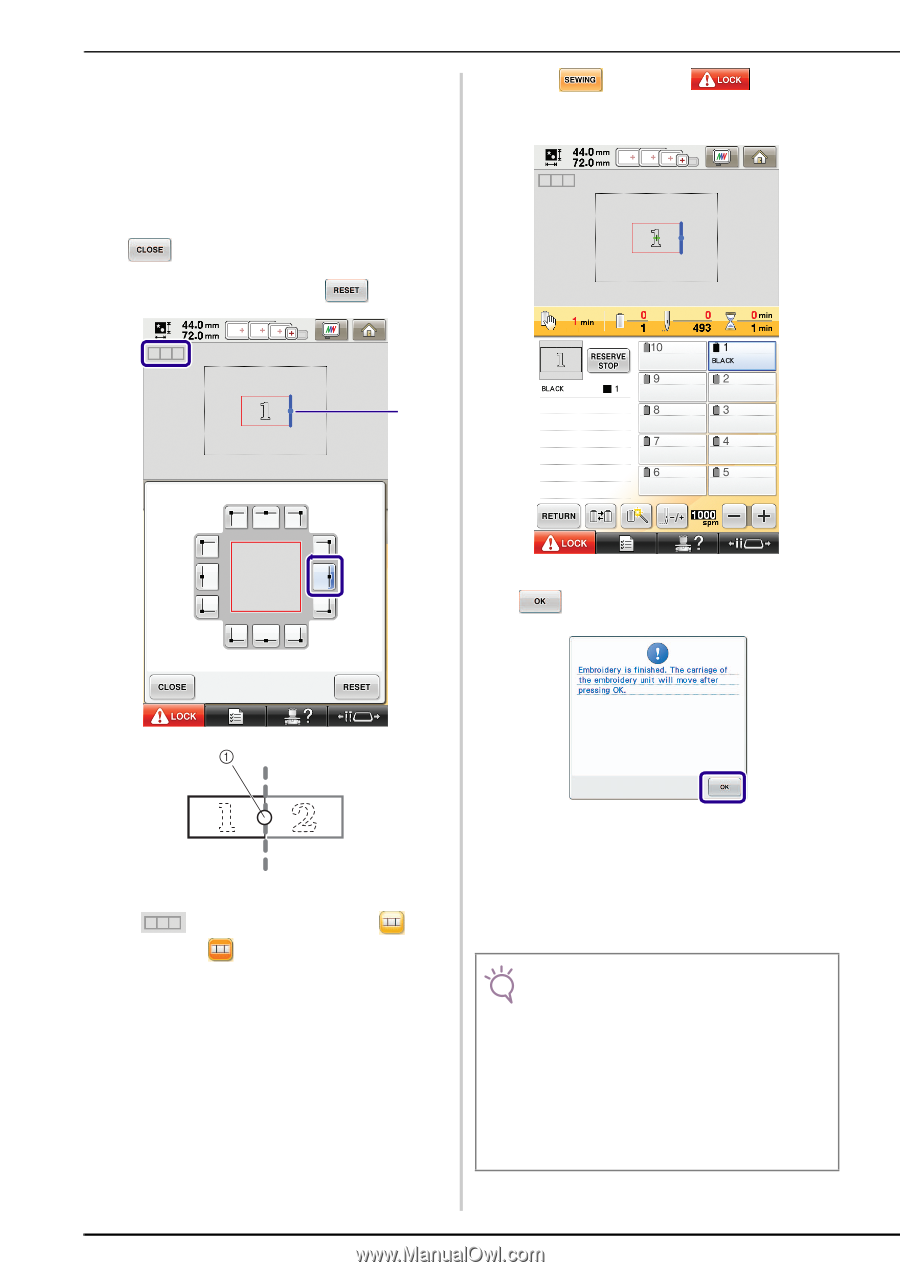
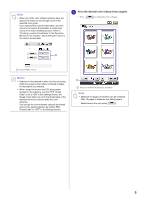
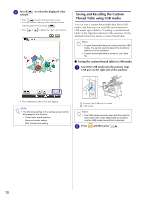
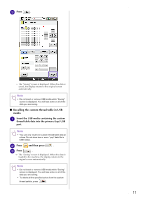
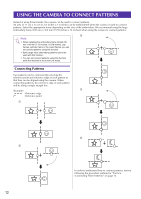
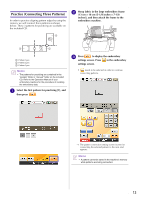
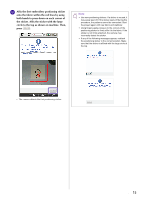
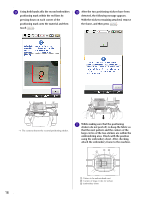
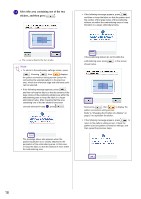
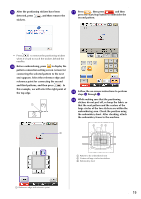
d Select the reference edge and reference point of the selected pattern for connecting the next pattern. Since, in this example, we will connect the center point of the right edge for the first pattern with the center point of the left edge for the next pattern, select the center point of the right edge, and then press . e Press , then press and then press the start/stop button to embroider the first pattern. • To cancel the selection, press . a f When the following message appears, press . a Reference edge and reference point of first pattern → appears in the screen, and then changes to . → The carriage will move. g Prepare two embroidery positioning stickers. We will follow the on-screen instructions to affix these two stickers to the fabric so that the positioning marks can be detected by the camera. Note • Use the positioning stickers included with this product or purchase replacement stickers (SAEPS2, EPS2: XF0763-001) from your Brother dealer. If any other sticker is used, the camera may not recognize it. • The 182 mm × 257 mm (7 inches × 10 inches) embroidery positioning sticker sheet with strong adhesion is most appropriate for connecting patterns (SAEPS2, EPS2: XF0763-001). If any other positioning sticker is used, it may peel off. If the sticker peels off, the patterns cannot be connected. 14
-
 1
1 -
2
-
3
-
4
-
5
-
6
-
7
-
8
-
9
-
 10
10 -
 11
11 -
 12
12 -
 13
13 -
 14
14 -
 15
15 -
 16
16 -
 17
17 -
 18
18 -
 19
19 -
 20
20 -
21
-
22
-
23
-
24
-
25
-
26
-
27
-
28
-
29
-
30
-
31
-
32
-
33
-
34
-
35
-
36
-
37
-
38
-
39
-
40
-
41
-
42
 |
 |