Brother International Entrepreneur Pro PR-1000 Kit 1 Instruction Manual - Engl - Page 24
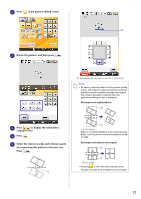
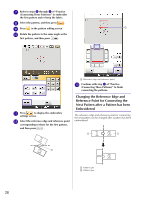
Practice Connecting Three Patterns on, next pattern and the centers of the large
 |
View all Brother International Entrepreneur Pro PR-1000 manuals
Add to My Manuals
Save this manual to your list of manuals |
Page 24 highlights
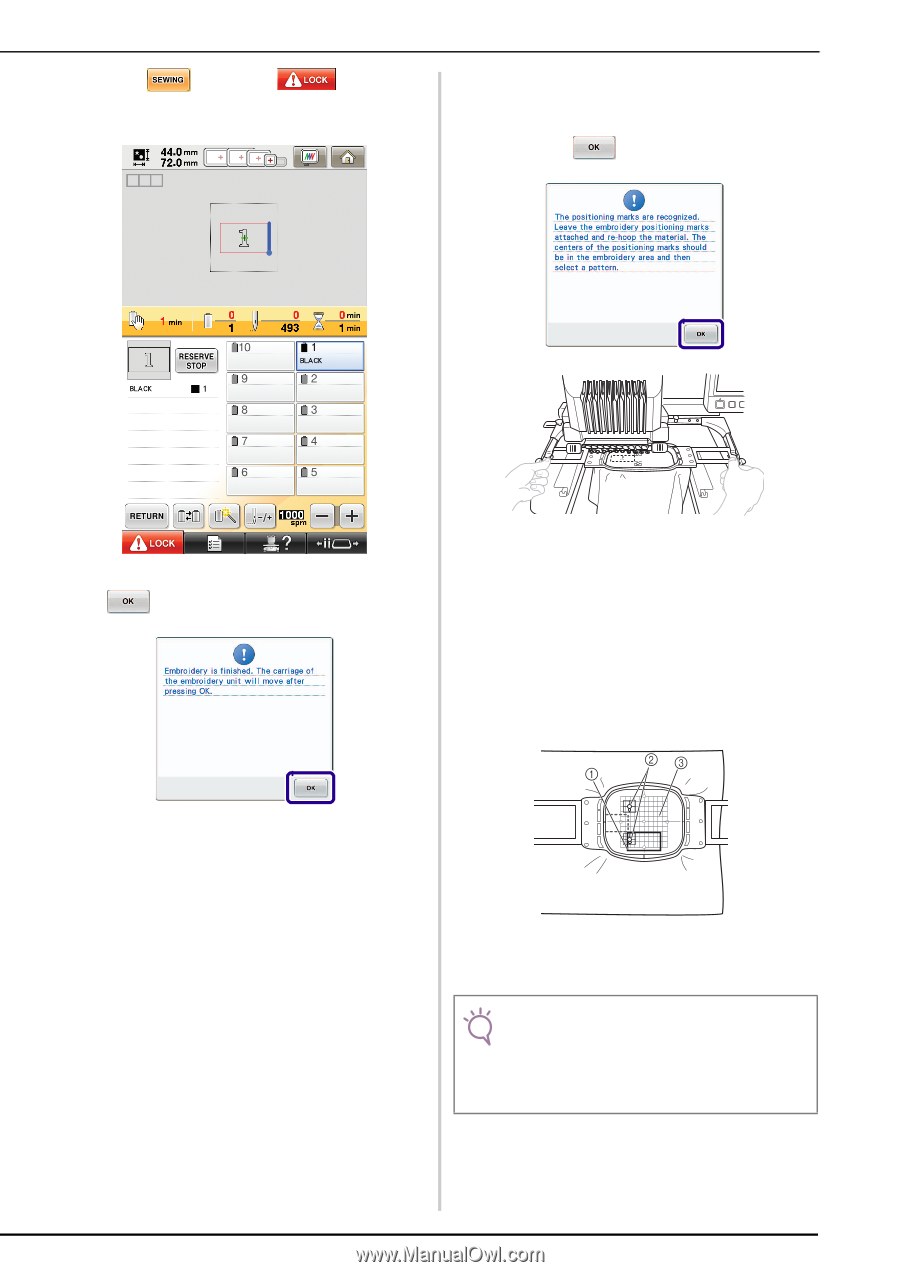
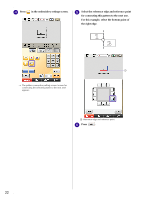
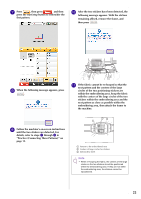
g Press , then press and then press the start/stop button to embroider the first pattern. j After the two stickers have been detected, the following message appears. With the stickers remaining affixed, remove the frame, and then press . h When the following message appears, press . k If the fabric cannot be re-hooped so that the next pattern and the centers of the large circles of the two positioning stickers are within the embroidering area, hoop the fabric with the centers of the large circles of the two stickers within the embroidering area and the next pattern as close as possible within the embroidering area, then attach the frame to the machine. i Follow the machine's on-screen instructions until the two stickers are detected. For details, refer to steps g through i in "Practice (Connecting Three Patterns)" on page 13. a Pattern to be embroidered next b Centers of large circles for stickers c Embroidery sheet Note • When re-hooping the fabric, the centers of the large circles on the two stickers should be positioned within the embroidering area. If they are not within the embroidering area, the stickers cannot be repositioned. 23
-
 1
1 -
2
-
3
-
4
-
5
-
6
-
7
-
8
-
9
-
10
-
11
-
12
-
13
-
14
-
15
-
16
-
17
-
18
-
 19
19 -
 20
20 -
 21
21 -
 22
22 -
 23
23 -
 24
24 -
 25
25 -
 26
26 -
 27
27 -
 28
28 -
 29
29 -
30
-
31
-
32
-
33
-
34
-
35
-
36
-
37
-
38
-
39
-
40
-
41
-
42
 |
 |