Brother International Entrepreneur Pro PR-1000 Kit 1 Instruction Manual - Engl - Page 20
second pattern., Follow the on-screen instructions to perform
 |
View all Brother International Entrepreneur Pro PR-1000 manuals
Add to My Manuals
Save this manual to your list of manuals |
Page 20 highlights
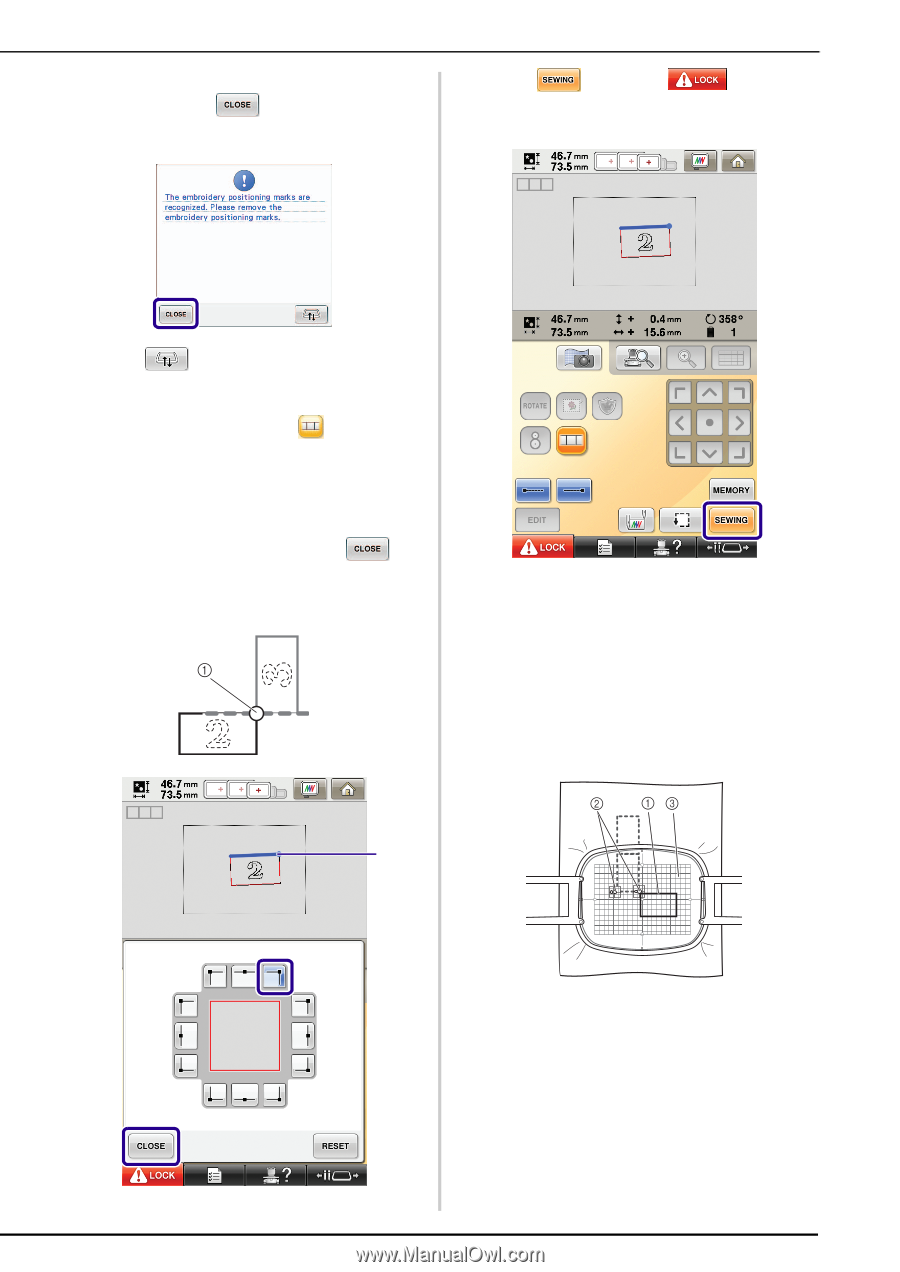
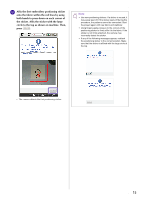
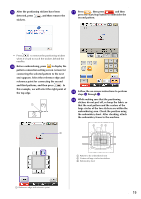
o After the positioning stickers have been detected, press , and then remove the stickers. q Press , then press and then press the start/stop button to embroider the second pattern. • Press to remove the positioning stickers when it's hard to reach the stickers behind the needles. p Before embroidering, press to display the pattern connection setting screen (screen for connecting the selected pattern to the next one) appears. Select the reference edge and reference point for connecting the second and third patterns, and then press . In this example, we will select the right point of the top edge. r Follow the on-screen instructions to perform steps f through j. s While making sure that the positioning stickers do not peel off, re-hoop the fabric so that the next pattern and the centers of the large circles of the two stickers are within the embroidering area. Check the position using the embroidery sheet. After checking, attach the embroidery frame to the machine. a a Pattern to be embroidered next b Centers of large circles for stickers c Embroidery sheet a Reference edge and reference point 19
-
 1
1 -
2
-
3
-
4
-
5
-
6
-
7
-
8
-
9
-
10
-
11
-
12
-
13
-
14
-
 15
15 -
 16
16 -
 17
17 -
 18
18 -
 19
19 -
 20
20 -
 21
21 -
 22
22 -
 23
23 -
 24
24 -
 25
25 -
26
-
27
-
28
-
29
-
30
-
31
-
32
-
33
-
34
-
35
-
36
-
37
-
38
-
39
-
40
-
41
-
42
 |
 |