Brother International Entrepreneur Pro PR-1000 Kit 1 Instruction Manual - Engl - Page 26
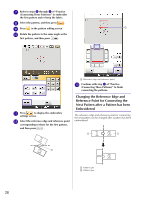
then attach the embroidery frame to the, When the pattern connection setting screen
 |
View all Brother International Entrepreneur Pro PR-1000 manuals
Add to My Manuals
Save this manual to your list of manuals |
Page 26 highlights
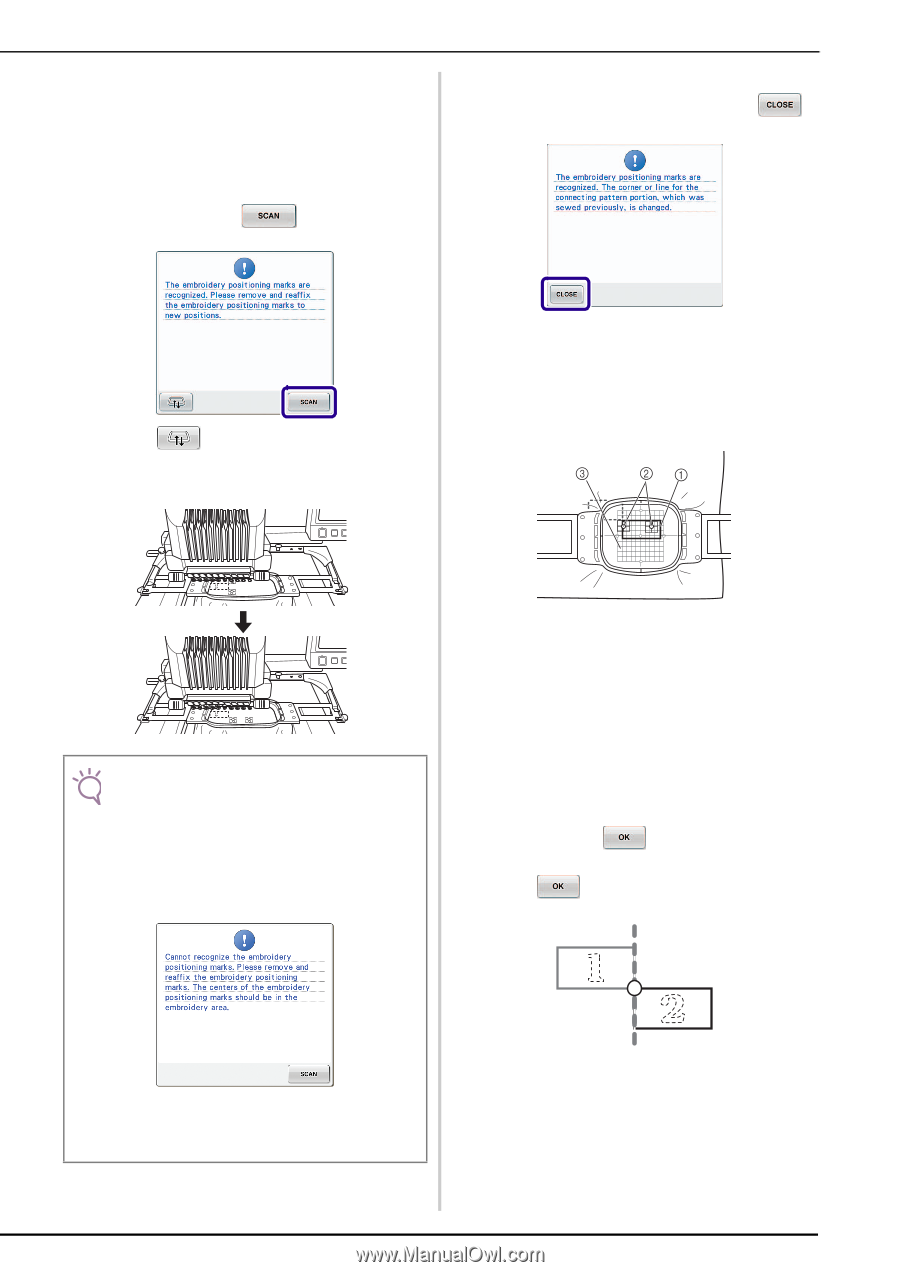
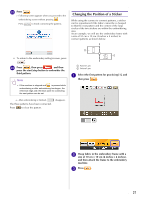
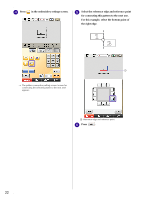
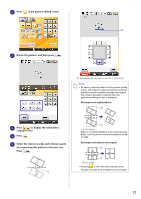
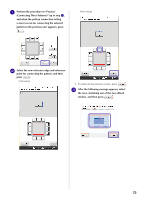
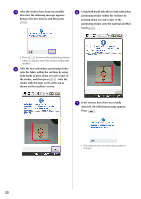
q When the following message appears, remove the two stickers, and then re-affix them so that the fabric can be re-hooped with the next pattern within the embroidering area. This time, keep the distance between stickers 5 cm (2 inches) or more. After the stickers have been affixed, press . r If the stickers has been successfully detected, the following message appears. Press . • Press to remove the positioning stickers when it's hard to reach the stickers behind the needles. s Hoop the fabric so that the next pattern and the centers for the large circles of the two marks are within the embroidering area, and then attach the embroidery frame to the machine. Note • If the stickers are re-affixed within or near the area where the next pattern is to be embroidered, the stickers and the next patterns will fit within the embroidering area more easily after being rehooped. • When the following message appears, reaffix the stickers within the embroidering area. a Pattern to be embroidered next b Centers of large circles for stickers c Embroidery sheet t When the pattern connection setting screen (screen for connecting the selected pattern to the previous one) appears, select the reference edge and reference point for connecting this pattern to the previous one, and then press . For this example, select the top point of the left edge, and then press . The message above may also appear when the sticker is attached slightly out of the embroidering area. In that case, reaffix the stickers so that they fit more within the embroidering area. 25
-
 1
1 -
2
-
3
-
4
-
5
-
6
-
7
-
8
-
9
-
10
-
11
-
12
-
13
-
14
-
15
-
16
-
17
-
18
-
19
-
20
-
 21
21 -
 22
22 -
 23
23 -
 24
24 -
 25
25 -
 26
26 -
 27
27 -
 28
28 -
 29
29 -
 30
30 -
 31
31 -
32
-
33
-
34
-
35
-
36
-
37
-
38
-
39
-
40
-
41
-
42
 |
 |