Brother International Entrepreneur Pro PR-1000 Kit 1 Instruction Manual - Engl - Page 27
Connecting Rotated Patterns, and then remove the stickers.
 |
View all Brother International Entrepreneur Pro PR-1000 manuals
Add to My Manuals
Save this manual to your list of manuals |
Page 27 highlights
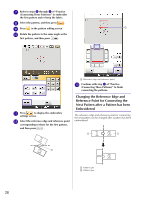
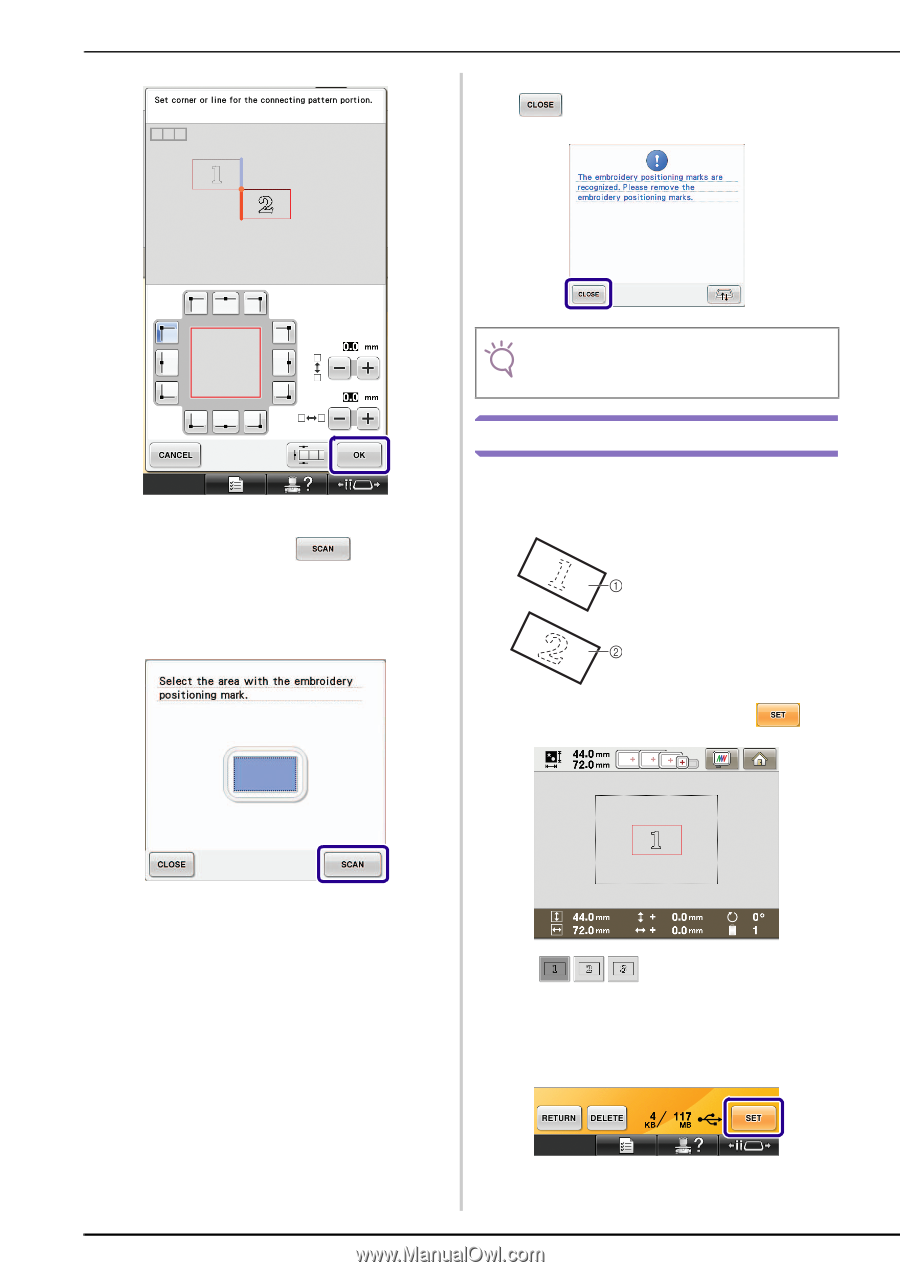
v After the stickers have been detected, press , and then remove the stickers. Note • If an error message appears, refer to page 18 to solve the problem. u Select the area containing one of the two stickers, and then press . • It is not necessary to select the area containing one of the two stickers, when using the embroidery frame with the size of 10 × 10 cm (4 inches × 4 inches) as exampled in this procedure. Connecting Rotated Patterns Greater design variations can be created by rotating patterns. The following procedure describes how to connect patterns that are rotated. a Pattern1.pes b Pattern2.pes a Select the pattern, and then press . → The pattern editing screen appears. 26
-
 1
1 -
2
-
3
-
4
-
5
-
6
-
7
-
8
-
9
-
10
-
11
-
12
-
13
-
14
-
15
-
16
-
17
-
18
-
19
-
20
-
21
-
 22
22 -
 23
23 -
 24
24 -
 25
25 -
 26
26 -
 27
27 -
 28
28 -
 29
29 -
 30
30 -
 31
31 -
 32
32 -
33
-
34
-
35
-
36
-
37
-
38
-
39
-
40
-
41
-
42
 |
 |
26
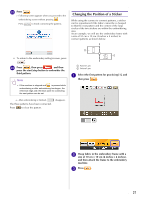
u
Select the area containing one of the two
stickers, and then press
.
• It is not necessary to select the area containing one
of the two stickers, when using the embroidery
frame with the size of 10 × 10 cm (4 inches × 4
inches) as exampled in this procedure.
v
After the stickers have been detected, press
, and then remove the stickers.
Connecting Rotated Patterns
Greater design variations can be created by rotating
patterns. The following procedure describes how to
connect patterns that are rotated.
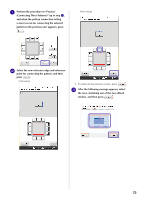
a
Select the pattern, and then press
.
→
The pattern editing screen appears.
Note
•
If an error message appears, refer to page 18 to
solve the problem.
a
Pattern1.pes
b
Pattern2.pes