Brother International JX2517 Users Manual - English and Spanish
Brother International JX2517 Manual
 |
View all Brother International JX2517 manuals
Add to My Manuals
Save this manual to your list of manuals |
Brother International JX2517 manual content summary:
- Brother International JX2517 | Users Manual - English and Spanish - Page 1
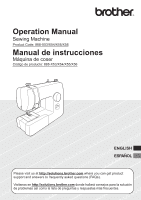
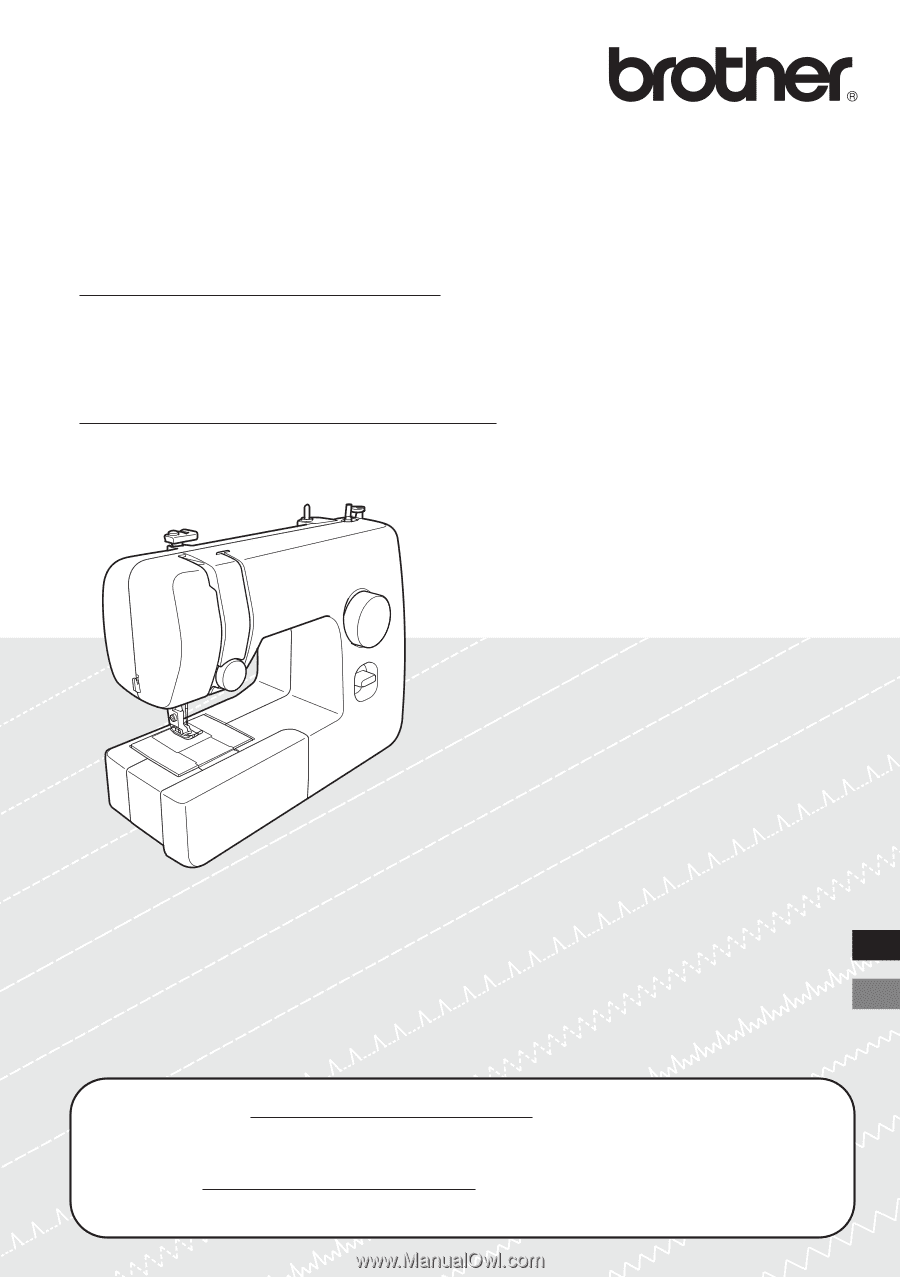
Operation Manual Sewing Machine Product Code: 888-X53/X54/X55/X56 Manual de instrucciones Máquina de coser Código de producto: 888-X53/X54/X55/X56 ENGLISH ESPAÑOL Please visit us at http://solutions.brother.com where you can get product support and answers to frequently asked questions (FAQs). Visí - Brother International JX2517 | Users Manual - English and Spanish - Page 2
Please read these safety instructions before attempting to use the machine. DANGER - To reduce the risk of electric shock: 1 Always unplug the machine from the electrical outlet immediately after using, when cleaning, when making any user servicing adjustments mentioned in this manual, or if you are - Brother International JX2517 | Users Manual - English and Spanish - Page 3
first follow the troubleshooting table in the back of the operation manual to inspect and adjust the machine yourself. If the problem persists, please consult your local authorized Brother dealer. Use this machine only for its intended use as described in this manual. Use accessories recommended by - Brother International JX2517 | Users Manual - English and Spanish - Page 4
the needle 7 Changing the presser foot 8 THE CONTROLS 9 Pattern selection dial 9 Patterns and stitch names 9 Reverse sewing lever 10 THREADING THE MACHINE 11 Winding the bobbin 11 Lower threading 13 Lower threading (for models equipped with a quick-set bobbin 14 Upper threading 15 Drawing - Brother International JX2517 | Users Manual - English and Spanish - Page 5
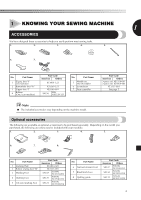
perform most sewing tasks. 1. 2. 3. 4. 5. 6. 7. No. Part Name 1 Zigzag foot "J" (on machine) 2 Buttonhole foot "A" 3 Zipper foot "I" 4 Bobbin (One is on machine) Part Code Americas Others XC4901-121 X59369-321 XE9369-001 SA156 SFB: XA5539-151 No. Part Name 5 Needle set (90 - Brother International JX2517 | Users Manual - English and Spanish - Page 6
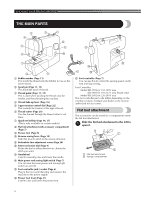
YOUR SEWING MACHINE THE MAIN PARTS 3 2 1 4 B 5 A C 6 0 7 8 9 1 Bobbin winder (Page 11) This winds the thread onto the bobbin for use as the lower thread. 2 Spool pin (Page 11, 15) This holds the spool of thread. 3 Thread guide (Page 11, 15) This is used when winding the thread onto - Brother International JX2517 | Users Manual - English and Spanish - Page 7
for a long period of time. Otherwise a fire may result. Connecting plugs Connect the foot controller plug to the 1 machine. Connect the power supply plug to a wall 2 outlet. b a Note ● If a power outage occurs while the sewing machine is being operated, turn off the main power and unplug the power - Brother International JX2517 | Users Manual - English and Spanish - Page 8
space 2 Level surface (bobbin cover, glass, etc.) Replacing the needle CAUTION ● Always turn off the machine before you change the needle. Otherwise, injuries may occur if the foot controller is accidentally pressed and the machine starts sewing. ● Only use sewing machine needles for home use. Other - Brother International JX2517 | Users Manual - English and Spanish - Page 9
when loosening or tightening the needle clamp screw, otherwise certain parts of the sewing machine may be damaged. You will have to change the presser foot depending on what you want to sew and how. Turn off the machine. 1 Raise the presser foot lever. Raise the needle by turning the 2 handwheel - Brother International JX2517 | Users Manual - English and Spanish - Page 10
KNOWING YOUR SEWING MACHINE Lower the presser foot lever and fix the 5 presser foot onto the shank. If the presser foot is in the correct place, the bar should snap in. ■ Presser foot installation orientation 1 2 1 Shank 2 Bar THE CONTROLS CAUTION ● If the presser foot is not installed with - Brother International JX2517 | Users Manual - English and Spanish - Page 11
push the foot controller. To sew forward, release the reverse sewing lever. The machine will then sew forward. The length of reverse stitches is fixed at 2 mm (1/16 inch). 10 4 (3/16) 23, 32 STRAIGHT STITCH (Center Needle - Position) 1 11 STRAIGHT STITCH (Left Needle Position) 2.5 (3/32 - Brother International JX2517 | Users Manual - English and Spanish - Page 12
that comes with this machine or bobbins of the same type (part code: SA156, SFB: XA5539-151). Using other bobbins may cause damage to the machine. Actual size 11.5 mm (7/16 inch) This model Other models 1 1 Pull the thread in completely. 2 3 1 Pre-tension disk 2 Bobbin winder shaft Pull up - Brother International JX2517 | Users Manual - English and Spanish - Page 13
the foot controller. Cut the thread, slide the bobbin winder 0 shaft to the left and remove the bobbin. Note ● When the sewing machine is started or the handwheel is turned after winding the thread around the bobbin, the machine will make a clicking sound; this is not a malfunction. ● The needle bar - Brother International JX2517 | Users Manual - English and Spanish - Page 14
machine starts to sew, you could be injured. Prepare the bobbin wound properly 1 before threading the lower thread. • See page 11 for the details about bobbin winding. Raise the needle by turning the handwheel 2 toward you (counterclockwise) and raise the presser foot lever. Remove the bobbin cover - Brother International JX2517 | Users Manual - English and Spanish - Page 15
you can draw up the lower thread by hand so that some thread will be left over. Refer to the steps in "Drawing up the lower thread" (page 17). 1 Slit 2 Cutter (Cut the thread with the cutter.) Note ● If the thread is not correctly inserted through the tension-adjusting spring of the bobbin case, it - Brother International JX2517 | Users Manual - English and Spanish - Page 16
YOUR SEWING MACHINE Upper threading 2 2 3 4 1 5 1 Spool pin 2 Thread guide (back) 3 Thread guide (front) 4 Thread take-up lever 5 Mark on the handwheel CAUTION ● When threading the upper thread, carefully follow the instructions. If the upper threading is not correct, the thread may - Brother International JX2517 | Users Manual - English and Spanish - Page 17
hand, pass the thread Put the thread behind the guide above the 8 needle. toward you, in the groove on the thread guide. • The thread can easily be passed behind the needle bar thread guide by holding the 1 • Make sure that the spring in the groove catches the thread. thread in your left hand - Brother International JX2517 | Users Manual - English and Spanish - Page 18
be removed. Draw up the lower thread as described in 3 the previous steps 1 to 3. Replace the bobbin cover. 4 2 1 Upper thread 2 Lower thread Pull out about 10 cm (4 inches) of both 3 threads and put them toward the back of the machine under the presser foot. 1 2 1 Upper thread 2 Lower thread 17 - Brother International JX2517 | Users Manual - English and Spanish - Page 19
#20 or lower. It may cause machine malfunction. Memo ● The lower the thread number, the thicker the thread; and the higher the needle number, the thicker the needle. ■ Ball point needle Use the ball point needle when sewing on stretch fabrics or fabrics where skipped stitches easily occur. The - Brother International JX2517 | Users Manual - English and Spanish - Page 20
may cause the thread to tangle and damage the needle or fabric, and you may be injured. ● Do not start sewing without placing the fabric under the presser foot, otherwise the presser foot may be damaged. Starting sewing Raise the presser foot lever. 5 Turn on the machine. 1 1 CAUTION ● Do not - Brother International JX2517 | Users Manual - English and Spanish - Page 21
should be sewn. Use a piece of fabric and thread that are the same as those used for your project, and check the thread tension and stitch length and width. Lower the presser foot lever. 8 Changing the sewing direction 2 Stop the machine with the needle in the fabric at the point where you want - Brother International JX2517 | Users Manual - English and Spanish - Page 22
on scrap of a fabric before you start to sew. ■ Correct tension Correct tension is important as too much or too little tension will weaken your seams or cause puckers on your fabric. 2 1 3 4 1 Surface of fabric 2 Back of fabric 3 Upper thread 4 Lower thread 1 1 Flat bed attachment X With the flat - Brother International JX2517 | Users Manual - English and Spanish - Page 23
was incorrectly threaded, the upper thread may be too tight. In this case, refer to "Lower threading" on page 13 and rethread the bobbin thread. 2 2 1 3 5 4 1 Surface of fabric 2 Back of fabric 3 Upper thread 4 Lower thread 5 Loops appear on surface of fabric Solution Reduce the tension by - Brother International JX2517 | Users Manual - English and Spanish - Page 24
using the Straight Stitch at the beginning and end of Zigzag Stitches. (This acts as a reinforcement stitch.) ■ Zigzag (Satin) Stitch You can use the Zigzag (Satin) Stitch for making decorative stitches. When sewing a Zigzag (Satin) Stitch, use a slightly looser upper-thread tension to produce more - Brother International JX2517 | Users Manual - English and Spanish - Page 25
of fabric 4 Basting stitching 6 5 5 mm (3/16 inch) 6 Desired edge of hem 1 2 1 2 Memo ● When the size of cylindrical pieces is too and make 6 free-arm sewing possible. • For details on free-arm sewing, refer to "Stitching cylindrical pieces" (Page 21). 24 - Brother International JX2517 | Users Manual - English and Spanish - Page 26
to the left end of the stitch. 1 Wrong side of fabric 2 Fold of hem 3 Needle drop point 1 23 1 2 1 Needle 2 Needle drop point 3 Fold of hem 3 Lower the presser foot lever. 0 Sew at a slow speed holding the fabric a with your hands, so that the needle slightly catches the fold of the hem. Remove - Brother International JX2517 | Users Manual - English and Spanish - Page 27
together and it is very effective when sewing knitted fabrics. If you are using nylon thread, the stitch will not be visible. Put the edge of the two pieces of fabric 1 together and center them under the presser foot. Sew them together using the Elastic Stitch. 2 Make sure you keep the two fabric - Brother International JX2517 | Users Manual - English and Spanish - Page 28
selection dial to "a". 2. Lower the presser foot and sew 5 to 6 stitches. 3. Stop the machine when the needle is at the left side of the stitches and then raise the needle from the material. Step 2 (Left side) 1 Marks on fabric 2 Buttonhole sewing Attach the buttonhole foot and push the 2 frame - Brother International JX2517 | Users Manual - English and Spanish - Page 29
to "c" (same position as in step 1). 2. Sew 5 to 6 stitches. 3. Stop the machine when the needle is at the right side of the stitch and then raise the needle from the material. Step 4 (Right side) Adjusting buttonholes If the stitching on the two sides of the buttonhole is not the same, you can - Brother International JX2517 | Users Manual - English and Spanish - Page 30
pressed and the machine starts sewing. Zipper insertion Turn off the machine. 2 Attach the zipper foot "I". Stitch Stitch Name Pattern Length Foot [mm (inch)] Straight Stitch 9 (Center Needle Position) 3 (1/8) Zipper Foot "I" You can use the zipper foot "I" to sew different types of - Brother International JX2517 | Users Manual - English and Spanish - Page 31
mm (inch)] 4 Zigzag Stitch 2 (1/16) 5 (3/16) Straight Stitch 9 (Center Needle Position) 3 (1/8) Zigzag (Satin) 5 Stitch 0.5 (1/32) 5 (3/16) Straight Stitch 11 (Left Needle Position) 2.5 (3/32) Loosen the tension of the upper thread so 1 that the lower thread lies on the underside of - Brother International JX2517 | Users Manual - English and Spanish - Page 32
5 (3/16) Button Sewing Darning Foot Plate "M" Measure the distance between the 1 buttonholes and set the pattern selection dial to the Zigzag Stitch with the desired width. Turn off the machine. 2 Change the foot to the button sewing foot 3 "M". Place the darning plate on the needle 4 plate. Put - Brother International JX2517 | Users Manual - English and Spanish - Page 33
(1/8) Darning Plate Straight Stitch 10 (Center Needle Position) 4 (3/16) Darning Plate Straight Stitch (Left Needle Position) 11 2.5 (3/32) Darning Plate Turn off the machine. 1 Place the darning plate on the needle plate. Begin sewing by alternating between 5 gently drawing the work away - Brother International JX2517 | Users Manual - English and Spanish - Page 34
the foot guide with the needle position. Set the pattern selection dial to the Zigzag 4 Stitch with the desired width. Place the fabric under the foot so the foot 5 guide is aligned between both edges of the fabric. Lower the presser foot and start sewing. 6 CAUTION ● Do not turn on the machine - Brother International JX2517 | Users Manual - English and Spanish - Page 35
unnecessary. If problems occur, such as difficulty turning the handwheel or an unusual noise, immediately stop using the machine, and contact your authorized dealer or the nearest authorized service center. Turn off the machine and unplug it. 1 Raise the needle and the presser foot. 2 Loosen the - Brother International JX2517 | Users Manual - English and Spanish - Page 36
bobbin case that is scratched; otherwise the upper thread may become tangled, the needle may break, or sewing performance may suffer. For a new bobbin case (part code: XE9326-001), contact your nearest authorized service center. ● Make sure that you fit the bobbin case properly, otherwise the needle - Brother International JX2517 | Users Manual - English and Spanish - Page 37
Lightly guide the fabric. Fit the spool properly. - 15 6 The area around the hole in the needle plate or the presser foot is scratched. Replace the needle plate. Contact your retailer or the nearest authorized service center. - The bobbin case is scratched. Replace the bobbin case. Contact - Brother International JX2517 | Users Manual - English and Spanish - Page 38
foot you are using is not appropriate for the type of stitch that you want to sew. The thread tension is incorrect. How to put it right Replace the needle. Correctly install the needle. Replace the needle plate. Contact your retailer or the nearest authorized service center. Replace the bobbin case - Brother International JX2517 | Users Manual - English and Spanish - Page 39
and the bobbin case. Attach the presser foot that is correct for the type of stitch that you want to sew. Adjust the tension of the upper thread. Remove the tangled thread. If the thread is tangled in the bobbin case, clean the bobbin case. Remove the darning plate. Choose a thread and needle that - Brother International JX2517 | Users Manual - English and Spanish - Page 40
stitch foot 33 Bobbin winding 11 Button sewing 31 Buttonhole adjusting 28 making 27 Buttonhole fine-adjustment screw 28 C Cleaning 34 Connecting plugs 6 D , Darning 32 Darning plate 31 32 Double action stitching 26 Drawing up the lower thread 17 E Elastic stitching 25 F Fabric, thread - Brother International JX2517 | Users Manual - English and Spanish - Page 41
- Brother International JX2517 | Users Manual - English and Spanish - Page 42
, incendio, descarga eléctrica o lesiones. 2 Desenchufe siempre la máquina de la toma de corriente cuando realice cualquier ajuste mencionado en el manual de instrucciones: • Para desenchufarla, coloque el interruptor de la máquina en la posición con el símbolo "O" para apagarla, sujete después el - Brother International JX2517 | Users Manual - English and Spanish - Page 43
consulte primero la tabla de solución de problemas al final del manual de instrucciones para inspeccionar y ajustar la máquina usted mismo. Si el problema persiste, póngase en contacto con su distribuidor de Brother autorizado más cercano. Utilice esta máquina solamente para los fines descritos en - Brother International JX2517 | Users Manual - English and Spanish - Page 44
hilo inferior (para los modelos equipados con una bobina rápida 14 Enhebrado del hilo superior 15 Procedimiento para tirar del hilo inferior .......... 17 COMBINACIONES DE TELA, HILO Y AGUJA 18 2. FUNCIONES DE COSTURA BÁSICAS 19 Lea lo siguiente antes de utilizar la máquina .... 19 Comienzo de - Brother International JX2517 | Users Manual - English and Spanish - Page 45
1 CONOZCA SU MÁQUINA DE COSER 1 ACCESORIOS Hemos diseñado estos accesorios para ayudarle a realizar fácilmente la mayoría de las tareas de costura. 1. 2. 3. 4. 5. 6. 7. N.º Nombre de la pieza 1 Pie para zig-zag "J" (en la máquina) 2 Pie para ojales "A" 3 Pie para cremalleras "I" 4 - Brother International JX2517 | Users Manual - English and Spanish - Page 46
páselos por el cortador de hilo. 7 Bobina rápida (Página 14, 17) (Disponible únicamente en determinados modelos). 8 Unidad de cama plana con tipo de puntada que desee. C Rueda Permite subir y bajar la aguja de forma manual. D Interruptor de la alimentación y de luz de cosido (Página 7) Puede - Brother International JX2517 | Users Manual - English and Spanish - Page 47
USO DE LA MÁQUINA DE COSER 1 ADVERTENCIA ● Utilice solamente electricidad doméstica regular para la alimentación de la máquina. El uso de otras fuentes de alimentación puede provocar incendios, descargas eléctricas o averías en la máquina. ● Asegúrese de que las clavijas del cable de corriente - Brother International JX2517 | Users Manual - English and Spanish - Page 48
la placa de características de la máquina. 7 ■ Comprobación correcta de la aguja Coloque la parte plana de la aguja sobre una superficie lisa. Examine la aguja desde la parte superior y los laterales. Deseche de manera segura las agujas dobladas. 1 2 1 Espacio paralelo 2 Superficie nivelada (tapa - Brother International JX2517 | Users Manual - English and Spanish - Page 49
que la marca de la rueda apunte hacia arriba. Con la parte plana hacia la parte trasera 5 de la máquina, inserte la aguja hasta que toque pie prensatela 2 Pie prensatela | Pulse el botón negro | situado en la parte | trasera del soporte | del pie prensatela | para soltar el pie | prensatela - Brother International JX2517 | Users Manual - English and Spanish - Page 50
de puntadas 2 Número de dibujo elegido Dibujos y nombres de las puntadas 1 23 4 5 67 *1 *1 *1 8 9 10 11 12 13 14 15 16 17 *1 : Núm. de puntadas 15-17 únicamente están disponibles en ciertos modelos. Dibujo Nombre de la puntada Longitud preajustada [mm (pulg.)] Anchura preajustada [mm (pulg - Brother International JX2517 | Users Manual - English and Spanish - Page 51
) 5 (3/16) 1,6 (1/16) - 1,8 (1/8) - 2 (1/16) 23, 30 23, 32 23, 32 14 COSTURA INVISIBLE ELÁSTICA 15 PUNTADA SOBREHILADA 16 PUNTADA DE DOBLE ACCIÓN 17 PUNTADA DE PUENTE 2 (1/16) 5 (3/16) 2 (1/16) 5 (3/16) 1,2 (1/16) 5 (3/16) 1,2 (1/16) 5 (3/16) 24, 33 25 26 26 PUNTADA RECTA (Posición de la aguja - Brother International JX2517 | Users Manual - English and Spanish - Page 52
CONOZCA SU MÁQUINA DE COSER ENHEBRADO DE LA MÁQUINA Devanado de la bobina PRECAUCIÓN ● Hemos diseñado la bobina que se proporciona con esta máquina. Si utiliza bobinas de otros modelos, la máquina no funcionará correctamente. Utilice exclusivamente la bobina suministrada con esta máquina o - Brother International JX2517 | Users Manual - English and Spanish - Page 53
Pase el extremo del hilo por el orificio de Recorte el hilo sobrante de la bobina. 3 la bobina desde el interior de la misma. 7 • Deje 1 cm (1/2 pulg.) de hilo desde el orificio de la bobina. 1 Coloque la bobina en el eje de la devanadora 4 y desplácelo hacia la derecha. Gire con la mano - Brother International JX2517 | Users Manual - English and Spanish - Page 54
la sujeción de la pista y empuje para cerrar. 1 2 1 Ranura 2 Proyección • Asegúrese de que el extremo del hilo sale por la tapa hacia la parte trasera de la máquina (como se muestra en la ilustración). • Tire del hilo inferior antes de comenzar a coser. Consulte "Procedimiento para tirar del hilo - Brother International JX2517 | Users Manual - English and Spanish - Page 55
tirar del hilo inferior manualmente para que sobre un poco de hilo. Consulte los pasos indicados en "Procedimiento para tirar del hilo inferior" (página 17). 1 Ranura 2 Cortador (corte el hilo con el cortador.) Nota ● Si el hilo no se inserta correctamente a través del resorte de ajuste de tensi - Brother International JX2517 | Users Manual - English and Spanish - Page 56
CONOZCA SU MÁQUINA DE COSER Enhebrado del hilo superior 2 2 3 4 1 5 1 Portacarrete 2 Guía del hilo (parte trasera) 3 Guía del hilo (parte delantera) 4 Tirahilo 5 Marca de la rueda PRECAUCIÓN ● Para enhebrar el hilo superior, siga las instrucciones con precisión. Si el enhebrado del hilo - Brother International JX2517 | Users Manual - English and Spanish - Page 57
Asegúrese de guiar el hilo de derecha a 7 izquierda por el tirahilo, como se muestra en la ilustración siguiente. 1 Enhebre la aguja desde la parte delantera 9 a la trasera, dejando un trocito de hilo de unos 5 cm (2 pulgadas). 1 1 Tirahilo Recuerde ● Si el tirahilo está en posición baja, el hilo - Brother International JX2517 | Users Manual - English and Spanish - Page 58
el hilo superior para tirar del 2 inferior. 1 2 1 2 1 Hilo superior 2 Hilo inferior Tire de los dos hilos unos 10 cm 3 (4 pulgadas) y colóquelos en la parte trasera de la máquina, debajo del pie prensatela. • Deberá quitar la tapa de la bobina. Tire del hilo inferior como se ha descrito 3 en los - Brother International JX2517 | Users Manual - English and Spanish - Page 59
COMBINACIONES DE TELA, HILO Y AGUJA 1 Tipo de tela/Aplicación Telas medianas Telas finas Paño Tafetán Franela, gabardina Lino Punto Georgette Challis, satén Telas gruesas Telas elásticas Tejano Pana Tweed Tejido de punto Punto de lana Telas que se deshilachan con facilidad Hilo Tipo Hilo - Brother International JX2517 | Users Manual - English and Spanish - Page 60
del pie prensatela Coloque la tela debajo del pie prensatela, 6 pase el hilo debajo del pie prensatela y saque unos 5 cm (2 pulg.) del hilo hacia la parte trasera de la máquina. Suba la aguja girando la rueda hacia usted 2 (en sentido contrario a las manecillas del reloj), de manera que la marca de - Brother International JX2517 | Users Manual - English and Spanish - Page 61
Mientras sujeta el extremo del hilo y la 7 tela con la mano izquierda, gire la rueda hacia usted (en sentido contrario a las manecillas del reloj) con la mano derecha para bajar la aguja al punto de inicio de la costura. Costura de prueba Debe coserse una prueba en un retal. Utilice una tela y - Brother International JX2517 | Users Manual - English and Spanish - Page 62
costura de brazo libre, vuelva a colocar la unidad de cama plana en su posición original. Deslice la parte que desee coser sobre el 2 brazo y, a continuación, cosa desde la parte superior. 1 1 Material estabilizador o papel Costura en telas elásticas En primer lugar, hilvane juntas las piezas de - Brother International JX2517 | Users Manual - English and Spanish - Page 63
■ El hilo superior está demasiado tenso Aparecerán ondas en la superficie de la tela. Nota ● Si el hilo de la bobina se enhebra incorrectamente, el hilo superior puede quedar demasiado tenso. En este caso, consulte "Enhebrado del hilo inferior" en la página 13 y vuelva a enhebrar el hilo - Brother International JX2517 | Users Manual - English and Spanish - Page 64
PUNTADAS DE COSTURA INCORPORADAS 3 PUNTADAS DE COSTURA INCORPORADAS Costura recta Las puntadas rectas se utilizan para la costura básica. Longitud de la Nombre de la puntada Dibujo puntada [mm (pulg.)] Puntada recta 6 (Posición de la aguja en el centro) 1,6 (1/16) Puntada recta 7 ( - Brother International JX2517 | Users Manual - English and Spanish - Page 65
Costura invisible para dobladillo Nombre de la puntada Longitud de Anchura de Dibujo la puntada la puntada [mm (pulg.)] [mm (pulg.)] Costura 12 invisible para dobladillo 2 (1/16) 5 (3/16) Utilice una tiza para hacer una marca en 3 la tela a unos 5 mm (3/16 pulg.) desde el borde de la - Brother International JX2517 | Users Manual - English and Spanish - Page 66
PUNTADAS DE COSTURA INCORPORADAS Deslice la parte que desee coser sobre el 7 brazo, asegurándose de que la tela avanza correctamente y, a continuación, comience a coser. 1 Costura de sobreorilla Nombre de la puntada Longitud - Brother International JX2517 | Users Manual - English and Spanish - Page 67
de Dibujo la puntada la puntada [mm (pulg.)] [mm (pulg.)] Puntada de doble acción 16 1,2 (1/16) 5 (3/16) Puntada de puente 17 1,2 (1/16) 5 (3/16) * Núm. de puntadas 16-17 únicamente están ■ Costura de gomas disponibles en ciertos modelos. 3 Sujete con alfileres la goma en el revés de 1 la - Brother International JX2517 | Users Manual - English and Spanish - Page 68
el pie para ojales y empuje el 2 bastidor hacia atrás hasta que haga tope con la pieza de plástico situada delante del bastidor. 2 1 1 Parte delantera de la marca de tiza 2 Líneas rojas ■ Realización de un ojal Paso Paso 1 (Tachuela delantera) Zona cosida Dibujo 1. Ajuste el selector de - Brother International JX2517 | Users Manual - English and Spanish - Page 69
Paso Paso 3 (Tachuela trasera) Zona cosida Dibujo 1. Coloque el selector de puntadas en "c" (misma posición que en el paso 1). 2. Cosa de 5 a 6 puntadas. 3. Detenga la máquina cuando la aguja esté en el lado derecho de la puntada y, a continuación, levante la aguja del material. Paso 4 (Lado - Brother International JX2517 | Users Manual - English and Spanish - Page 70
USO DE ACCESORIOS Y APLICACIONES 5 USO DE ACCESORIOS Y APLICACIONES PRECAUCIÓN ● Apague siempre la máquina antes de cambiar el pie prensatela. De lo contrario, podría lesionarse si el pedal se pisa accidentalmente y la máquina comienza a coser. Costura de cremalleras Apague la máquina. 2 - Brother International JX2517 | Users Manual - English and Spanish - Page 71
PRECAUCIÓN ● Asegúrese de que la aguja no golpea la cremallera durante la costura. Si la aguja golpeara la cremallera, podría romperse y usted podría lesionarse. Una vez finalizada la costura, quite la 5 costura de hilvanado. Fruncidos Aplicaciones Nombre de la puntada Longitud de Anchura de - Brother International JX2517 | Users Manual - English and Spanish - Page 72
USO DE ACCESORIOS Y APLICACIONES USO DE ACCESORIOS OPCIONALES Costura de botones Longitud Anchura Nombre de la de la de la Dibujo puntada puntada Pie puntada [mm [mm (pulg.)] (pulg.)] Otro Puntada 2 de zig-zag 0,7 (1/32) Pie 1,8 (1/8) especial para botones Placa de zurcir "M" - Brother International JX2517 | Users Manual - English and Spanish - Page 73
Zurcido Comience a coser alternando entre alejar 5 y acercar poco a poco la labor. Nombre de la puntada Puntada recta (Posición de la aguja en el centro) Puntada recta (Posición de la aguja en el centro) Longitud de Dibujo la puntada [mm (pulg.)] 6 1,6 (1/16) 7 1,8 (1/8) Otro Placa de zurcir - Brother International JX2517 | Users Manual - English and Spanish - Page 74
USO DE ACCESORIOS Y APLICACIONES Utilización del pie para puntada invisible Nombre de la puntada Longitud de Anchura de Dibujo la puntada la puntada [mm (pulg.)] [mm (pulg.)] Puntada de zig-zag 2 0,7 (1/32) 1,8 (1/8) Puntada de zig-zag 3 1,5 (1/16) 3,3 (3/16) Puntada de 4 zig-zag 2 (1/ - Brother International JX2517 | Users Manual - English and Spanish - Page 75
6 ANEXO MANTENIMIENTO Restricciones para el engrase Para evitar que se dañe la máquina, no debe ser engrasada por el usuario. Esta máquina se fabricó con la cantidad de aceite necesaria ya aplicada para garantizar un funcionamiento correcto, lo que hace que el engrase periódico no sea necesario. - Brother International JX2517 | Users Manual - English and Spanish - Page 76
ANEXO Coja la caja de la bobina y tire de ella 5 hacia la izquierda. Coloque la placa de la aguja y apriete los 8 tornillos. 1 Utilice el cepillo de limpieza o una 6 aspiradora para eliminar todo el polvo de la pista y la zona de alrededor. 1 2 1 Cepillo de limpieza 2 Pista • No aplique aceite - Brother International JX2517 | Users Manual - English and Spanish - Page 77
se exponen a continuación antes de solicitar la reparación. Usted podrá resolver la mayoría de los problemas. Si necesitara ayuda adicional, en Brother Solutions Center hallará consejos para la solución de problemas, así como la lista actualizada de preguntas y respuestas más frecuentes. Visítenos - Brother International JX2517 | Users Manual - English and Spanish - Page 78
tela. ▼ La aguja está doblada o poco afilada. Cambie la aguja. Página 18 22 7 7 - - 11 11 - 34 11 13 15 11 18 - 21 11 13 11-17 15 18 7 37 - Brother International JX2517 | Users Manual - English and Spanish - Page 79
Síntoma Causa posible Solución Página ▲ Si se cosen telas finas, la tela no está avanzando correctamente. Cosa utilizando un material estabilizador debajo de la tela. 21 La tela está arrugada. El pie prensatela que utiliza no es adecuado para el tipo de puntada que desea realizar. - Brother International JX2517 | Users Manual - English and Spanish - Page 80
hilo superior 15 , Enhebrado del hilo inferior 13 bobina rápida 14 17 Enhebrado del hilo superior 15 Estilo de brazo libre 21 F Fruncidos 30 32 , Portacarrete 11 15 Procedimiento para tirar del hilo inferior ...... 17 39 Pulsador de retroceso 10 Puntadas incorporadas 23 nombres 9 R Rueda
-
 1
1 -
 2
2 -
 3
3 -
 4
4 -
 5
5 -
 6
6 -
 7
7 -
8
-
9
-
10
-
11
-
12
-
13
-
14
-
15
-
16
-
17
-
18
-
19
-
20
-
21
-
22
-
23
-
24
-
25
-
26
-
27
-
28
-
29
-
30
-
31
-
32
-
33
-
34
-
35
-
36
-
37
-
38
-
39
-
40
-
41
-
42
-
43
-
44
-
45
-
46
-
47
-
48
-
49
-
50
-
51
-
52
-
53
-
54
-
55
-
56
-
57
-
58
-
59
-
60
-
61
-
62
-
63
-
64
-
65
-
66
-
67
-
68
-
69
-
70
-
71
-
72
-
73
-
74
-
75
-
76
-
77
-
78
-
79
-
80
 |
 |
ENGLISH
ESPAÑOL
Operation Manual
Product Code: 888-X53/X54/X55/X56
Sewing Machine
Manual de instrucciones
Código de producto: 888-X53/X54/X55/X56
Máquina de coser
Please visit us at
where you can get product
support and answers to frequently asked questions (FAQs).
Visítenos en
donde hallará consejos para la solución
de problemas así como la lista de preguntas y respuestas más frecuentes.