Brother International JX2517 Users Manual - English and Spanish - Page 33
Darning
 |
View all Brother International JX2517 manuals
Add to My Manuals
Save this manual to your list of manuals |
Page 33 highlights
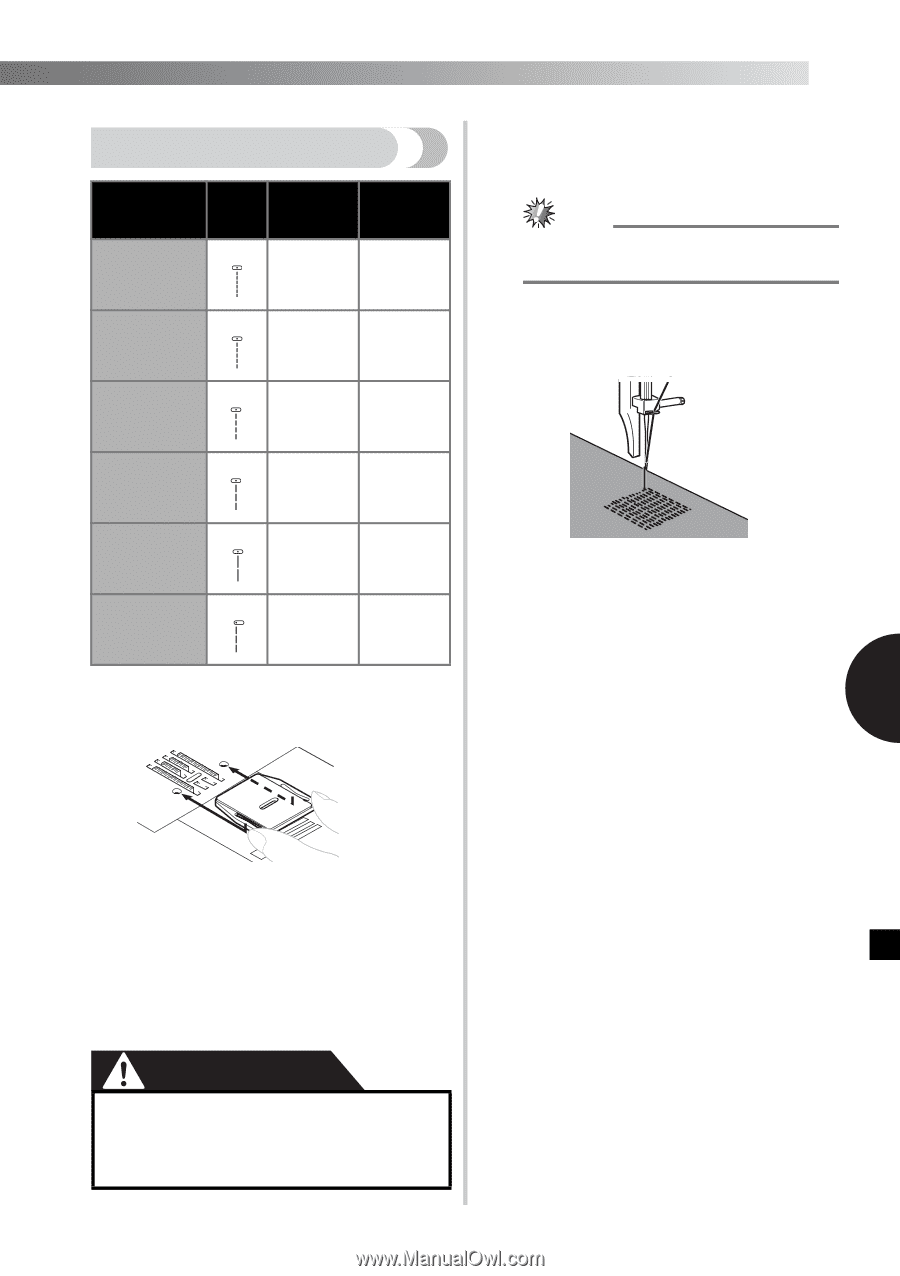
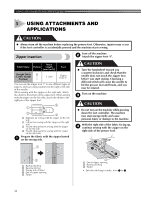
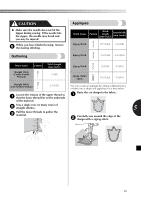
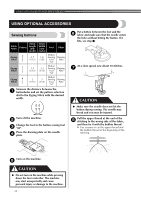
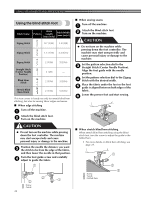
Darning Stitch Name Stitch Pattern Length [mm (inch)] Straight Stitch 6 (Center Needle Position) 1.6 (1/16) Other Darning Plate Straight Stitch 7 (Center Needle Position) 1.8 (1/8) Darning Plate Straight Stitch 8 (Center Needle Position) 2 (1/16) Darning Plate Straight Stitch 9 (Center Needle Position) 3 (1/8) Darning Plate Straight Stitch 10 (Center Needle Position) 4 (3/16) Darning Plate Straight Stitch (Left Needle Position) 11 2.5 (3/32) Darning Plate Turn off the machine. 1 Place the darning plate on the needle plate. Begin sewing by alternating between 5 gently drawing the work away from you and pulling it toward you. Note ● Sew while holding the fabric stretched in order to keep the fabric held down. Repeat this motion until the section being 6 darned is filled with parallel lines of stitching. 5 Either remove both the presser foot and 2 presser foot holder assembly and then lower the presser foot lever. Put the section you want to darn under 3 the presser foot together with fabric for reinforcement. Turn on the machine. 4 CAUTION ● Do not turn on the machine while pressing down the foot controller. The machine may start unexpectedly and cause personal injury or damage to the machine. 32
-
 1
1 -
2
-
3
-
4
-
5
-
6
-
7
-
8
-
9
-
10
-
11
-
12
-
13
-
14
-
15
-
16
-
17
-
18
-
19
-
20
-
21
-
22
-
23
-
24
-
25
-
26
-
27
-
 28
28 -
 29
29 -
 30
30 -
 31
31 -
 32
32 -
 33
33 -
 34
34 -
 35
35 -
 36
36 -
 37
37 -
 38
38 -
39
-
40
-
41
-
42
-
43
-
44
-
45
-
46
-
47
-
48
-
49
-
50
-
51
-
52
-
53
-
54
-
55
-
56
-
57
-
58
-
59
-
60
-
61
-
62
-
63
-
64
-
65
-
66
-
67
-
68
-
69
-
70
-
71
-
72
-
73
-
74
-
75
-
76
-
77
-
78
-
79
-
80
 |
 |