Brother International MFC 8890DW Quick Setup Guide - English - Page 33
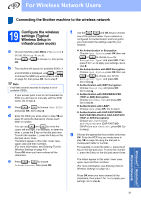
Con the wireless settings using the automatic wireless (one-push) method
 |
UPC - 012502622673
View all Brother International MFC 8890DW manuals
Add to My Manuals
Save this manual to your list of manuals |
Page 33 highlights
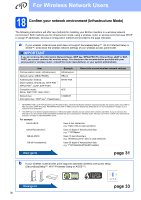
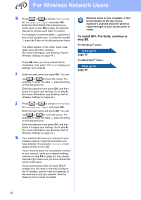
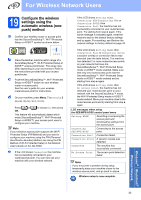
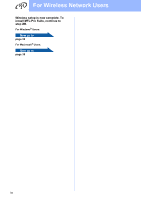
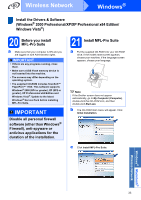
For Wireless Network Users 19 Configure the wireless settings using the automatic wireless (onepush) method a Confirm your wireless router or access point has the SecureEasySetup™, Wi-Fi Protected Setup or AOSS™ symbol as shown below. b Place the Brother machine within range of a SecureEasySetup™, Wi-Fi Protected Setup or AOSS™ access point/router. The range may differ depending on your environment. Refer to the instructions provided with your access point/router. c Push the SecureEasySetup™, Wi-Fi Protected Setup or AOSS™ button on your wireless router or access point. See the user's guide for your wireless router/access point for instructions. d On your machine, press Menu, 7 (Network), 2 (WLAN), 3 (SES/WPS/AOSS). Press or to choose On, then press OK. This feature will automatically detect which mode (SecureEasySetup™, Wi-Fi Protected Setup or AOSS™) your access point uses to configure your machine. Note If your wireless access point supports the Wi-Fi Protected Setup (PIN Method) and you want to configure your machine using the PIN (Personal Identification Number) Method, see Using the PIN Method of Wi-Fi Protected Setup in the Network User's Guide on the CD-ROM. e If the LCD shows Connected, the machine has successfully connected to your router/access point. You can now use your machine with your wireless network. If the LCD shows Setting WLAN, Connecting SES (Connecting WPS or Connecting AOSS), then Connection Fail, the machine has not successfully connected to your router/access point. Try starting from step c again. If the same message is indicated again, reset the machine back to the default factory settings and try again. For resetting, see Restore the network settings to factory default on page 43. If the LCD shows Setting WLAN, then Connection Fail or Connection Error, a session overlap or connection failure was detected (see the table below). The machine has detected 2 or more routers/access points on your network that have the SecureEasySetup™, Wi-Fi Protected Setup mode or AOSS™ mode enabled. Make sure that only one router/access point has the SecureEasySetup™, Wi-Fi Protected Setup mode or AOSS™ mode enabled and try starting from step c again. If the LCD shows Setting WLAN, then No Access Point, the machine has not detected your router/access point on your network with the SecureEasySetup™ mode, the Wi-Fi Protected Setup mode or AOSS™ mode enabled. Move your machine close to the router/access point and try starting from step c again. LCD messages when using the SES/WPS/AOSS control panel menu Setting WLAN Searching or accessing the access point and downloading settings from the access point. Connecting SES/WPS/AOSS Connecting to the access point. Connection Fail Connection failed. Connection Error A session overlap was detected. Connected The machine has successfully connected. No Access Point The access point detection failed. Note If you encounter a problem during setup, temporarily place your machine closer to the wireless access point, and go back to step c. Wireless setup is now complete. Windows® Macintosh® Wireless Network 33
-
 1
1 -
2
-
3
-
4
-
5
-
6
-
7
-
8
-
9
-
10
-
11
-
12
-
13
-
14
-
15
-
16
-
17
-
18
-
19
-
20
-
21
-
22
-
23
-
24
-
25
-
26
-
27
-
 28
28 -
 29
29 -
 30
30 -
 31
31 -
 32
32 -
 33
33 -
 34
34 -
 35
35 -
 36
36 -
 37
37 -
 38
38 -
39
-
40
-
41
-
42
-
43
-
44
-
45
-
46
 |
 |