Brother International MFC 8890DW Quick Setup Guide - English - Page 36
Start.exe, User Account Control, Allow, Custom Install, Select Features, PS Printer Driver, h - scan to network folder
 |
UPC - 012502622673
View all Brother International MFC 8890DW manuals
Add to My Manuals
Save this manual to your list of manuals |
Page 36 highlights
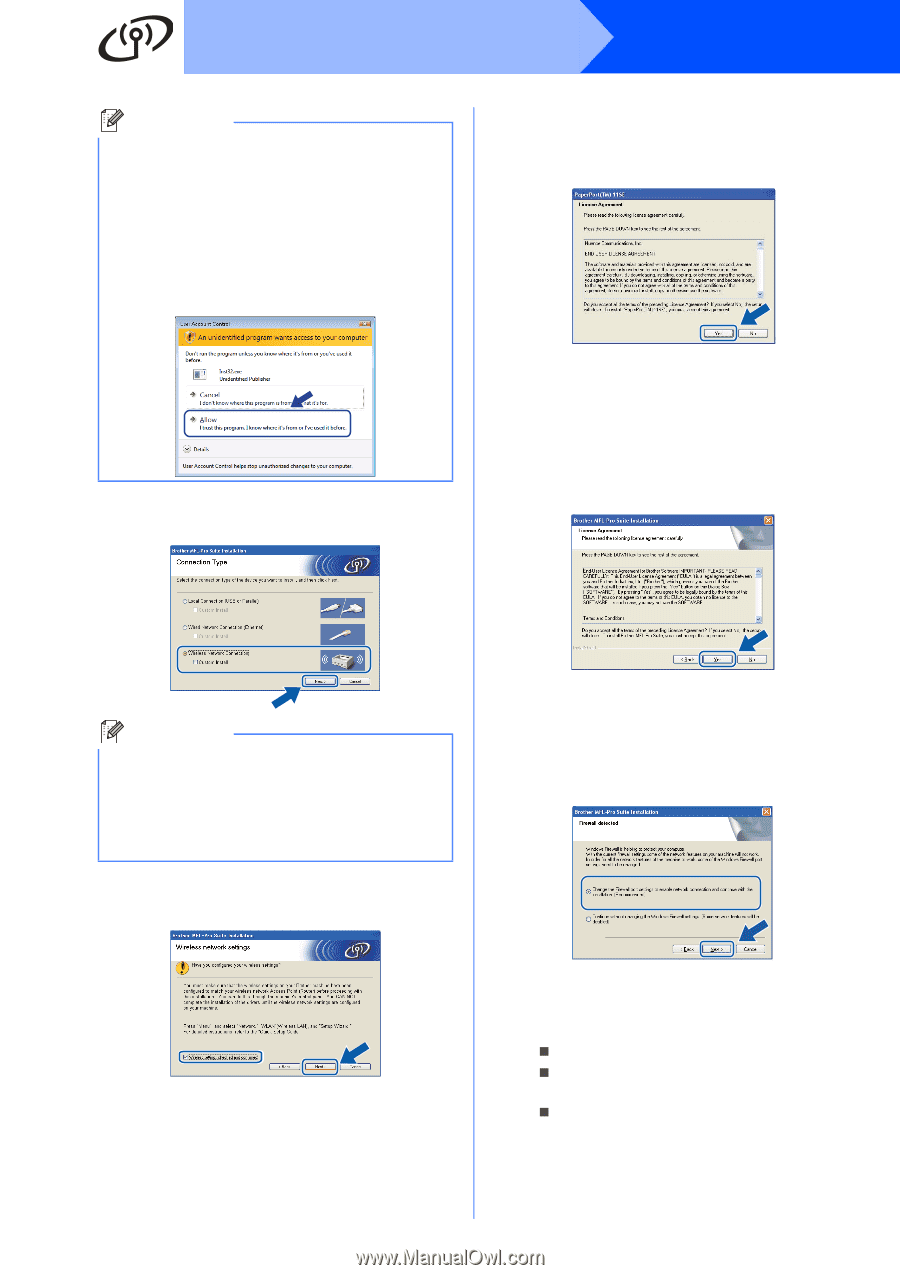
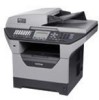
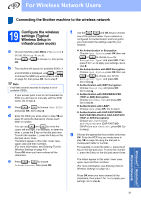
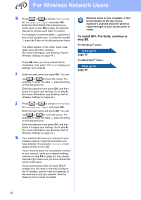
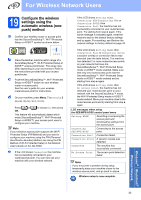
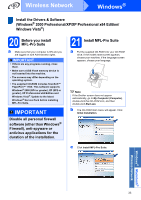
Wireless Network Windows® Note • If the installation does not continue automatically, open the main menu again by ejecting and then reinserting the CD-ROM or double-click the Start.exe program from the root folder, and continue from step c to install MFL-Pro Suite. • For Windows Vista®, when the User Account Control screen appears, click Allow. f When the ScanSoft™ PaperPort™ 11SE License Agreement window appears, click Yes if you agree to the Software License Agreement. d Choose Wireless Network Connection, and then click Next. g The installation of ScanSoft™ PaperPort™ 11SE will automatically start and is followed by the installation of MFL-Pro Suite. h When the Brother MFL-Pro Suite Software License Agreement window appears, click Yes if you agree to the Software License Agreement. Note If you want to install the PS driver (Brother's BR-Script Driver), choose Custom Install and then follow the on-screen instructions. When the Select Features screen appears, check PS Printer Driver, and then continue following the on-screen instructions. e Click on Wireless settings checked and confirmed check box, and then click Next. i For Windows® XP SP2/XP Professional x64 Edition/ Windows Vista® users, when this screen appears, choose Change the Firewall port settings to enable network connection and continue with the installation. (Recommended) and click Next. If you are not using the Windows® Firewall, see the User's Guide for your software for information on how to add the following network ports. „ For network scanning, add UDP port 54925. „ For network PC-Fax receiving, add UDP port 54926. „ If you still have trouble with your network connection, add UDP port 137. 36
-
 1
1 -
2
-
3
-
4
-
5
-
6
-
7
-
8
-
9
-
10
-
11
-
12
-
13
-
14
-
15
-
16
-
17
-
18
-
19
-
20
-
21
-
22
-
23
-
24
-
25
-
26
-
27
-
28
-
29
-
30
-
 31
31 -
 32
32 -
 33
33 -
 34
34 -
 35
35 -
 36
36 -
 37
37 -
 38
38 -
 39
39 -
 40
40 -
 41
41 -
42
-
43
-
44
-
45
-
46
 |
 |