Brother International MFC 8890DW Network Users Manual - English - Page 106
Gateway, DCP-8080DN, MFC-8480DN, MFC-8680DN and MFC-8880DN Go to step
 |
UPC - 012502622673
View all Brother International MFC 8890DW manuals
Add to My Manuals
Save this manual to your list of manuals |
Page 106 highlights
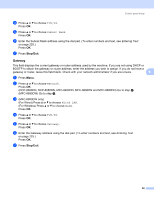
Control panel setup d Press a or b to choose TCP/IP. Press OK. e Press a or b to choose Subnet Mask. Press OK. f Enter the Subnet Mask address using the dial pad. (To enter numbers and text, see Entering Text on page 225.) Press OK. g Press Stop/Exit. Gateway 6 This field displays the current gateway or router address used by the machine. If you are not using DHCP or BOOTP to obtain the gateway or router address, enter the address you wish to assign. If you do not have a gateway or router, leave this field blank. Check with your network administrator if you are unsure. 6 a Press Menu. b Press a or b to choose Network. Press OK. (DCP-8080DN, DCP-8085DN, MFC-8480DN, MFC-8680DN and MFC-8880DN) Go to step d. (MFC-8890DW) Go to step c. c (MFC-8890DW only) (For Wired) Press a or b to choose Wired LAN. (For Wireless) Press a or b to choose WLAN. Press OK. d Press a or b to choose TCP/IP. Press OK. e Press a or b to choose Gateway. Press OK. f Enter the Gateway address using the dial pad. (To enter numbers and text, see Entering Text on page 225.) Press OK. g Press Stop/Exit. 96
-
 1
1 -
2
-
3
-
4
-
5
-
6
-
7
-
8
-
9
-
10
-
11
-
12
-
13
-
14
-
15
-
16
-
17
-
18
-
19
-
20
-
21
-
22
-
23
-
24
-
25
-
26
-
27
-
28
-
29
-
30
-
31
-
32
-
33
-
34
-
35
-
36
-
37
-
38
-
39
-
40
-
41
-
42
-
43
-
44
-
45
-
46
-
47
-
48
-
49
-
50
-
51
-
52
-
53
-
54
-
55
-
56
-
57
-
58
-
59
-
60
-
61
-
62
-
63
-
64
-
65
-
66
-
67
-
68
-
69
-
70
-
71
-
72
-
73
-
74
-
75
-
76
-
77
-
78
-
79
-
80
-
81
-
82
-
83
-
84
-
85
-
86
-
87
-
88
-
89
-
90
-
91
-
92
-
93
-
94
-
95
-
96
-
97
-
98
-
99
-
100
-
 101
101 -
 102
102 -
 103
103 -
 104
104 -
 105
105 -
 106
106 -
 107
107 -
 108
108 -
 109
109 -
 110
110 -
 111
111 -
112
-
113
-
114
-
115
-
116
-
117
-
118
-
119
-
120
-
121
-
122
-
123
-
124
-
125
-
126
-
127
-
128
-
129
-
130
-
131
-
132
-
133
-
134
-
135
-
136
-
137
-
138
-
139
-
140
-
141
-
142
-
143
-
144
-
145
-
146
-
147
-
148
-
149
-
150
-
151
-
152
-
153
-
154
-
155
-
156
-
157
-
158
-
159
-
160
-
161
-
162
-
163
-
164
-
165
-
166
-
167
-
168
-
169
-
170
-
171
-
172
-
173
-
174
-
175
-
176
-
177
-
178
-
179
-
180
-
181
-
182
-
183
-
184
-
185
-
186
-
187
-
188
-
189
-
190
-
191
-
192
-
193
-
194
-
195
-
196
-
197
-
198
-
199
-
200
-
201
-
202
-
203
-
204
-
205
-
206
-
207
-
208
-
209
-
210
-
211
-
212
-
213
-
214
-
215
-
216
-
217
-
218
-
219
-
220
-
221
-
222
-
223
-
224
-
225
-
226
-
227
-
228
-
229
-
230
-
231
-
232
-
233
-
234
-
235
-
236
-
237
-
238
-
239
-
240
-
241
-
242
-
243
-
244
-
245
-
246
-
247
-
248
 |
 |
