Brother International PE-DESIGN Ver.4 3 2 Instructin Manual for PE-DESIGN Ver. - Page 123
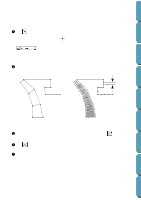
Drawing a fan shape, Drawing an arc & string
 |
View all Brother International PE-DESIGN Ver.4 3 2 manuals
Add to My Manuals
Save this manual to your list of manuals |
Page 123 highlights
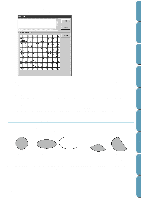
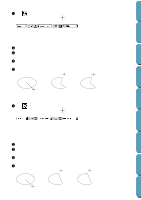
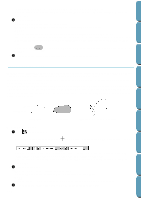
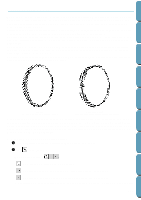
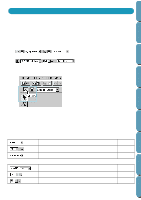
Contents Before Using s Drawing a fan shape 1 Click on the Tool Box. The shape of the cursor changes to Attributes bar now looks like this: and displays together with a small ellipse. The Sewing You can select the colors and stitches at this step or after creating the pattern. See "Color" on page 127 and "Stitch" on page 129. You can also set the sewing attributes using the Sew menu (see "Sewing Attribute Setting" on page 159). You must decide now which kind of circle-related graphic you need. 2 Click the Arc shape selector, then click Fan Shape. 3 Proceed as you would to draw a circle or an ellipse. When you release the mouse, a radial line appears on the ellipse. 4 Move the cursor (without dragging) to the start point of the fan shape and click. The radial line disappears. 5 Move the cursor (without dragging) to the end point of the fan shape and click. Click at end point Getting Started Design Center Layout & Editing File Utility Programmable Stich Creator Click at start point Move to end point s Drawing an arc & string 1 Click on the Tool Box. The shape of the cursor changes to Attributes bar now looks like this: and displays together with a small ellipse. The Sewing You can select the colors and stitches at this step or after creating the pattern. See "Color" on page 127 and "Stitch" on page 129. You can also set the sewing attributes using the Sew menu (see "Sewing Attribute Setting" on page 159). You must decide now which kind of circle-related graphic you need. 2 Click the Arc shape selector, then click Arc & String. 3 Proceed as you would to draw a circle or an ellipse. When you release the mouse, a radial line appears on the ellipse. 4 Move the cursor (without dragging) to the start point of the arc & string and click. The radial line disappears. 5 Move the cursor (without dragging) to the end point of the arc & string and click. Click at end point 114 Click at start point Move to end point Quik Reference Alphabetic Index
-
 1
1 -
2
-
3
-
4
-
5
-
6
-
7
-
8
-
9
-
10
-
11
-
12
-
13
-
14
-
15
-
16
-
17
-
18
-
19
-
20
-
21
-
22
-
23
-
24
-
25
-
26
-
27
-
28
-
29
-
30
-
31
-
32
-
33
-
34
-
35
-
36
-
37
-
38
-
39
-
40
-
41
-
42
-
43
-
44
-
45
-
46
-
47
-
48
-
49
-
50
-
51
-
52
-
53
-
54
-
55
-
56
-
57
-
58
-
59
-
60
-
61
-
62
-
63
-
64
-
65
-
66
-
67
-
68
-
69
-
70
-
71
-
72
-
73
-
74
-
75
-
76
-
77
-
78
-
79
-
80
-
81
-
82
-
83
-
84
-
85
-
86
-
87
-
88
-
89
-
90
-
91
-
92
-
93
-
94
-
95
-
96
-
97
-
98
-
99
-
100
-
101
-
102
-
103
-
104
-
105
-
106
-
107
-
108
-
109
-
110
-
111
-
112
-
113
-
114
-
115
-
116
-
117
-
 118
118 -
 119
119 -
 120
120 -
 121
121 -
 122
122 -
 123
123 -
 124
124 -
 125
125 -
 126
126 -
 127
127 -
 128
128 -
129
-
130
-
131
-
132
-
133
-
134
-
135
-
136
-
137
-
138
-
139
-
140
-
141
-
142
-
143
-
144
-
145
-
146
-
147
-
148
-
149
-
150
-
151
-
152
-
153
-
154
-
155
-
156
-
157
-
158
-
159
-
160
-
161
-
162
-
163
-
164
-
165
-
166
-
167
-
168
-
169
-
170
-
171
-
172
-
173
-
174
-
175
-
176
-
177
-
178
-
179
-
180
-
181
-
182
-
183
-
184
-
185
-
186
-
187
-
188
-
189
-
190
-
191
-
192
-
193
-
194
-
195
-
196
-
197
-
198
-
199
-
200
-
201
-
202
-
203
-
204
-
205
-
206
-
207
-
208
-
209
-
210
-
211
-
212
-
213
-
214
-
215
-
216
-
217
-
218
-
219
-
220
-
221
-
222
-
223
-
224
 |
 |
