Brother International PE-DESIGN Ver.4 3 2 Instructin Manual for PE-DESIGN Ver. - Page 63
tions, design the embroidery pattern data so, to be installed at different installation posi
 |
View all Brother International PE-DESIGN Ver.4 3 2 manuals
Add to My Manuals
Save this manual to your list of manuals |
Page 63 highlights
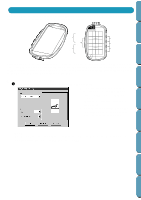
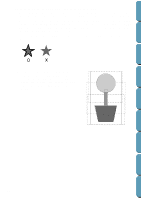
Contents Before Using Getting Started Design Center Layout & Editing Notes on embroidering using the extra-large embroidery frame: • Before embroidering your project, sew a trial sample of the pattern on a scrap piece of fabric that is the same as that used for your project. In addition, use the correct needle and thread. • Be sure to affix stabilizer material to the back of the fabric and tightly stretch the fabric within the embroidery frame. When embroidering on thin or stretch fabrics, use two layers of stabilizer material. If no stabilizer material is used, the fabric may become over-stretched or wrinkled or the embroidery may not be sewn correctly. • Use the zigzag stitch for sewing the outlines in order to prevent embroidering outside the out- lines. • For patterns that require the embroidery frame to be installed at different installation positions, design the embroidery pattern data so that the various parts of the pattern overlap in order to prevent misalignment while embroidering. 54 File Utility Programmable Stich Creator Quik Reference Alphabetic Index
-
 1
1 -
2
-
3
-
4
-
5
-
6
-
7
-
8
-
9
-
10
-
11
-
12
-
13
-
14
-
15
-
16
-
17
-
18
-
19
-
20
-
21
-
22
-
23
-
24
-
25
-
26
-
27
-
28
-
29
-
30
-
31
-
32
-
33
-
34
-
35
-
36
-
37
-
38
-
39
-
40
-
41
-
42
-
43
-
44
-
45
-
46
-
47
-
48
-
49
-
50
-
51
-
52
-
53
-
54
-
55
-
56
-
57
-
 58
58 -
 59
59 -
 60
60 -
 61
61 -
 62
62 -
 63
63 -
 64
64 -
 65
65 -
 66
66 -
 67
67 -
 68
68 -
69
-
70
-
71
-
72
-
73
-
74
-
75
-
76
-
77
-
78
-
79
-
80
-
81
-
82
-
83
-
84
-
85
-
86
-
87
-
88
-
89
-
90
-
91
-
92
-
93
-
94
-
95
-
96
-
97
-
98
-
99
-
100
-
101
-
102
-
103
-
104
-
105
-
106
-
107
-
108
-
109
-
110
-
111
-
112
-
113
-
114
-
115
-
116
-
117
-
118
-
119
-
120
-
121
-
122
-
123
-
124
-
125
-
126
-
127
-
128
-
129
-
130
-
131
-
132
-
133
-
134
-
135
-
136
-
137
-
138
-
139
-
140
-
141
-
142
-
143
-
144
-
145
-
146
-
147
-
148
-
149
-
150
-
151
-
152
-
153
-
154
-
155
-
156
-
157
-
158
-
159
-
160
-
161
-
162
-
163
-
164
-
165
-
166
-
167
-
168
-
169
-
170
-
171
-
172
-
173
-
174
-
175
-
176
-
177
-
178
-
179
-
180
-
181
-
182
-
183
-
184
-
185
-
186
-
187
-
188
-
189
-
190
-
191
-
192
-
193
-
194
-
195
-
196
-
197
-
198
-
199
-
200
-
201
-
202
-
203
-
204
-
205
-
206
-
207
-
208
-
209
-
210
-
211
-
212
-
213
-
214
-
215
-
216
-
217
-
218
-
219
-
220
-
221
-
222
-
223
-
224
 |
 |
