Brother International PE180D Users Manual - English - Page 23
Setting the fabric in the embroidery frame, Right side surface for embroidering
 |
View all Brother International PE180D manuals
Add to My Manuals
Save this manual to your list of manuals |
Page 23 highlights
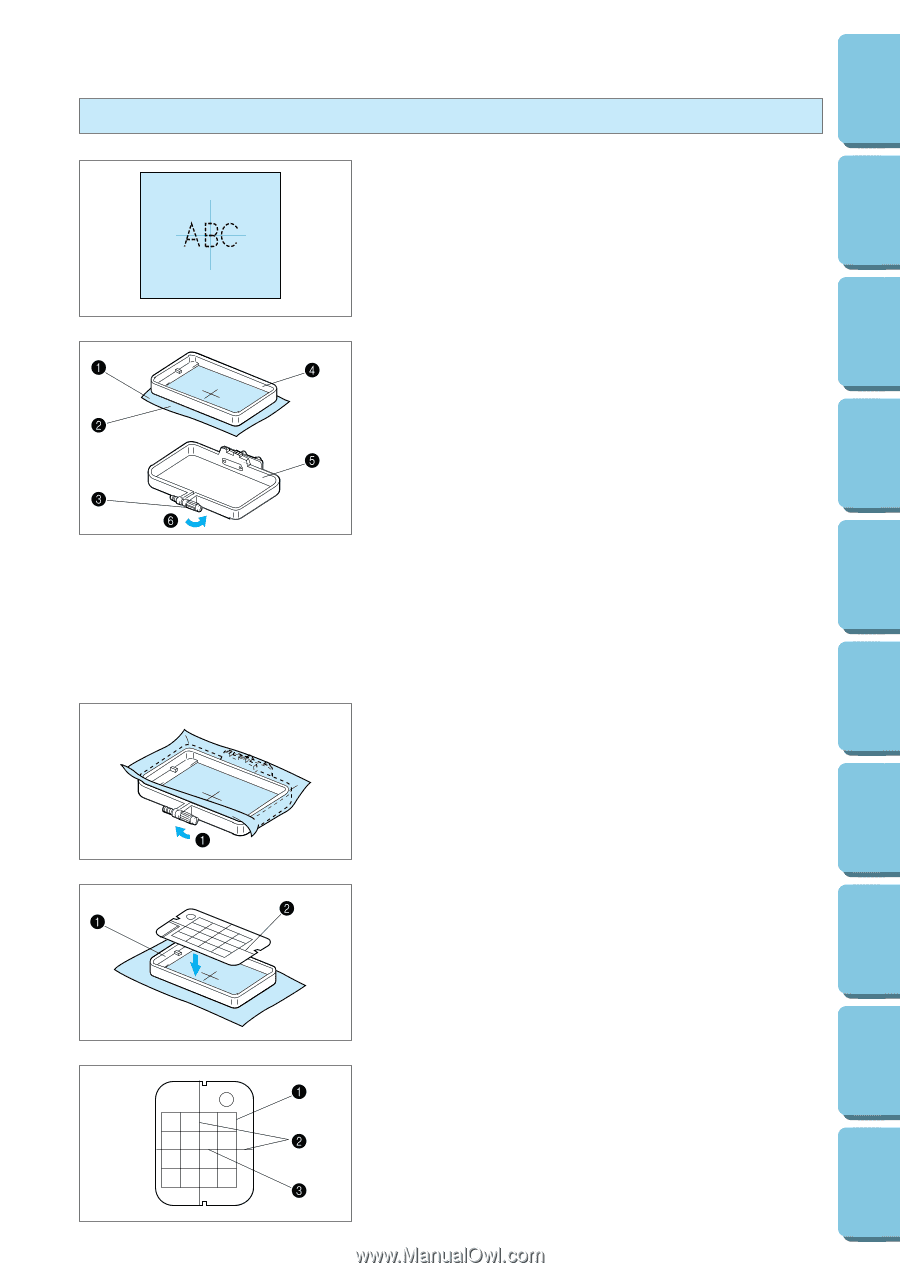
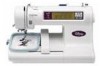
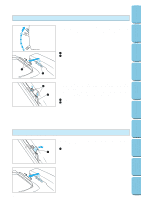
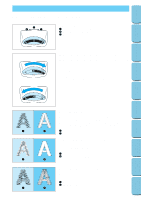
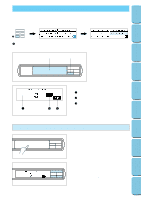
CONTENTS MACHINE KNOWLEDGE EMBROIDERING MAINTENANCE ERROR MESSAGE TROUBLESHOOTING Setting the fabric in the embroidery frame 1. Make a mark on the fabric with chalk or marking pencil indicating the center of the area to be embroidered. 2. Loosen the adjusting screw of the outer frame, place the fabric on top of the outer frame with the right side of the fabric up, and then place the inner frame into the outer frame to clamp the fabric. * Make sure that the ᮢ marks of the outer and inner frames are aligned. 1 Fabric 2 Right side surface for embroidering 3 Adjusting screw 4 Inner frame 5 Outer frame 6 Loosen 3. Firmly tighten the adjusting screw, and then temporarily remove the fabric and the inner frame from the outer frame. 1 Tighten 4. Place the embroidery sheet on top of the inner frame so that the center crosshairs on the embroidery sheet and the mark on the fabric are aligned. 1 Inner frame 2 Vertical + horizontal crosshair lines 1 Area available for embroidering 2 Vertical + horizontal crosshair lines 3 Center of the crosshairs and the pattern 20 PATTERNS EMBROIDERING USING A SMALL FRAME (OPTIONAL) EMBROIDERING USING A EXTRA-SMALL FRAME (OPTIONAL) EMBROIDERING USING A LARGE FRAME (OPTIONAL)
-
 1
1 -
2
-
3
-
4
-
5
-
6
-
7
-
8
-
9
-
10
-
11
-
12
-
13
-
14
-
15
-
16
-
17
-
 18
18 -
 19
19 -
 20
20 -
 21
21 -
 22
22 -
 23
23 -
 24
24 -
 25
25 -
 26
26 -
 27
27 -
 28
28 -
29
-
30
-
31
-
32
-
33
-
34
-
35
-
36
-
37
-
38
-
39
-
40
-
41
-
42
-
43
-
44
-
45
-
46
-
47
-
48
-
49
-
50
-
51
-
52
-
53
-
54
-
55
-
56
-
57
-
58
-
59
-
60
-
61
-
62
-
63
-
64
-
65
-
66
-
67
-
68
-
69
-
70
-
71
-
72
-
73
-
74
-
75
-
76
-
77
-
78
-
79
-
80
-
81
-
82
-
83
-
84
-
85
-
86
-
87
-
88
-
89
-
90
-
91
-
92
-
93
-
94
-
95
-
96
-
97
-
98
-
99
-
100
-
101
-
102
-
103
-
104
-
105
-
106
-
107
-
108
-
109
-
110
-
111
-
112
-
113
-
114
-
115
-
116
-
117
-
118
-
119
-
120
-
121
-
122
-
123
-
124
-
125
-
126
-
127
-
128
-
129
-
130
-
131
-
132
-
133
-
134
-
135
-
136
-
137
-
138
-
139
-
140
-
141
-
142
-
143
-
144
-
145
-
146
-
147
 |
 |