Brother International PE180D Users Manual - English - Page 54
EMBROIDERING APPLICATIONS, Combining a frame pattern with a design
 |
View all Brother International PE180D manuals
Add to My Manuals
Save this manual to your list of manuals |
Page 54 highlights
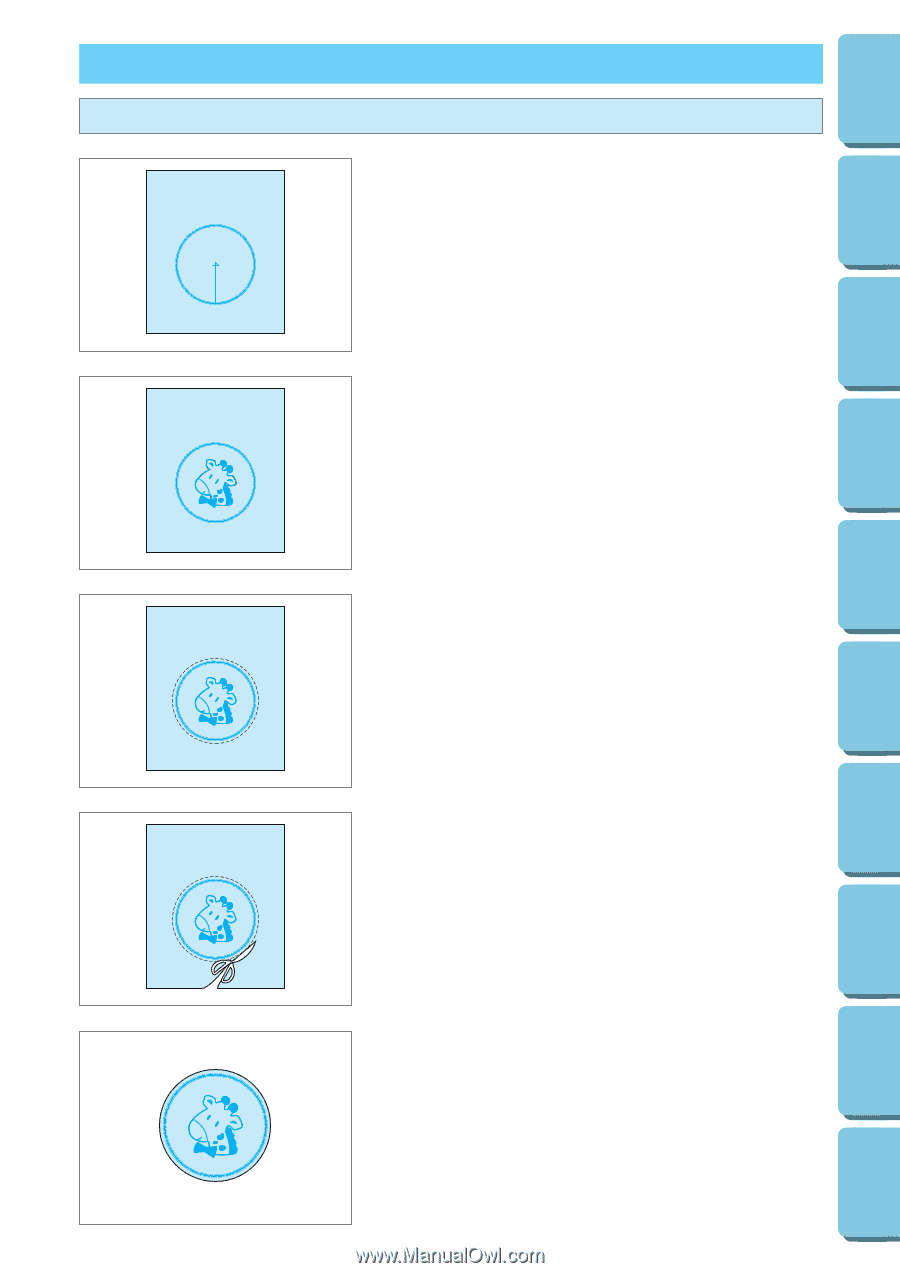
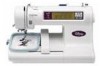
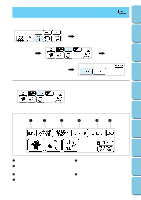
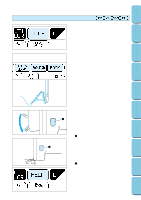
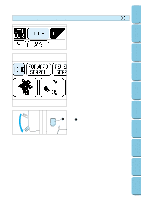
CONTENTS MACHINE KNOWLEDGE EMBROIDERING MAINTENANCE ERROR MESSAGE TROUBLESHOOTING EMBROIDERING APPLICATIONS Combining a frame pattern with a design 1. Select a frame pattern and embroider it. A "+" mark is sewn after embroidering of the frame pattern in the center of pattern. This mark can be used as a guide when embroidering characters or patterns to position them within the frame pattern. 2. Using the "+" mark inside the frame pattern as a guide, align the needle using the center needle layout function. Embroider the design. Making badges or decorative patches 1. After embroidering a frame pattern and the combined design, sew an extra frame pattern on the outside using the "- - -" stitch slightly larger than the original frame pattern. 2. Cut cleanly around the frame pattern, following the line of the outside pattern. The finished badge or decorative patch is now ready to be attached to a project. 51 PATTERNS EMBROIDERING USING A SMALL FRAME (OPTIONAL) EMBROIDERING USING A EXTRA-SMALL FRAME (OPTIONAL) EMBROIDERING USING A LARGE FRAME (OPTIONAL)
-
 1
1 -
2
-
3
-
4
-
5
-
6
-
7
-
8
-
9
-
10
-
11
-
12
-
13
-
14
-
15
-
16
-
17
-
18
-
19
-
20
-
21
-
22
-
23
-
24
-
25
-
26
-
27
-
28
-
29
-
30
-
31
-
32
-
33
-
34
-
35
-
36
-
37
-
38
-
39
-
40
-
41
-
42
-
43
-
44
-
45
-
46
-
47
-
48
-
 49
49 -
 50
50 -
 51
51 -
 52
52 -
 53
53 -
 54
54 -
 55
55 -
 56
56 -
 57
57 -
 58
58 -
 59
59 -
60
-
61
-
62
-
63
-
64
-
65
-
66
-
67
-
68
-
69
-
70
-
71
-
72
-
73
-
74
-
75
-
76
-
77
-
78
-
79
-
80
-
81
-
82
-
83
-
84
-
85
-
86
-
87
-
88
-
89
-
90
-
91
-
92
-
93
-
94
-
95
-
96
-
97
-
98
-
99
-
100
-
101
-
102
-
103
-
104
-
105
-
106
-
107
-
108
-
109
-
110
-
111
-
112
-
113
-
114
-
115
-
116
-
117
-
118
-
119
-
120
-
121
-
122
-
123
-
124
-
125
-
126
-
127
-
128
-
129
-
130
-
131
-
132
-
133
-
134
-
135
-
136
-
137
-
138
-
139
-
140
-
141
-
142
-
143
-
144
-
145
-
146
-
147
 |
 |