Brother International PE770 Users Manual - English - Page 42
Embroidering Neatly - accessories
 |
UPC - 012502623489
View all Brother International PE770 manuals
Add to My Manuals
Save this manual to your list of manuals |
Page 42 highlights
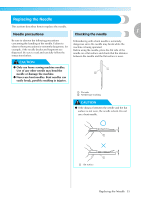
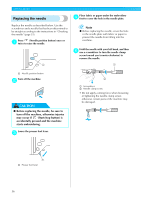
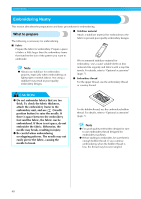
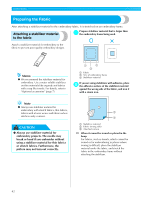
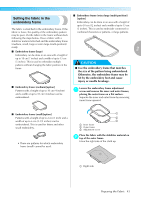
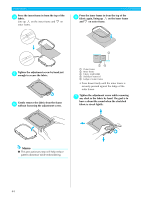
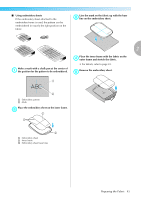
EMBROIDERY Embroidering Neatly This section describes the preparations and basic procedures for embroidering. What to prepare The following is necessary for embroidering. ■ Stabilizer material Attach a stabilizer material for embroidery to the fabric to prevent poor quality embroidery designs. ■ Fabric Prepare the fabric for embroidery. Prepare a piece of fabric a little larger than the embroidery frame that matches the size of the pattern you want to embroider. Note z Always use stabilizer for embroidery projects, especially when embroidering on lightweight or stretch fabrics. Not using a stabilizer may result in poor quality embroidery designs. We recommend stabilizer material for embroidery. Use a water soluble sheet on thin materials like organdy and fabrics with a nap like towels. For details, refer to "Optional accessories" (page 7). ■ Embroidery thread For the upper thread, use the embroidery thread or country thread. CAUTION ● Do not embroider fabrics that are too thick. To check the fabric thickness, attach the embroidery frame to the embroidery unit, and use (Needle position button) to raise the needle. If there is space between the embroidery foot and the fabric, the fabric can be embroidered. If there is not space, do not embroider the fabric. Otherwise, the needle may break, resulting in injury. ● Be careful when embroidering overlapping patterns. The needle may not easily pierce the fabric, causing the needle to break. For the bobbin thread, use the embroidery bobbin thread. For details, refer to "Optional accessories" (page 7). Note z For good quality embroidery designs be sure to use embroidery thread designed for embroidery machines. z Before starting to embroider, be sure there is enough bobbin thread. If you continue embroidering when the bobbin thread is low, the thread may become tangled. 40
-
 1
1 -
2
-
3
-
4
-
5
-
6
-
7
-
8
-
9
-
10
-
11
-
12
-
13
-
14
-
15
-
16
-
17
-
18
-
19
-
20
-
21
-
22
-
23
-
24
-
25
-
26
-
27
-
28
-
29
-
30
-
31
-
32
-
33
-
34
-
35
-
36
-
 37
37 -
 38
38 -
 39
39 -
 40
40 -
 41
41 -
 42
42 -
 43
43 -
 44
44 -
 45
45 -
 46
46 -
 47
47 -
48
-
49
-
50
-
51
-
52
-
53
-
54
-
55
-
56
-
57
-
58
-
59
-
60
-
61
-
62
-
63
-
64
-
65
-
66
-
67
-
68
-
69
-
70
-
71
-
72
-
73
-
74
-
75
-
76
-
77
-
78
-
79
-
80
-
81
-
82
-
83
-
84
-
85
-
86
-
87
-
88
 |
 |