Brother International SE600 Operation Manual - Page 71
Using a frame pattern to make an appliqué
 |
View all Brother International SE600 manuals
Add to My Manuals
Save this manual to your list of manuals |
Page 71 highlights
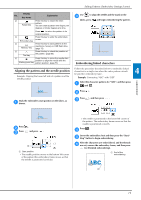
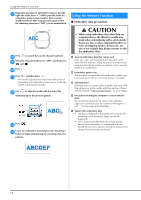
Using a frame pattern to make an appliqué You can use framed patterns of the same size and shape to create an appliqué. Embroider one pattern with a straight stitch and one pattern with a satin stitch. ■ Method 1 Select a straight stitch frame pattern. Embroider the a pattern onto the appliqué material, then cut neatly around the outside of the shape. Embroidering ■ Method 2 Select a straight stitch frame pattern, and embroider a the pattern onto the base fabric. Place the appliqué fabric over the pattern embroidered b in step a and embroider the same pattern on the appliqué fabric. • Be sure that the appliqué fabric completely covers the stitched line. Embroider the same pattern from step a onto the b base fabric. Apply a thin layer of fabric glue or a temporary spray adhesive to the back of the appliqué created in step a. Attach the appliqué to the base fabric matching the shapes. Remove the embroidery frame from the embroidery c unit, and cut around the outside of the stitches of the appliqué fabric. And then, reattach the embroidery frame to the embroidery unit. 4 EMBROIDERY Select the satin stitch frame pattern of the same shape c as the appliqué. Embroider over the appliqué and base fabric from step b to create the appliqué. Note • Do not remove the fabric from the embroidery frame to cut it. Also, do not pull or push on the fabric. Otherwise, the fabric may loosen in the frame. Select the satin stitch frame pattern of the same shape d as the appliqué and embroider the satin stitch pattern to create an appliqué. • Do not change the size or position of the pattern. 69
-
 1
1 -
2
-
3
-
4
-
5
-
6
-
7
-
8
-
9
-
10
-
11
-
12
-
13
-
14
-
15
-
16
-
17
-
18
-
19
-
20
-
21
-
22
-
23
-
24
-
25
-
26
-
27
-
28
-
29
-
30
-
31
-
32
-
33
-
34
-
35
-
36
-
37
-
38
-
39
-
40
-
41
-
42
-
43
-
44
-
45
-
46
-
47
-
48
-
49
-
50
-
51
-
52
-
53
-
54
-
55
-
56
-
57
-
58
-
59
-
60
-
61
-
62
-
63
-
64
-
65
-
 66
66 -
 67
67 -
 68
68 -
 69
69 -
 70
70 -
 71
71 -
 72
72 -
 73
73 -
 74
74 -
 75
75 -
 76
76 -
77
-
78
-
79
-
80
-
81
-
82
-
83
-
84
-
85
-
86
-
87
-
88
-
89
-
90
-
91
-
92
-
93
-
94
-
95
-
96
-
97
-
98
-
99
-
100
 |
 |
