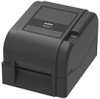
Brother International TD-4520TN Users Guide
Brother International TD-4520TN Manual
 |
View all Brother International TD-4520TN manuals
Add to My Manuals
Save this manual to your list of manuals |
Brother International TD-4520TN manual content summary:
- Brother International TD-4520TN | Users Guide - Page 1
User's Guide TD-4420TN/4520TN TD-4420TN/4520TN User's Guide (English) © 2019 Brother Industries, Ltd. All rights reserved. Version 01 ENG - Brother International TD-4520TN | Users Guide - Page 2
Copyright Information The copyright in this manual, the software, and firmware in the printer described therein are owned by Brother. All rights reserved. CG Triumvirate is a trademark of Agfa Corporation. CG Triumvirate Bold Condensed font is under license from the Monotype Corporation. All other - Brother International TD-4520TN | Users Guide - Page 3
Contents 1. Introduction ...1 1.1 Product Introduction 1 1.2 Product Features 2 1.2.1 Standard Features 2 1.2.2 Optional Features 3 1.3 General Specifications 3 1.4 Print Specifications 3 1.5 Ribbon Specifications 4 1.6 Media Specifications 4 2. Operations Overview 5 2.1 Unpack the printer - Brother International TD-4520TN | Users Guide - Page 4
5. BPM (Brother Printer Management Tool 33 5.1 Start the BPM 33 5.2 Printer Function 34 5.3 Calibrating the Media Sensor using the BPM 35 5.3.1 Auto Calibration 35 6. Troubleshooting 36 7. Maintenance...38 iii - Brother International TD-4520TN | Users Guide - Page 5
1. Introduction 1.1 Product Introduction The sleek design of the TD-4420TN/4520TN label printer can handle up to 984 ft. ( to download additional TrueType fonts from a computer to print custom labels. It also supports most of the standard barcode formats and can print fonts and barcodes in four - Brother International TD-4520TN | Users Guide - Page 6
(from a computer) Downloadable firmware upgrades Text, barcode, graphics/image printing (See the FBPL Command Reference Manual for the supported codes.) Supported barcodes 1D barcodes Code128UCC, Code128 subsets A/B/C, EAN128, Interleaved 2 of 5, Interleaved 2 of 5 with check digit, Code39 - Brother International TD-4520TN | Users Guide - Page 7
240 V, 1.5 A, 50 Hz - 60 Hz Output: DC 24 V, 2.5 A, 60 W, LPS Operating temperature: Between 41˚F and 104˚F (between 5˚C and 40˚C) Operating humidity: Between 25% Speed for Label Peeler Mode Maximum Print Width Maximum Print Length TD-4420TN TD-4520TN (203 dpi model) (300 dpi model) 203 dots/ - Brother International TD-4520TN | Users Guide - Page 8
1.5 Ribbon Specifications Ribbon Diameter Ribbon Length Ribbon Core Diameter Ribbon Width Ribbon Wound Type 1" (25.4 mm) core: Max. 2.63" (67 mm) 0.5" (12.7 mm) core: Max. 1.57" (40 mm) 1" (25.4 mm) inner core: 984 ft (300 m) 0.5" (12.7 mm) inner core: 360 ft (110 m) 0.5" (12.7 mm) and 1" (25.4 mm - Brother International TD-4520TN | Users Guide - Page 9
Paper Core 3. Two 1" (25.4 mm) Ribbon Spindles for the 984 ft (300 m) ribbon 4. Power Cord 5. External Universal Switching Power Supply 6. USB Interface Cable 7. Quick Setup Guide If any components are missing, contact the product manufacturer's customer service or your local dealer. 5 - Brother International TD-4520TN | Users Guide - Page 10
2.2 Printer Overview 2.2.1 Front View 1 2 4 3 1. LED Indicator 2. Feed/Pause Button 3. Roll Compartment Cover Open Tab 4. Label Output Slot 6 - Brother International TD-4520TN | Users Guide - Page 11
Spindle 3. Ribbon Supply Hub 4. Ribbon Rewind Hub 5. Ribbon Rewind Spindle 6. Print Head Release Button 7. Roll Guides 8. Platen Roller 9. Black Mark Sensor 10. Gap Sensor 11. Media Guide Tips 12. Media Guide Hub 13. Print Head WARNING DO NOT touch rotating parts. There is a risk of injury if your - Brother International TD-4520TN | Users Guide - Page 12
2.2.3 Rear View 1 2 34 5 6 1. Power Switch 2. Power Port 3. USB Port (USB 2.0/Hi-Speed mode) 4. USB Host Port 5. RS-232 Serial Port 6. Ethernet Port Note Some features are not available depending on the model. For more information, see the product specification. 8 - Brother International TD-4520TN | Users Guide - Page 13
3. Setup 3.1 Setting up the Printer Note Before you plug the Power Cord into the Power Port, make sure the printer's Power Switch is in the OFF position. Some features are not available depending on the model. For more information, see the product specification. 1. Place the printer on a flat, - Brother International TD-4520TN | Users Guide - Page 14
3.2 Loading the Ribbon 1. Open the Roll Compartment Cover by pressing the tabs located on each side of the printer. 2. Insert the Ribbon Rewind Spindle into the Paper Core in the direction shown in the illustrations. L R 3. First, insert the right side of the Ribbon Rewind Spindle (marked - Brother International TD-4520TN | Users Guide - Page 15
4. Push the Print Head Release Button to open the Print Head mechanism. 5. Lift the Print Head until it locks into place. Interior View 6. Insert the Ribbon Spindle into the ribbon. Note The Ribbon Spindle can be substituted with the ribbon with notches on both sides, which can be inserted into - Brother International TD-4520TN | Users Guide - Page 16
7. First, insert the right side of the Ribbon Supply Spindle (marked "R") into the Ribbon Supply Hub. Then, insert the left side of the Ribbon Supply Spindle into the hole on the left side of the Ribbon Supply Hub. 8. Thread the ribbon through the Print Head and adhere the leader of the ribbon onto - Brother International TD-4520TN | Users Guide - Page 17
10. Close the Print Head mechanism with both hands until it locks into place. Ribbon Loading Path 1. Print Head 2. Ribbon Rewind Gear 3. Media Guide Tips 4. Platen Roller 5. Black Mark Sensor 6. Gap Sensor 7. Ribbon 1 7 6 5 4 2 3 13 - Brother International TD-4520TN | Users Guide - Page 18
the Roll Compartment Cover by pressing the tabs located on each side of the printer. 2. Push up the lock switch to unlock the Roll Guides. Slide both Roll Guides outwards. 3. Insert the paper roll with the labels facing up, as shown in the illustration. Push down the lock switch to lock the - Brother International TD-4520TN | Users Guide - Page 19
Sensor Slider with the installed media and that the position of the media's gap/black mark is aligned with the Gap Sensor. 6. Adjust the Media Guide Tips to fit the label width. Media - Brother International TD-4520TN | Users Guide - Page 20
7. Close the Print Head mechanism with both hands until it locks into place. 8. Use the Brother Printer Management Tool to set the media sensor type and calibrate the selected sensor. a. Start the BPM. b. Click the Printer Function button. c. Click the Calibrate - Brother International TD-4520TN | Users Guide - Page 21
Media Loading Path 1. Print Head 2. Ribbon Rewind Gear 3. Media 4. Media Guide Tips 5. Platen Roller 6. Black Mark Sensor 7. Gap Sensor 8. Ribbon 2 1 8 7 3 6 5 4 WARNING DO NOT touch rotating parts. There is a risk of injury if your finger is caught - Brother International TD-4520TN | Users Guide - Page 22
3.3.2 External Label Roll Mount Installation (Optional) 1. Tighten the screws on the metal fittings of the extended plate. 2. Attach the extended plate to the bottom of the printer. 3. Insert a 3" (76.2 mm) Label Spindle into a paper roll. Then, install it on the External Paper Roll Mount. 3" (76 - Brother International TD-4520TN | Users Guide - Page 23
align the paper width with the Roll Guides. Push down the lock switch to lock the Roll Guide. 6. Install the label roll as described in section 3.3.1. 7. Turn the Media Guide Hub, and match the Media Guide width to the paper width. 8. Use the Brother Printer Management Tool to set the media sensor - Brother International TD-4520TN | Users Guide - Page 24
Install the label roll as described in section 3.3.1. 2. Use the Brother Printer Management Tool to set the media sensor type and calibrate the Print Head mechanism and feed the media through the media sensor. Adjust the Media Guide Tips to fit the label width. 5. Push the media through the Cutter - Brother International TD-4520TN | Users Guide - Page 25
6. Close the Print Head mechanism with both hands until it locks into place. 7. Close the Roll Compartment Cover. 8. Use the Brother Printer Management Tool to set the printer for cutter mode. a. Start the BPM. b. Click the Printer Configuration button. c. Select the FBPL tab. d. Select the CUTTER - Brother International TD-4520TN | Users Guide - Page 26
Install the label roll as described in section 3.3.1. 2. Use the Brother Printer Management Tool to set the media sensor type and calibrate the selected Head mechanism and feed the media through the media sensor. Adjust the Media Guide Tips to fit the label width. 5. Pull the media out of the - Brother International TD-4520TN | Users Guide - Page 27
the Label Peeler Cover. Feed the liner into Label Peeler Cover Slot. 7. Close the Label Peeler Module. Label Peeler Cover Slot 8. Use the Brother Printer Management Tool to set the Label Peeler mode. a. Start the BPM. b. Click the Printer Configuration button. c. Select the FBPL tab. d. Select the - Brother International TD-4520TN | Users Guide - Page 28
9. Close the Roll Compartment Cover. Note The Label Peeler Module supports only plain paper. 24 - Brother International TD-4520TN | Users Guide - Page 29
ready to use. The printer is downloading data from a computer. The printer is paused. The printer removes data. The Print Head is open. There is a problem with the Cutter. There is a memory error or printing error (for example: paper jam, Print Head is open, paper is empty, or the ribbon is - Brother International TD-4520TN | Users Guide - Page 30
: send the GAP command For the Black Mark Sensor: send the BLINE command For more information about the available commands, see the FBPL Command Reference Manual. 26 - Brother International TD-4520TN | Users Guide - Page 31
: send the GAP command For the Black Mark Sensor: send the BLINE command For more information about the available commands, see the FBPL Command Reference Manual. 27 - Brother International TD-4520TN | Users Guide - Page 32
Self-test You can print the printer configuration after the Gap/Black Mark Sensor calibration. Self-test printouts list the printer's configuration and available memory space, and can indicate whether there is any dot damage on the heater component. Self-test printout Model name Firmware version - Brother International TD-4520TN | Users Guide - Page 33
Printer name Mac Address DHCP IP Address Subnet Mask Gateway RAW Port Number of downloaded files Total and available memory space Print Head check pattern 29 - Brother International TD-4520TN | Users Guide - Page 34
Dump mode The printer will enter dump mode after printing the printer configuration. This mode allows users to verify and debug the printer's programs. The characters in the left column are received from the printer's system and those in the right column are their hexadecimal representation. - Brother International TD-4520TN | Users Guide - Page 35
After the initialization, the following factory settings will be restored: Parameter Speed Density Label Width Label Height Sensor Type Gap Setting Print Direction Reference Point Offset Tear Mode Label Peeler Off Mode Cutter Mode Code Page Country Code Clear Flash Memory Default Values 127 mm/sec - Brother International TD-4520TN | Users Guide - Page 36
4.3.5 Media Sensor Calibration (For the Gap Sensor) 1. Turn off the printer. 2. Press and hold the Feed/Pause Button, and then turn on the printer. 3. Release the button after the green/amber LED flashes five times and the LED is lit in red/amber. Note The LED color will change as follows: Amber - Brother International TD-4520TN | Users Guide - Page 37
Using this tool, you can also review your printer's status and settings to troubleshoot any problems. 5.1 Start the BPM 1. Double-click the BPM icon to start the Setup Printer Function Bitmap Font Manager For more information, see the Brother Printer Management Tool Quick Start Guide. 33 - Brother International TD-4520TN | Users Guide - Page 38
. Exit the line mode. Reset the Wi-Fi settings to their default values. Activate the printer's dump mode. (See section 4.3.2) For more information, see the Brother Printer Management Tool Quick Start Guide. 34 - Brother International TD-4520TN | Users Guide - Page 39
5.3 Calibrating the Media Sensor using the BPM 5.3.1 Auto Calibration Use the BPM to set the media sensor type (Gap Sensor or Black Mark Sensor) and calibrate the selected sensor. Gap Sensor Black Mark Sensor The transmissive/gap sensor detects the beginning of the label and feeds the label to - Brother International TD-4520TN | Users Guide - Page 40
, first make sure you have performed the following tasks correctly. If you still have problems, contact the product manufacturer's customer service or your local dealer. Problem The LED Indicator is not lit. - The Brother Printer Management Tool shows Head Open. - The LED flashes in red. - The - Brother International TD-4520TN | Users Guide - Page 41
Problem size is set up correctly. Calibrate the sensor using the Auto Gap or Manual Gap options. Clean the Gap/Black Mark Sensor using a blower brush. to improve the print quality. Make sure the label guide touches the edge of the Media Guide Tips. Clean the Print Head. Clean the Platen - Brother International TD-4520TN | Users Guide - Page 42
7. Maintenance We recommend cleaning your printer on a regular basis to maintain its correct performance. Recommended cleaning materials: Cotton swab Lint-free cloth Vacuum / Blower brush Compressed air Isopropyl alcohol or ethanol Printer Part Print Head Cleaning Method Interval 1. - Brother International TD-4520TN | Users Guide - Page 43
Note Do not touch the Print Head. If you have touched it, clean it as described above. Do not use medical alcohol as it may damage the Print Head. Use isopropyl alcohol or ethanol according to the manufacturer's safety guidelines, as applicable. To maintain the printer's correct performance, - Brother International TD-4520TN | Users Guide - Page 44
-
 1
1 -
 2
2 -
 3
3 -
 4
4 -
 5
5 -
 6
6 -
 7
7 -
8
-
9
-
10
-
11
-
12
-
13
-
14
-
15
-
16
-
17
-
18
-
19
-
20
-
21
-
22
-
23
-
24
-
25
-
26
-
27
-
28
-
29
-
30
-
31
-
32
-
33
-
34
-
35
-
36
-
37
-
38
-
39
-
40
-
41
-
42
-
43
-
44
 |
 |

User's Guide TD-4420TN/4520TN
TD-4420TN
/
4520TN
User's Guide (English)
© 2019 Brother Industries, Ltd. All rights reserved.
Version 01
ENG