Brother International XL-6452 User Manual - French - Page 22
VARIOUS, CONTROLS, Pattern, Selection
 |
View all Brother International XL-6452 manuals
Add to My Manuals
Save this manual to your list of manuals |
Page 22 highlights
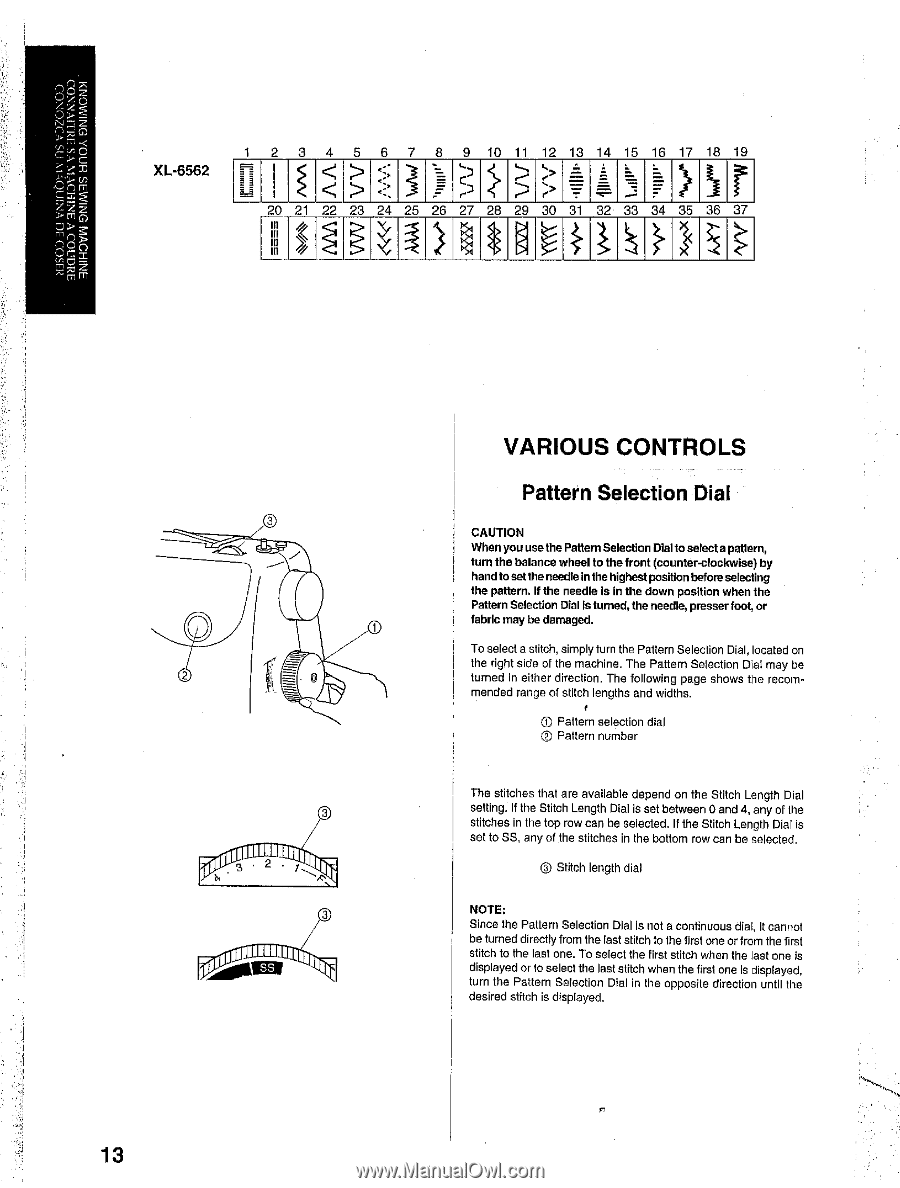
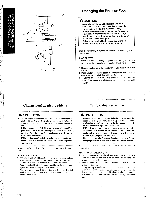
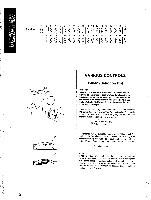
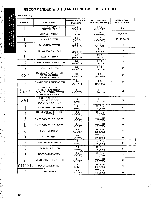
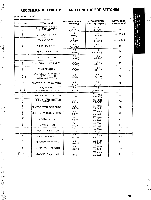
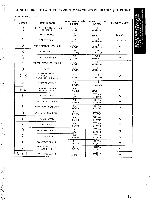
XL-6562 2 3 4 5 6 7 3 8 9 r) 10 11 12 13 14 15 16 17 18 19 re' e> = Fr_ ""--• e%-> = -7= r 20 21 22 23 24 25 26 27 28 29 30 31 32 33 34 35 36 37 III III III li * 3 s•2• 7 b • VARIOUS CONTROLS Pattern Selection Dial CAUTION When you use the Pattern Selection Dial to select a pattern, turn the balance wheel to the front (counter-clockwise) by hand toset theneedle inthe highest positionbefore selecting the pattern. If the needle is in the down position when the Pattern Selection Dial Is turned, the needle, presser foot, or fabric may be damaged. To select a stitch, simply turn the Pattern Selection Dial, located on the right side of the machine. The Pattern Selection Dial may be turned in either direction. The following page shows the recommended range of stitch lengths and widths. (i) Pattern selection dial C) Pattern number The stitches that are available depend on the Stitch Length Dial setting. If the Stitch Length Dial is set between 0 and 4, any of the stitches in the top row can be selected. If the Stitch Length Dial is set to SS, any of the stitches in the bottom row can be selected. C1 Stitch length dial NOTE: Since the Pattern Selection Dial Is not a continuous dial, It cannot be turned directly from the last stitch to the first one or from the first stitch to the last one. To select the first stitch when the last one is displayed or to select the last stitch when the first one Is displayed, turn the Pattern Selection Dial in the opposite direction until the desired stitch is displayed. 13
-
 1
1 -
2
-
3
-
4
-
5
-
6
-
7
-
8
-
9
-
10
-
11
-
12
-
13
-
14
-
15
-
16
-
 17
17 -
 18
18 -
 19
19 -
 20
20 -
 21
21 -
 22
22 -
 23
23 -
 24
24 -
 25
25 -
 26
26 -
 27
27 -
28
-
29
-
30
-
31
-
32
-
33
-
34
-
35
-
36
-
37
-
38
-
39
-
40
-
41
-
42
-
43
-
44
-
45
-
46
-
47
-
48
-
49
-
50
-
51
-
52
-
53
-
54
-
55
-
56
-
57
-
58
-
59
-
60
-
61
-
62
-
63
-
64
-
65
-
66
-
67
-
68
-
69
-
70
-
71
-
72
-
73
-
74
-
75
-
76
-
77
-
78
-
79
-
80
-
81
-
82
-
83
-
84
-
85
-
86
-
87
-
88
-
89
-
90
-
91
-
92
-
93
-
94
-
95
-
96
-
97
-
98
 |
 |