Brother International XL-6452 User Manual - French - Page 80
Using, Spring, Quilting
 |
View all Brother International XL-6452 manuals
Add to My Manuals
Save this manual to your list of manuals |
Page 80 highlights
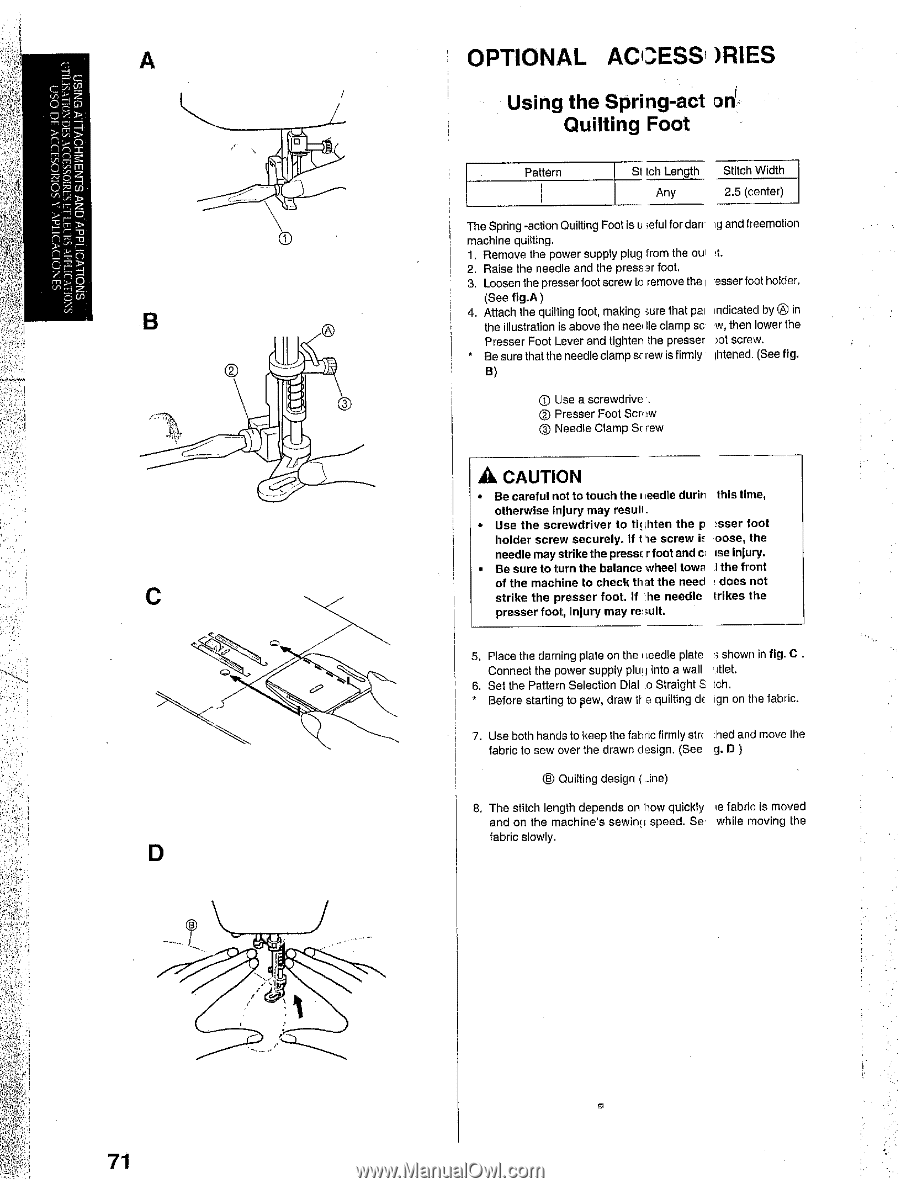
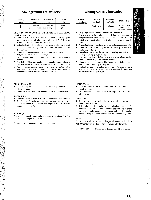
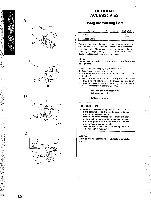
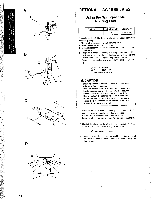
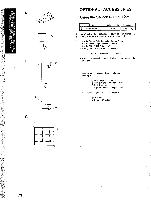
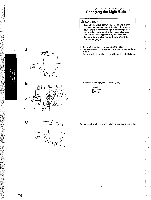
A I° C O D OPTIONAL ACCESS )RIES Using the Spring-act on' Quilting Foot Pattern St tch Length Any Stitch Width 2.5 (center) The Spring -action Quilting Foot is useful for dart ig and freemotion machine quilting. 1. Remove the power supply plug from the out 2. Raise the needle and the pressor foot. 3. Loosen the presser foot screw to remove the esser foot holder, (See fig.A ) 4. Attach the quilting foot, making Aire that pa, indicated by (AI) in the illustration is above the needle clamp sc w, then lower the Presser Foot Lever and tighten the presser tot screw. • Be sure that the needle clamp screw is firmly ihtened. (See fig. B) QQ Use a screwdrive ,C) Presser Foot Screw Needle Clamp Sr raw A CAUTION • Be careful not to touch the I ieedle durin this time, otherwise injury may result. • Use the screwdriver to tit Mten the p tsser foot holder screw securely. If t le screw if oose, the needle may strike the press( r foot and c ise injury. • Be sure to turn the balance wheel tows I the front of the machine to check th at the need does not strike the presser foot. If he needle trikes the presser foot, injury may re•rult 5, Place the darning plate on the needle plate '3 shown in fig. C Connect the power supply plug into a wall Itlet. 6. Set the Pattern Selection Dial o Straight S [ch. • Before starting to pew, draw 11 e quilting dc ign on the fabric. 7. Use both hands to keep the fabric firmly sin had and move the fabric to sew over the drawn design. (See g. 0 Quilting design ( _ine) 8. The stitch length depends on how quickly le fabric is moved and on the machine's sewint, speed. Se. while moving the fabric slowly. 71
-
 1
1 -
2
-
3
-
4
-
5
-
6
-
7
-
8
-
9
-
10
-
11
-
12
-
13
-
14
-
15
-
16
-
17
-
18
-
19
-
20
-
21
-
22
-
23
-
24
-
25
-
26
-
27
-
28
-
29
-
30
-
31
-
32
-
33
-
34
-
35
-
36
-
37
-
38
-
39
-
40
-
41
-
42
-
43
-
44
-
45
-
46
-
47
-
48
-
49
-
50
-
51
-
52
-
53
-
54
-
55
-
56
-
57
-
58
-
59
-
60
-
61
-
62
-
63
-
64
-
65
-
66
-
67
-
68
-
69
-
70
-
71
-
72
-
73
-
74
-
 75
75 -
 76
76 -
 77
77 -
 78
78 -
 79
79 -
 80
80 -
 81
81 -
 82
82 -
 83
83 -
 84
84 -
 85
85 -
86
-
87
-
88
-
89
-
90
-
91
-
92
-
93
-
94
-
95
-
96
-
97
-
98
 |
 |