Canon BJC 6100 User Guide - Page 8
Parts and Functions of the Printer
 |
View all Canon BJC 6100 manuals
Add to My Manuals
Save this manual to your list of manuals |
Page 8 highlights
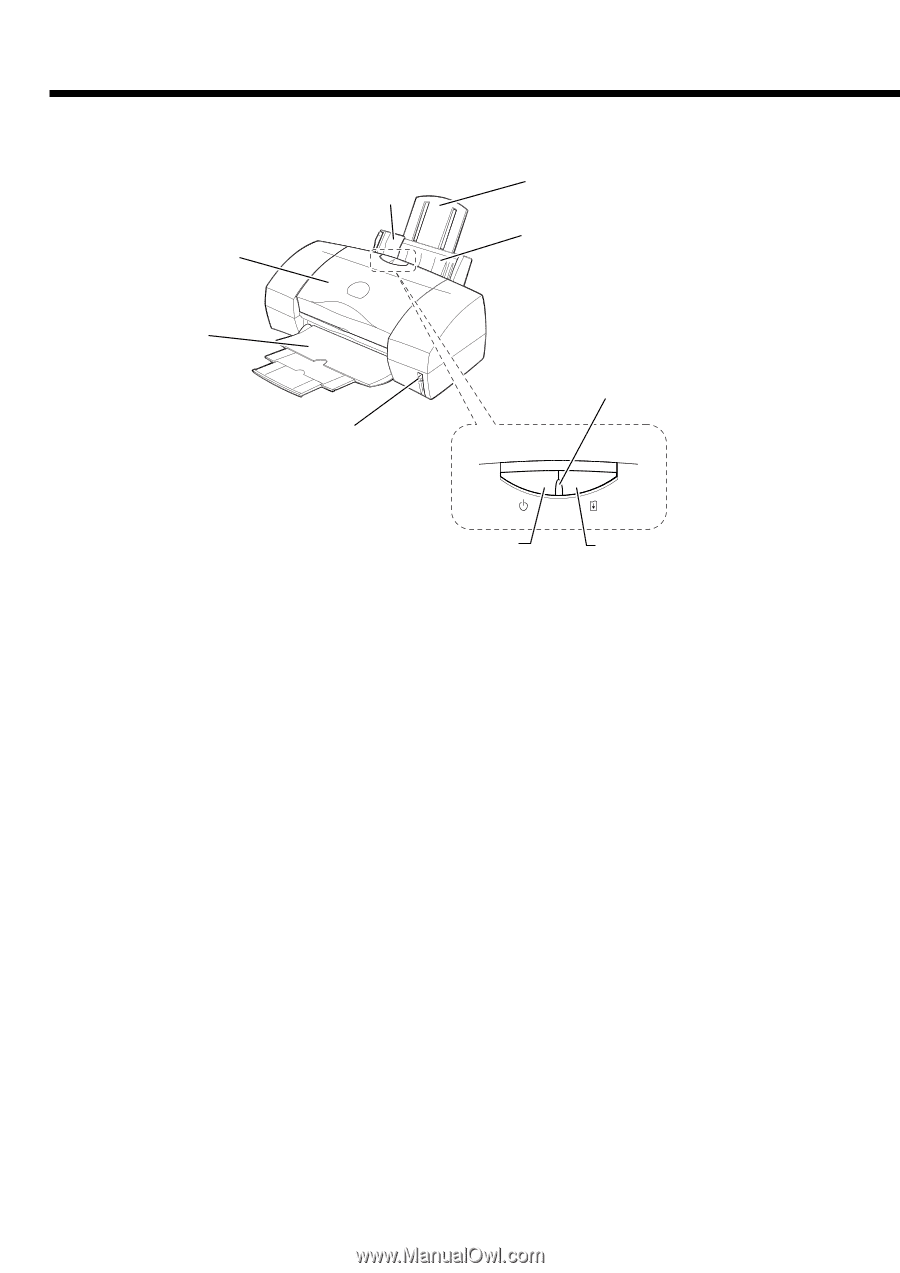
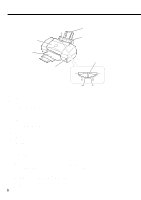
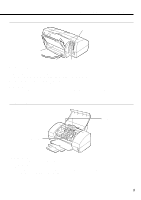
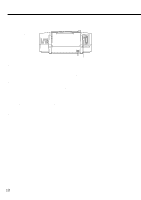
Parts and Functions of the Printer Front View Front Cover Paper Guide Paper Rest Auto Sheet Feeder Paper Output Tray and Extension Paper Thickness Lever Operation Panel POWER lamp POWER button RESUME button Paper Guide Ensures that the sheets from the stack in the auto sheet feeder feed straight into the printer. Always align this guide with the left edge of the paper loaded in the auto sheet feeder. Paper Rest Raise to support the paper, especially a larger paper size. Auto Sheet Feeder Holds sheets of paper or other media for printing. The auto sheet feeder holds multiple sheets which are automatically fed into the printer one sheet at a time. Front Cover Open to install, replace or switch the BJ Cartridges, or to remove a paper jam. Paper Output Tray and Extension Holds printed sheets after they are ejected from the printer. Lower the paper output tray and pull out the extensions before you start a print job. When the printer is not in use, push in the extensions and close the paper output tray. Operation Panel POWER button Press to switch the printer on and off. POWER lamp Lights to indicate the status of the printer. Off : Printer power off. On (green) : Ready for operation. Flashing (green) : Standby status or print job in progress. Flashing (orange) : Printer error. Remove the cause of the error before printing is resumed. Flashing (orange and green) : Service error. Contact a Canon service facility. RESUME button After you have removed the cause of a printer error, press the RESUME button to resume printing. Press and hold the RESUME button for the required number of beeps and release to perform these special tasks. One beep: Cleans the print heads. Two beeps: Prints a nozzle check pattern. Three beeps: Cleans the paper feed rollers. These important tasks can also be performed with the printer driver. Paper Thickness Lever Adjusts the gap between the print heads and the surface of the paper for the type of paper you are printing on. 8
-
 1
1 -
2
-
 3
3 -
 4
4 -
 5
5 -
 6
6 -
 7
7 -
 8
8 -
 9
9 -
 10
10 -
 11
11 -
 12
12 -
 13
13 -
14
-
15
-
16
-
17
-
18
-
19
-
20
-
21
-
22
-
23
-
24
-
25
-
26
-
27
-
28
-
29
-
30
-
31
-
32
-
33
-
34
-
35
-
36
-
37
-
38
-
39
-
40
-
41
-
42
-
43
-
44
-
45
-
46
-
47
-
48
-
49
-
50
-
51
-
52
-
53
-
54
-
55
-
56
-
57
-
58
-
59
-
60
-
61
-
62
-
63
-
64
-
65
-
66
-
67
-
68
-
69
-
70
-
71
-
72
-
73
-
74
-
75
 |
 |