Canon Digital Rebel Software Instructions EOS DSD Ver.6
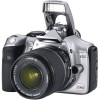
Canon Digital Rebel - EOS 6.3MP Digital Rebel Camera Manual
 |
UPC - 013803028997
View all Canon Digital Rebel manuals
Add to My Manuals
Save this manual to your list of manuals |
Canon Digital Rebel manual content summary:
- Canon Digital Rebel | Software Instructions EOS DSD Ver.6 - Page 1
Software INSTRUCTIONS Windows Macintosh EOS DIGITAL SOLUTION DISK Ver. 6 Please read these instructions carefully before using the EOS REBEL/300D software. This guide should be kept in a safe place so that it can be used for future reference. ´ English Edition - Canon Digital Rebel | Software Instructions EOS DSD Ver.6 - Page 2
, fixes or support will be made available for the SOFTWARE. 4. LIMITED WARRANTY AND LIMITATION OF LIABILITY: It is your responsibility to choose, maintain and match the hardware and software components of your computer system. Thus Canon does not guarantee uninterrupted service or correction of - Canon Digital Rebel | Software Instructions EOS DSD Ver.6 - Page 3
if you fail to comply with any of the terms of this Agreement and you must then promptly return the SOFTWARE. In addition, Canon may enforce its other legal rights. 6. U.S. GOVERNMENT RESTRICTED RIGHTS NOTICE: The SOFTWARE is provided with restricted rights. Use, duplication or disclosure is subject - Canon Digital Rebel | Software Instructions EOS DSD Ver.6 - Page 4
is familiar with the information in the instructions supplied with the camera. ● For detailed information on how to use the software products and the restrictions that apply to those products, refer also to the Help, Readme files and Software User Guide (A7) for the respective products. ● In order - Canon Digital Rebel | Software Instructions EOS DSD Ver.6 - Page 5
Manual and the Conventions Used Operation Flow Install the software (W-3, M-3) Connect the camera you can use the WIA Driver or TWAIN Driver (W-59) to quickly and easily download JPEG images from your camera. You can also use Trademark Acknowledgments • Canon and EOS are trademarks of Canon Inc. • - Canon Digital Rebel | Software Instructions EOS DSD Ver.6 - Page 6
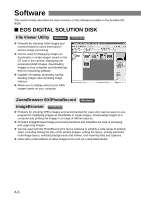
bundled CDROM. ■ EOS DIGITAL SOLUTION DISK File Viewer Utility Windows Macintosh ● Primarily for shooting RAW images and recommended for users interested in serious image processing. ● Can be used for displaying images as thumbnails or single images saved on the CF card in the camera, displaying and - Canon Digital Rebel | Software Instructions EOS DSD Ver.6 - Page 7
timer or interval timer. ● Allows you to download images directly to the computer. WIA Driver Windows ● WIA Driver controls the communication between the camera and your computer. ● You must install WIA driver to use File Viewer Utility, ZoomBrowser EX or RemoteCapture on Windows XP or Windows Me - Canon Digital Rebel | Software Instructions EOS DSD Ver.6 - Page 8
User Guide PDF format manuals providing more detailed explanations of the functions available in ZoomBrowser EX and ImageBrowser are available on the Canon website. For URL addresses*, please see the Canon Customer Support contacts in the Canon Limited Warranty supplied with your camera. * The - Canon Digital Rebel | Software Instructions EOS DSD Ver.6 - Page 9
OS preinstalled and a USB port as a standard feature * Upgraded machines not supported. CPU Windows XP: 300 MHz Pentium or better Windows Me, 2000, 98 100 MB or more, RemoteCapture: 20 MB or more, WIA Driver: 25 MB or more, TWAIN Driver: 25 MB or more, ZoomBrowser EX (including the PhotoRecord): - Canon Digital Rebel | Software Instructions EOS DSD Ver.6 - Page 10
System Requirements Macintosh System Requirements OS Computer CPU RAM Interface Hard disk space Display Mac OS X (version 10.2 recommended), Mac OS 9.0 to 9.2 (Mac OS 9.2 recommended) Macintosh computer with one of the above OS installed and a USB port as a standard feature * Users of first- - Canon Digital Rebel | Software Instructions EOS DSD Ver.6 - Page 11
Installing the Software on Windows .... W-4 Installing Photoshop Elements 2.0 ..... W-8 Please Register Your Camera W-8 2 Getting Ready to Work with Images W-9 Setting the Communication Mode ..... W-10 Connecting the Camera to Your Computer W-11 Inserting a CF Card into Your Card Reader W-13 CF - Canon Digital Rebel | Software Instructions EOS DSD Ver.6 - Page 12
Compensating the Brightness (Digital Exposure Compensation) ....... Images W-36 Saving Images from the Camera to Your Computer W-36 Extracting JPEG Troubleshooting and Uninstallation W-79 Troubleshooting W-80 Uninstalling W-83 Uninstalling (Deleting) the Software W-83 Uninstalling the Driver - Canon Digital Rebel | Software Instructions EOS DSD Ver.6 - Page 13
1W 1 Installing the Software on Your Computer This chapter describes how to install the bundled software. - Canon Digital Rebel | Software Instructions EOS DSD Ver.6 - Page 14
● For instructions for installing guide, see "When You Have Problems with Installation" (W-7). ● If you connected the camera to your computer before installing the software, see "Troubleshooting" (W-82). 1 Start up your computer. ● Close any programs that are running. 2 Insert the CD (EOS DIGITAL - Canon Digital Rebel | Software Instructions EOS DSD Ver.6 - Page 15
same time, depending on your version of Windows: • Windows XP, Me: [Canon Camera WIA Driver] • Windows 2000, 98 SE: [Canon Camera TWAIN Driver] 8 Click the checkbox for [EOS Kiss/REBEL/300D]. ● Once you have clicked the [EOS Kiss/REBEL/300D] checkbox so that it changes to , click the [Next] button - Canon Digital Rebel | Software Instructions EOS DSD Ver.6 - Page 16
camera's power switch to . 14 Connect the camera to your computer. USB port DIGITAL terminal Dedicated USB cable Dedicated USB cable 15 Set the camera automatically disappears. W-6 ● When [EOS Kiss REBEL 300D] screen (event screen) and the [Scanner and Camera Wizard] dialog box appear, - Canon Digital Rebel | Software Instructions EOS DSD Ver.6 - Page 17
to until the [Found New Hardware] or [Create driver information database] message automatically disappears. Installing the Software on Your Computer ● When [EOS Kiss REBEL 300D] screen (event screen) and the [Scanner and Camera Wizard] dialog box appear, click the [Cancel] buttons and close - Canon Digital Rebel | Software Instructions EOS DSD Ver.6 - Page 18
menu that appears. Please Register Your Camera! We recommend you take a moment to register your camera, in order to receive further product information. To proceed to the online User Registration page, simply click the [User Registration] button from the [EOS DIGITAL SOLUTION DISK]. If there is no - Canon Digital Rebel | Software Instructions EOS DSD Ver.6 - Page 19
2W 2 Getting Ready to Work with Images This chapter explains how to set the communication mode, how to connect the camera to your computer, and how to use a card reader (third-party product). - Canon Digital Rebel | Software Instructions EOS DSD Ver.6 - Page 20
[Normal]. If you set the communication mode to [PTP], the SOLUTION DISK software cannot communicate with the camera. When you are using the software, always set the communication mode to [Normal]. 1 Check that the camera is not connected to the computer and then set the power switch to . 2 Set - Canon Digital Rebel | Software Instructions EOS DSD Ver.6 - Page 21
differs depending on your computer. Refer to the User's Manual for your computer for details. USB port Dedicated USB cable Getting Ready camera. DIGITAL terminal Dedicated USB cable 3 Set the camera's power switch to . \ The [EOS Kiss REBEL 300D] screen (event screen) and the [Scanner and Camera - Canon Digital Rebel | Software Instructions EOS DSD Ver.6 - Page 22
to the computer User's Manual for more information on Sleep mode. When the camera is connected to a computer camera regardless of battery level. About Backing up (Copying) Images You should back up (copy) the captured images on the hard disk of your computer, etc. before working with EOS DIGITAL - Canon Digital Rebel | Software Instructions EOS DSD Ver.6 - Page 23
the computer. 1 Remove the CF card from the camera. 2 Load the card into the card reader. W reader to your computer, refer to the User's Manual provided with the card reader. CF Card Folder RAW images) CRW_xxxx.THM (image used to show the camera index) The folder that holds the image control files - Canon Digital Rebel | Software Instructions EOS DSD Ver.6 - Page 24
● Press the button to clear the LCD monitor display. ● When you have finished, switch the camera off. 2 Connect the camera to the computer and set the camera's power switch to (W-11). \ The [Scanner and Camera Wizard] dialog box appears. 3 Download images as directed in the [Scanner and - Canon Digital Rebel | Software Instructions EOS DSD Ver.6 - Page 25
display and save images stored on a CF card loaded in the camera, and also explains how to perform image processing including processing RAW images and select [All Programs] ([Programs] in other versions of Windows) s [Canon Utilities] s [FileViewerUtility xx] ("xx" is the version) s [FileViewerUtility - Canon Digital Rebel | Software Instructions EOS DSD Ver.6 - Page 26
camera to your computer. (W-11) \ The [EOS Kiss REBEL 300D] screen (event screen) and the [Scanner and Camera Wizard] dialog box appear. ● Click the [Cancel] button and close all the open windows. 2 Click the [Start] button and select [All Programs] ([Programs] in other versions of Windows) s [Canon - Canon Digital Rebel | Software Instructions EOS DSD Ver.6 - Page 27
25) Menu bar Displays the [File], [Edit], [View], and [Help] menus. Model-specific processing mode list box (W-22) Path display Displays the connected camera, drive on your computer and folder. Display Mode list box (W-23) Display Size list box (W-24) Histogram Shows the distribution of W the - Canon Digital Rebel | Software Instructions EOS DSD Ver.6 - Page 28
button Select Previous Image button (W-21) Select Next Image button (W-21) Version button Play sound button * This button is not supported for images shot on your camera. Protect button (W-26) * The above window shows all the information at once. In actual use, only the information needed is - Canon Digital Rebel | Software Instructions EOS DSD Ver.6 - Page 29
Starting File Viewer Utility Digital Exposure Compensation button (W-30) White Balance list box (W-31, W-32) Contrast list box (W-34) Click White Balance button (W-33) Color Temp. input box (W-32) Color - Canon Digital Rebel | Software Instructions EOS DSD Ver.6 - Page 30
card in the camera. Select a folder that contains images to be displayed. ● Double-click [EOS DIGITAL REBEL] and then click the plus Your camera model is displayed. Utility. • JPEG images shot on a Canon digital camera • RAW images shot on a Canon digital camera • TIFF and JPEG images saved in - Canon Digital Rebel | Software Instructions EOS DSD Ver.6 - Page 31
Selecting Images Selecting Images with the Mouse Position the mouse cursor over the image and click on it. ● To select multiple images, hold down the key and click the images. ● To select consecutive images, click W the first image and then hold down the key and click the last - Canon Digital Rebel | Software Instructions EOS DSD Ver.6 - Page 32
. [EOS DIGITAL REBEL] / [EOS 300D DIGITAL] The RAW image process tool bar is displayed. By selecting RAW images, you can check and/or modify the image processing used. When a JPEG image is selected, however, the RAW image process tool bar is grayed out and disabled. When images shot on Canon cameras - Canon Digital Rebel | Software Instructions EOS DSD Ver.6 - Page 33
mark (W-26) This mark is displayed for protected images. Digital exposure compensation value (W-30) 3 Recording format The [RAW] thumbnail-displayed image, it is displayed in the [Preview] mode. ● When you use your camera to shoot a RAW image, a JPEG image (Middle/Fine) is recorded at the same - Canon Digital Rebel | Software Instructions EOS DSD Ver.6 - Page 34
Selecting the Image Display Mode Selecting the Display Size Click the [Display Size] list box and select the display size. \ The image is displayed in the selected display size. In the [Preview] mode, the available image sizes are [Large] (100% - pixelequivalent), [Middle] (50%) and [Small] (25%). - Canon Digital Rebel | Software Instructions EOS DSD Ver.6 - Page 35
Selecting the Image Display Mode Showing/Hiding the Information Display Frame of Thumbnail Images You can hide the information displayed on the frame of the thumbnail images (W-23) to display more images in the image display area. 1 Select [Thumbnail display] from the [Display Mode] list box. (W- - Canon Digital Rebel | Software Instructions EOS DSD Ver.6 - Page 36
When multiple images are selected, all the selected images are protected. ● The [ ] is automatically displayed for images that were protected on the camera. ● Protection only prevents images from being erased. Other types of image processing can still be performed for protected images. ● A range of - Canon Digital Rebel | Software Instructions EOS DSD Ver.6 - Page 37
are selected, all the selected images are rotated. ● Images for which [Auto rotate display orientation] is set that were shot with the camera held vertically are automatically displayed vertically. 3 ● If a rotated image is displayed in another application, the image may not appear rotated - Canon Digital Rebel | Software Instructions EOS DSD Ver.6 - Page 38
camera model name and shooting data. The number of items displayed differs depending on the camera settings to retouching software for displaying, use retouching software that supports Adobe RGB and specify [AdobeRGB] as the RGB setting printer settings, select [Page Setup] from the [File] menu. W-28 - Canon Digital Rebel | Software Instructions EOS DSD Ver.6 - Page 39
depending on the images and the computer system. • Processing times are based on Canon testing standards. (OS: Windows XP; CPU: 2.2 GHz Pentium 4; RAM: specify additional processing parameters not available on the camera, such as digital exposure compensation and white balance adjustment using the - Canon Digital Rebel | Software Instructions EOS DSD Ver.6 - Page 40
Processing RAW Images 1 Select [EOS DIGITAL REBEL] from the [Model-specific processing mode] list box. (W-22 range of +/-2 stops in 0.1-stop increments. 1 Click the [Digital Exposure Compensation] button. \ The [Digital Exposure Compensation] dialog box appears. 2 Compensate the image brightness. - Canon Digital Rebel | Software Instructions EOS DSD Ver.6 - Page 41
outdoors. For cloudy or hazy days and during sunset. For tungsten (light bulb) light. For fluorescent light. When flash is used. You can manually set color temperature for 2800 to 10000K (in 100K increments). (W-32) Color temp./K (Kelvin) - Approx. 3000 to 7000 Approx. 5200 Approx. 7000 Approx - Canon Digital Rebel | Software Instructions EOS DSD Ver.6 - Page 42
Processing RAW Images Setting the Color Temperature You can set the color temperature to a value between 2800K and 10000K (in 100K increments). 1 Select [Color Temp] from the [White Balance] list box. 2 Enter a color temperature. ● Enter the color temperature in the [Color Temp.] input box. ● You - Canon Digital Rebel | Software Instructions EOS DSD Ver.6 - Page 43
Processing RAW Images Click White Balance Function This function allows you to automatically adjust the white balance simply by clicking a point in a white part of the image. 1 Click the [Click White Balance] button. \ When you move the cursor over the image, it changes to the shape of an - Canon Digital Rebel | Software Instructions EOS DSD Ver.6 - Page 44
Processing RAW Images Adjusting the Color in Images Use the procedures below to adjust the color parameters (contrast, color saturation and color tone) in images. You can adjust the color by selecting settings from the respective list boxes. Adjusting the Contrast Select the desired setting from the - Canon Digital Rebel | Software Instructions EOS DSD Ver.6 - Page 45
set to [AdobeRGB] to retouching software, use retouching software that supports Adobe RGB and specify [AdobeRGB] as the RGB setting for apply the processing parameters used for one RAW image (such as the digital exposure compensation and white balance adjustment settings) to other images. 1 Right - Canon Digital Rebel | Software Instructions EOS DSD Ver.6 - Page 46
then save the JPEG images onto your computer, and how to save multiple images as an index file on your computer. Saving Images from the Camera to Your Computer You should save the images you have shot on your computer. 1 Select images to be saved. (W-21) 2 Click the [Save File] button - Canon Digital Rebel | Software Instructions EOS DSD Ver.6 - Page 47
] field below the text box. 9 You can specify up to 9 digits for the file number. 10 Specifies the first file number. 11 Images shot on your camera do not support this function. 12 Images shot on your camera do not support this function. A range of operations is also available by selecting the - Canon Digital Rebel | Software Instructions EOS DSD Ver.6 - Page 48
time. You can save the JPEG image (Middle/Fine) included with the RAW image to your computer by selecting the RAW image shot on your camera and extracting the JPEG image. 1 Select the RAW image from which a JPEG image is to be extracted. (W-21) 2 Click the [Save File] button and select - Canon Digital Rebel | Software Instructions EOS DSD Ver.6 - Page 49
this option when the images selected are saved on a CF card in the camera. This option is only available when the selected images are saved on your [Example] field below the text box. 7 You can specify up to 9 digits for the file number. 8 Specifies the first file number. 3 Working with Images - Canon Digital Rebel | Software Instructions EOS DSD Ver.6 - Page 50
Saving Images Saving Images as an Index File This function combines multiple images into an index image and saves the index on your computer as a single JPEG file. 1 Select images to be saved as an index. (W-21) 2 Click the [Save File] button and select [Save Index] from the menu that appears. \ The - Canon Digital Rebel | Software Instructions EOS DSD Ver.6 - Page 51
cannot use this option when the images selected are saved on a CF card in the camera. This option is only available when the selected images are saved on your computer or . 6 You can specify up to 9 digits for the file number. 7 Specifies the first file number. Working with Images in File Viewer - Canon Digital Rebel | Software Instructions EOS DSD Ver.6 - Page 52
Transferring Images to Retouching Software This section describes how to transfer images displayed in File Viewer Utility to the retouching software and also describes how to make settings for image transfer. ● In order to transfer images, you will need the retouching software such as Adobe - Canon Digital Rebel | Software Instructions EOS DSD Ver.6 - Page 53
Transferring Images to Retouching Software Transferring Images This section describes how to transfer the images displayed in File Viewer Utility to the retouching software. Although the descriptions given here show how to transfer images to Photoshop Elements 2.0, as an example, you can also - Canon Digital Rebel | Software Instructions EOS DSD Ver.6 - Page 54
Specifying the Preferences You can use the procedure below to specify the settings for image transfer and the processing parameters used for RAW images when images are transferred and saved. 1 Click the [Preferences] button. \ The [Preferences] dialog box appears. 2 Select the [General Settings] tab - Canon Digital Rebel | Software Instructions EOS DSD Ver.6 - Page 55
settings] tab sheet. The settings described here are those shown when [EOS DIGITAL REBEL] / [EOS 300D DIGITAL] is selected in the [Model Name] list box. 5 Select [EOS DIGITAL REBEL] / [EOS 300D DIGITAL]. * When images shot on a Canon camera are saved in the selected folder or on a CF card in the - Canon Digital Rebel | Software Instructions EOS DSD Ver.6 - Page 56
] dialog box. ● To display this dialog box from File Viewer Utility, click the [Camera Settings] button in the main window. ● To display this dialog box from RemoteCapture, select [Camera Settings] from the [Camera] menu in the Shooting window. ● To display this dialog box from ZoomBrowser EX, click - Canon Digital Rebel | Software Instructions EOS DSD Ver.6 - Page 57
enter up to 31 characters in [Owner's Name]. Working with Images in File Viewer Utility This box shows whether a CF card is loaded in the camera along with 3 the available space on the card and its total capacity. You can also format a CF card from this box. Applies the specified settings - Canon Digital Rebel | Software Instructions EOS DSD Ver.6 - Page 58
imports the Date and Time data from your computer. 3 Click the [Apply] button. \ The owner's name, date and time settings are applied to the camera. ● Once you click the [Apply] button, the settings remain effective until you reset the owner's name, date or time. ● Clicking the [OK] button applies - Canon Digital Rebel | Software Instructions EOS DSD Ver.6 - Page 59
4W Operating the Camera from 4 Your Computer This chapter describes the operations using Click the [Start] button and select [All Programs] ([Programs] in other versions of Windows) s [Canon Utilities] s [RemoteCapture xx] ("xx" is the version) s [RemoteCapture Readme]. Help: Displayed by - Canon Digital Rebel | Software Instructions EOS DSD Ver.6 - Page 60
11) \ The [EOS Kiss REBEL 300D] screen (event screen) and the [Scanner and Camera Wizard] dialog box appear. ● Click the [Cancel] button and close all the open windows. 2 Click the [Start] button and select [All Programs] ([Programs] in other versions of Windows) s [Canon Utilities] s [RemoteCapture - Canon Digital Rebel | Software Instructions EOS DSD Ver.6 - Page 61
. Histogram Shows the distribution of the brightness of an 4 image. Image Information Allows you to check the image information details. Operating the Camera from Your Computer Image display area Displays the image selected in the thumbnail view. Comments input box Use this field to type in - Canon Digital Rebel | Software Instructions EOS DSD Ver.6 - Page 62
not ready for shooting (the lens is not attached, etc.), you cannot perform the operation as shown below. Taking Shots from Your Computer 1 Set the camera up ready to shoot. 2 Make various settings. ● For information on how to set the size and image quality, refer to "Shooting window" (W-50). ● See - Canon Digital Rebel | Software Instructions EOS DSD Ver.6 - Page 63
system. • Transfer times are based on Canon testing standards. (Time until the RAW image , focus manually and then take a shot. ● The test-shot images taken with the camera held vertically the Windows Explorer in the WIA Driver to display images on the camera, RemoteCapture may not operate correctly - Canon Digital Rebel | Software Instructions EOS DSD Ver.6 - Page 64
in the Shooting window and select the [Shooting Settings] tab. \ The camera settings used when images are taken are displayed. Printing Images You can print images the Save window. \ The Printer Setup dialog box appears. 2 Select the printer to be used, specify the print settings and print images. W- - Canon Digital Rebel | Software Instructions EOS DSD Ver.6 - Page 65
. 2 Specify the desired settings and click the [OK] button. \ The settings are saved and the [Preferences] dialog box closes to end the procedure. Operating the Camera from Your Computer 1 2 4 3 4 5 6 7 8 9 10 W-55 - Canon Digital Rebel | Software Instructions EOS DSD Ver.6 - Page 66
camera. 3 Use this field to enter a file name when saving a captured image. * The file name can consist of up to 16 characters. 4 Sets the number of digits enter [Capture] into [File Prefix] field, [5] into [Number of Digits], and [1] into [Start], sequential file names will be assigned automatically - Canon Digital Rebel | Software Instructions EOS DSD Ver.6 - Page 67
White Balance and Exposure Compensation, from your computer remotely. ● Before you make detailed settings, be sure to confirm that the camera is ready for shooting. If the camera is not ready for shooting (the lens is not attached, etc.), you cannot make some of the settings. W ● The shooting - Canon Digital Rebel | Software Instructions EOS DSD Ver.6 - Page 68
. (Enabled only when Program AE, Shutter-priority AE, Aperture-priority AE or Automatic Depth-priority AE is selected as the shooting mode on the camera.) 3 Allows you to specify ISO Speed. 4 Allows you to specify the Av (aperture value) and Tv (shutter speed) settings. (The specifiable settings are - Canon Digital Rebel | Software Instructions EOS DSD Ver.6 - Page 69
(supported on Windows XP only). ● A number of restrictions apply to the WIA Driver. You must read the "WIA Driver Readme" file before using the WIA Driver. Readme: Click the [Start] button and then select [All Programs] ([Programs] on Windows Me) s [Canon Utilities] s [EOS Kiss REBEL 300D WIA Driver - Canon Digital Rebel | Software Instructions EOS DSD Ver.6 - Page 70
and easily download JPEG images to your computer by following the Wizard's on-screen instructions. 1 Connect the camera to your computer. (W-11) \ The [EOS Kiss REBEL 300D] screen (event screen) appears. Select [Microsoft Scanner and Camera Wizard], and then click the [OK] button. The [Scanner and - Canon Digital Rebel | Software Instructions EOS DSD Ver.6 - Page 71
Wizard] dialog box. 6 Click the [Finish] button. \ The [Scanner and Camera Wizard] dialog box closes. 5 Downloading JPEG Images RAW images are displayed by the WIA TWAIN driver but cannot be downloaded. To download and process RAW images, use the File Viewer Utility described in Chapter 3. W-61 - Canon Digital Rebel | Software Instructions EOS DSD Ver.6 - Page 72
Downloading Images with the WIA Driver Downloading with Windows Explorer JPEG images can be downloaded to the computer with Windows Explorer just as you would copy any other file. 1 Connect the camera to your computer. (W-11) \ The [EOS Kiss REBEL 300D] screen (event screen) and the [Scanner and - Canon Digital Rebel | Software Instructions EOS DSD Ver.6 - Page 73
how to use the TWAIN Driver-compatible retouching software, select images via the WIA TWAIN driver and import them into your program. The description given here use Photoshop Elements 2.0, as an example. 1 Connect the camera to your computer. (W-11) \ The [EOS Kiss REBEL 300D] screen (event screen - Canon Digital Rebel | Software Instructions EOS DSD Ver.6 - Page 74
Photoshop Elements 2.0 starts up. 3 Select the [File] menu s [Import] s [Canon EOS Kiss REBEL 300D USB]. \ The TWAIN Driver starts and the JPEG image saved on the CF card in the camera is displayed. ● To exit the TWAIN Driver, select [Exit] from the [File] menu. 4 Select the image to be transferred - Canon Digital Rebel | Software Instructions EOS DSD Ver.6 - Page 75
EX to perform a range of 6 operations including downloading the camera's images, printing them, and sending e-mail with downloaded images and select [All Programs] ([Programs] in other versions of Windows) s [Canon Utilities] s [ZoomBrowser EX] s [ZoomBrowser EX README]. Help: Displayed by - Canon Digital Rebel | Software Instructions EOS DSD Ver.6 - Page 76
\ The [EOS Kiss REBEL 300D] screen (event screen) appears. \ In Windows Me, the [Scanner and Camera Wizard] dialog box appears. Click the [Cancel] button to exit the [Scanner and Camera Wizard] dialog box and start ZoomBrowser EX (see "Starting ZoomBrowser EX Using the Icon" (W-67).) 2 Select [Canon - Canon Digital Rebel | Software Instructions EOS DSD Ver.6 - Page 77
[All W Programs] ([Programs] in other versions of Windows) s [Canon Utilities] s [ZoomBrowser EX] s [ZoomBrowser EX]. \ ZoomBrowser EX starts third-party retouching software. Starts PhotoRecord and prints images. Opens the Camera window. When RemoteCapture is running (W-50), [Remote Shooting] is - Canon Digital Rebel | Software Instructions EOS DSD Ver.6 - Page 78
Deselects images. Selects all the images at once. Displays the next folder level up from the folders currently displayed in the Browser area. 2 Click the [Camera & Memory Card] button and select [Browse/ Download images] from the menu that appears. \ The ZoomBrowser EX main window closes and the - Canon Digital Rebel | Software Instructions EOS DSD Ver.6 - Page 79
or card reader and save those images on your computer. 1 Select the images to be downloaded from the Camera window and click the [Download image] button. ● Click the displayed images to select them. You can also select multiple images by clicking images successively. ● Click a - Canon Digital Rebel | Software Instructions EOS DSD Ver.6 - Page 80
Downloading and Saving Images 2 Specify the desired settings and click the [OK] button. \ The images are saved on your computer, the Camera window closes and the ZoomBrowser EX main window opens. \ The downloaded images are displayed in the ZoomBrowser EX main window. Saves images in the selected - Canon Digital Rebel | Software Instructions EOS DSD Ver.6 - Page 81
supports layout printing and index printing. Printing Images 1 Select the images to be printed in the ZoomBrowser EX main window or the Camera window in step 2, the [Index Print Settings] dialog box appears. Set the printer and paper settings and then click the [Print] button to begin printing. - Canon Digital Rebel | Software Instructions EOS DSD Ver.6 - Page 82
-screen printing is used, [Tiled photo printing] is displayed.) Select this option when you want to print on the Canon perforated paper. (This option is not displayed if you are using a printer that does not support printing on perforated paper.) * The print mode settings vary depending on your - Canon Digital Rebel | Software Instructions EOS DSD Ver.6 - Page 83
to the desired position. Changes the image sequence. Options button Displays the menu options used to edit the window. Select [AUTO], [INDEX] or [MANUAL] as the layout method. You can enter a title by clicking the [Options] button and selecting [Title] s [Edit] W from the menu that appears. You - Canon Digital Rebel | Software Instructions EOS DSD Ver.6 - Page 84
may not be possible to print from PhotoRecord. If this problem occurs, open the Control Panel and select [Printers and other hardware] s [Printers and Faxes] (In other versions of Windows select [Printer] from the Control Panel). Then change the path and printer name so that it is no longer than 31 - Canon Digital Rebel | Software Instructions EOS DSD Ver.6 - Page 85
Control Panel] and then click the [CLOSE] button. \ The selected image is corrected. 6 Working with Images in ZoomBrowser EX Images shot on camera that comply with Exif 2.2 incorporate recorded information on the settings used when the shot was taken. The Exif Print correction functions use this - Canon Digital Rebel | Software Instructions EOS DSD Ver.6 - Page 86
automatically start your e-mail software from ZoomBrowser EX and send images, your e-mail software must be set as a MAPI client. Refer to the user manuals for your e-mail software for information on MAPI settings. 1 Display an image in the ZoomBrowser EX main window. (W-69) 2 Select the image to be - Canon Digital Rebel | Software Instructions EOS DSD Ver.6 - Page 87
the address and a message and then send the e-mail. ● If the [Save the images in a folder to send through an email program that dose not support MAPI] radio button is selected, click the [Browse] button and specify the folder where the image is to be saved. \ The images are saved in - Canon Digital Rebel | Software Instructions EOS DSD Ver.6 - Page 88
View Area] is not displayed, the functions such as the camera settings, image rotation, image transfer, index saving, image erasing, Photos] from the menu that appears. \ PhotoStitch starts up. ● Follow the instructions in the guidance window to merge the images. ● Please refer to the PhotoStitch - Canon Digital Rebel | Software Instructions EOS DSD Ver.6 - Page 89
7W Troubleshooting and Uninstallation This chapter provides a troubleshooting manual and describes the software uninstallation procedures. 7 - Canon Digital Rebel | Software Instructions EOS DSD Ver.6 - Page 90
Troubleshooting When the "Could not complete installation correctly" or "Communication between the camera and computer failed" message appears, check the items described below. ● The EOS Kiss REBEL 300D is shown in the operation screens as "EOS XXX". Installation failed. ● If you are using Windows - Canon Digital Rebel | Software Instructions EOS DSD Ver.6 - Page 91
USB cable and set the camera's power switch to (W-11) and open [Device Manager] (below). Click the plus symbol [+] to the left of [Other devices] or [Unknown devices] and check whether [EOS Kiss REBEL 300D] or [Canon Digital Camera] is displayed. Troubleshooting and Uninstallation W-81 - Canon Digital Rebel | Software Instructions EOS DSD Ver.6 - Page 92
Troubleshooting ➞ If [EOS Kiss REBEL 300D] or [Canon Digital Camera] is displayed in [Other devices] or [Unknown devices], the driver was not installed correctly. Use the following procedure to re-install the driver. 1 Delete [EOS Kiss REBEL 300D] or [Canon Digital Camera] displayed in [Other - Canon Digital Rebel | Software Instructions EOS DSD Ver.6 - Page 93
of Windows) s [Canon Utilities] s [FileViewerUtility xx] s [FileViewerUtility Uninstall]. ● File Viewer Utility version information is displayed in xx. 2 Proceed with the uninstallation as directed by the on-screen messages. \ Software is uninstalled. 7 Troubleshooting and Uninstallation W-83 - Canon Digital Rebel | Software Instructions EOS DSD Ver.6 - Page 94
then select [Programs] s [Canon Utilities] s [EOS Kiss REBEL 300D TWAIN Driver] s [TWAIN Driver Uninstall]. 2 Proceed with the uninstallation as directed by the on-screen messages. \ The driver is uninstalled. 3 Connect the camera to your computer. ● If the [EOS Kiss REBEL 300D] screen (event screen - Canon Digital Rebel | Software Instructions EOS DSD Ver.6 - Page 95
as follows. If drivers for other devices such as scanners are already installed, those device names are displayed. Take particular care not to delete the wrong driver. 7 Display [Device Manager]. (W-82) 8 Delete [EOS Kiss REBEL 300D]. For Windows XP and Windows 2000 users: 7 Troubleshooting and - Canon Digital Rebel | Software Instructions EOS DSD Ver.6 - Page 96
more than once in [Other devices], delete all the occurrences. ● When [EOS Kiss REBEL 300D] is not displayed in [Imaging devices] or [Other devices], close the dialog box and proceed as follows. 9 Delete the driver settings files. ● The method for deleting the settings files differs depending on - Canon Digital Rebel | Software Instructions EOS DSD Ver.6 - Page 97
Uninstalling Deleting the Driver Settings Files Mistakenly deleting the wrong files can cause Windows types] checkbox. ● If these settings are already selected, simply proceed to the next step. Troubleshooting and Uninstallation 7 4 Click the [OK] button to close the [Folder Options] dialog box - Canon Digital Rebel | Software Instructions EOS DSD Ver.6 - Page 98
*] files. 8 Check the contents of the [Oem*.inf] files. ● Double-click an [Oem*.inf] file to display the file contents. Check that [; **** Canon Camera Driver Setup File ****] appears on the first line. ● If there are multiple [Oem*.inf] files, repeat this procedure. ● Once you have identified the - Canon Digital Rebel | Software Instructions EOS DSD Ver.6 - Page 99
**** Canon Camera Driver Setup File ****] appears on the first line. ● If there are multiple [Oem*.inf] files, repeat this procedure. ● Once you have identified the target file or files, make a note of the file names. 9 Delete the [Oem*.inf] and [Oem*.pnf] files you identified. Troubleshooting and - Canon Digital Rebel | Software Instructions EOS DSD Ver.6 - Page 100
Uninstalling For Windows Me and Windows 98 SE users: 1 Click the [Start] button and select [Settings] s [Control Panel]. Then double-click the [Folder Options] icon. ● Windows 98 SE users should click the [Start] button and select [Settings] s [Folder Options]. \ The [Folder Options] dialog box - Canon Digital Rebel | Software Instructions EOS DSD Ver.6 - Page 101
.inf] file if it exists. ● "E3KR" is displayed in place of "XXX" in the file name. ● The [Canon.IncCAP_E3KR.inf] file may not exist depending on your computer system. 7 Troubleshooting and Uninstallation The [INF] folder contains a large number of files. Deleting the wrong files could, at worst - Canon Digital Rebel | Software Instructions EOS DSD Ver.6 - Page 102
Uninstalling Uninstalling Photoshop Elements 2.0 ● Before beginning the software uninstallation, close all programs you are using and disconnect the dedicated USB cable from your computer. ● Windows XP Professional or Windows 2000 users should log in using computer Administrator privileges. 1 Click - Canon Digital Rebel | Software Instructions EOS DSD Ver.6 - Page 103
Quality and TWAIN Driver A-6 Printing (Exif Pri W-75 WIA Driver A-6 W Adjusting Camera to Your Computer W-11 Copying the Processing Parameters .... W-35 O Operation Flow A-4 P D Digital Camera Settings W-46 Default Settings W-55 Detailed Settings W-57 Preferences W-44 Troubleshooting - Canon Digital Rebel | Software Instructions EOS DSD Ver.6 - Page 104
W-35 Software Window File Viewer Utility Main Window ........ W-17 RemoteCapture Save Window W-51 Shooting Window W-50 TWAIN Driver Main Window W-64 ZoomBrowser EX Camera Window W-66 ZoomBrowser EX Main Window W-67 Specifying the Color Space W-35 Starting the Software Starting File Viewer - Canon Digital Rebel | Software Instructions EOS DSD Ver.6 - Page 105
Installing the Software on Macintosh M-4 Installing Photoshop Elements 2.0 ..... M-6 Please Register Your Camera M-6 2 Getting Ready to Work with Images M-7 Setting the Communication Mode ....... M-8 Connecting the Camera to Your Computer M-9 Inserting a CF Card into Your Card Reader M-11 CF - Canon Digital Rebel | Software Instructions EOS DSD Ver.6 - Page 106
Parameters M-27 Compensating the Brightness (Digital Exposure Compensation) ....... M-28 Adjusting 33 Saving Images M-34 Saving Images from the Camera to Your Computer M-34 Extracting JPEG Images from ....... M-70 6 Troubleshooting and Uninstallation M-71 Troubleshooting M-72 Uninstalling M-74 - Canon Digital Rebel | Software Instructions EOS DSD Ver.6 - Page 107
1M 1 Installing the Software on Your Computer This chapter describes how to install the bundled software. - Canon Digital Rebel | Software Instructions EOS DSD Ver.6 - Page 108
instructions for installing Photoshop Elements, refer to (M-6). 1 Start up your Macintosh. ● Close any programs that are running. 2 Insert the CD (EOS DIGITAL the CD window s [Canon EOS Digital Installer]. \ The Installer panel appears. OS 9 4Click [Digital Camera Software Installation]. 5 Check - Canon Digital Rebel | Software Instructions EOS DSD Ver.6 - Page 109
Installing the Software on Macintosh 6 Check the details of the User License Agreement. ● If you have checked the details and agree to the terms of the Agreement, click the [Agree] button. 7 Check the folder in which the software will be installed. ● Check the install destination and then click - Canon Digital Rebel | Software Instructions EOS DSD Ver.6 - Page 110
Elements 2.0 CD-ROM. Please Register Your Camera! We recommend you take a moment to register your camera, in order to receive further product information. To proceed to the online User Registration page, simply click the [User Registration] button from the [EOS DIGITAL SOLUTION DISK]. If there is no - Canon Digital Rebel | Software Instructions EOS DSD Ver.6 - Page 111
2M 2 Getting Ready to Work with Images This chapter explains how to set the communication mode, how to connect the camera to your computer, and how to use a card reader (third-party product). - Canon Digital Rebel | Software Instructions EOS DSD Ver.6 - Page 112
Normal]. If you set the communication mode to [PTP], the SOLUTION DISK software cannot communicate with the camera. When you are using the software, always set the communication mode to [Normal]. 1 Check that the camera is not connected to the computer and then set the power switch to . 2 Set - Canon Digital Rebel | Software Instructions EOS DSD Ver.6 - Page 113
's Manual for your computer for details. Dedicated USB cable Getting Ready to Work with Images 2 Plug the dedicated USB cable into your camera. facing the front of the camera. DIGITAL terminal Dedicated USB cable 3 Set the camera's power switch to . \ The camera is now ready to communicate - Canon Digital Rebel | Software Instructions EOS DSD Ver.6 - Page 114
to the computer User's Manual for more information on Sleep mode. When the camera is connected to a computer camera regardless of battery level. About Backing up (Copying) Images You should back up (copy) the captured images on the hard disk of your computer, etc. before working with EOS DIGITAL - Canon Digital Rebel | Software Instructions EOS DSD Ver.6 - Page 115
the computer. 1 Remove the CF card from the camera. 2 Load the card into the card reader. M reader to your computer, refer to the User's Manual provided with the card reader. CF Card Folder images) CRW_xxxx.THM (image used to show the camera index) The folder that holds the image control files - Canon Digital Rebel | Software Instructions EOS DSD Ver.6 - Page 116
software starts up in Image Capture. 3 Download the images as directed. ● Follow the instructions in the on-screen messages to download the JPEG images. ● To specify the software that will start up when the camera is connected to the computer, start up Image Capture and select [Preferences] in the - Canon Digital Rebel | Software Instructions EOS DSD Ver.6 - Page 117
File Viewer Utility to display and save images stored on a CF card loaded in the camera, and also explains how to perform image processing including processing RAW images and how to sources listed below. ReadMe: Double-click the [Canon Utilities] folder s the [File Viewer Utility] folder s [ReadMe]. - Canon Digital Rebel | Software Instructions EOS DSD Ver.6 - Page 118
Viewer Utility 1 Connect the camera to your computer. (M-9) ● In OS 9, ImageBrowser starts up and the [ImageBrowser Automation wizard] dialog box appears. Click the [Cancel] button and select [Quit] from the [File] menu to exit ImageBrowser. 2 Double-click the [Canon File Viewer Utility] icon on - Canon Digital Rebel | Software Instructions EOS DSD Ver.6 - Page 119
window Show/Hide Thumbnail Frames button (M-23) Display Mode list box (M-21) Display Size list box (M-22) Path display Displays the connected camera, drive on your computer and folder. Model-specific processing mode list box (M-20) Histogram Shows the distribution Image transfer mode of the - Canon Digital Rebel | Software Instructions EOS DSD Ver.6 - Page 120
(M-24) Version button Select Previous Image button (M-19) Select Next Image button (M-19) Play sound button * This button is not supported for images shot on your camera. protect button (M-24) * The above window shows all the information at once. In actual use, only the information needed is - Canon Digital Rebel | Software Instructions EOS DSD Ver.6 - Page 121
Starting File Viewer Utility Digital Exposure Compensation button (M-28) White Balance list box (M-29, M-30) Contrast list box (M-32) Color Temp. input box (M-30) Click White Balance button (M-31) Color - Canon Digital Rebel | Software Instructions EOS DSD Ver.6 - Page 122
on a CF card in the camera. Select a folder that contains images to be displayed. ● Click [s] to the left of the [EOS DIGITAL REBEL] icon s [s] to the left Viewer Utility. • JPEG images shot on a Canon digital camera • RAW images shot on a Canon digital camera • TIFF and JPEG images saved in File - Canon Digital Rebel | Software Instructions EOS DSD Ver.6 - Page 123
Selecting Images Selecting Images with the Mouse Position the mouse cursor over the image and click on it. ● To select multiple images, hold down the key and click the images. ● To select consecutive images, click the first image and then hold down the + keys and click - Canon Digital Rebel | Software Instructions EOS DSD Ver.6 - Page 124
. [EOS DIGITAL REBEL] / [EOS 300D DIGITAL] The RAW image process tool bar is displayed. By selecting RAW images, you can check and/or modify the image processing used. When a JPEG image is selected, however, the RAW image process tool bar is grayed out and disabled. When images shot on Canon cameras - Canon Digital Rebel | Software Instructions EOS DSD Ver.6 - Page 125
mark (M-24) This mark is displayed for protected images. Digital exposure compensation value (M-28) 3 Recording format The [RAW] thumbnail-displayed image, it is displayed in the [Preview] mode. ● When you use your camera to shoot a RAW image, a JPEG image (Middle/Fine) is recorded at the same time - Canon Digital Rebel | Software Instructions EOS DSD Ver.6 - Page 126
Selecting the Image Display Mode Selecting the Display Size Click the [Display Size] list box and select the display size. \ The image is displayed in the selected display size. In the [Preview] mode, the available image sizes are [Large] (100% - pixelequivalent), [Middle] (50%) and [Small] (25%). - Canon Digital Rebel | Software Instructions EOS DSD Ver.6 - Page 127
Selecting the Image Display Mode Showing/Hiding the Information Display Frame of Thumbnail Images You can hide the information displayed on the frame of the thumbnail images (M-21) to display more images in the image display area. 1 Select [Thumbnail display] from the [Display Mode] list box. (M- - Canon Digital Rebel | Software Instructions EOS DSD Ver.6 - Page 128
When multiple images are selected, all the selected images are protected. ● The [ ] is automatically displayed for images that were protected on the camera. ● Protection only prevents images from being erased. Other types of image processing can still be performed for protected images. ● A range of - Canon Digital Rebel | Software Instructions EOS DSD Ver.6 - Page 129
selected, all the selected images are rotated. ● Images for which [Auto rotate display orientation] is set that were shot with the camera held vertically are automatically displayed vertically. ● If a rotated image is displayed in another application, the image may not appear rotated. ● A range - Canon Digital Rebel | Software Instructions EOS DSD Ver.6 - Page 130
camera model name and shooting data. The number of items displayed differs depending on the camera software for displaying, use retouching software that supports Adobe RGB and specify [AdobeRGB] as the The Printer Setup dialog box appears. 3 Select the printer to be used, specify the print settings - Canon Digital Rebel | Software Instructions EOS DSD Ver.6 - Page 131
depending on the images and the computer system. • Processing times are based on Canon testing standards. (OS: OS X (10.2); CPU: Power PC G4 700 MHz specify additional processing parameters not available on the camera, such as digital exposure compensation and white balance adjustment using the - Canon Digital Rebel | Software Instructions EOS DSD Ver.6 - Page 132
Processing RAW Images 1 Select [EOS DIGITAL REBEL] from the [Model-specific processing mode] list box. (M-20 range of +/-2 stops in 0.1-stop increments. 1 Click the [Digital Exposure Compensation] button. \ The [Digital Exposure Compensation] dialog box appears. 2 Compensate the image brightness. - Canon Digital Rebel | Software Instructions EOS DSD Ver.6 - Page 133
outdoors. For cloudy or hazy days and during sunset. For tungsten (light bulb) light. For fluorescent light. When flash is used. You can manually set color temperature for 2800 to 10000K (in 100K increments). (M-30) Color temp./K (Kelvin) - Approx. 3000 to 7000 Approx. 5200 Approx. 7000 Approx - Canon Digital Rebel | Software Instructions EOS DSD Ver.6 - Page 134
Processing RAW Images Setting the Color Temperature You can set the color temperature to a value between 2800K and 10000K (in 100K increments). 1 Select [Color Temp] from the [White Balance] list box. 2 Enter a color temperature. ● Enter the color temperature in the [Color Temp.] input box. ● You - Canon Digital Rebel | Software Instructions EOS DSD Ver.6 - Page 135
Working with Images in File Viewer Utility Processing RAW Images Click White Balance Function This function allows you to automatically adjust the white balance simply by clicking a point in a white part of the image. 1 Click the [Click White Balance] button. \ When you move the cursor over the - Canon Digital Rebel | Software Instructions EOS DSD Ver.6 - Page 136
Processing RAW Images Adjusting the Color in Images Use the procedures below to adjust the color parameters (contrast, color saturation and color tone) in images. You can adjust the color by selecting settings from the respective list boxes. Adjusting the Contrast Select the desired setting from the - Canon Digital Rebel | Software Instructions EOS DSD Ver.6 - Page 137
set to [AdobeRGB] to retouching software, use retouching software that supports Adobe RGB and specify [AdobeRGB] as the RGB setting for apply the processing parameters used for one RAW image (such as the digital exposure compensation and white balance adjustment settings) to other images. 1 Hold - Canon Digital Rebel | Software Instructions EOS DSD Ver.6 - Page 138
then save the JPEG images onto your computer, and how to save multiple images as an index file on your computer. Saving Images from the Camera to Your Computer You should save the images you have shot on your computer. 1 Select images to be saved. (M-19) 2 Click the [Save File] button - Canon Digital Rebel | Software Instructions EOS DSD Ver.6 - Page 139
] field below the text box. 9 You can specify up to 9 digits for the file number. 10 Specifies the first file number. 11 Images shot on your camera do not support this function. 12 Images shot on your camera do not support this function. A range of operations is also available by selecting the - Canon Digital Rebel | Software Instructions EOS DSD Ver.6 - Page 140
time. You can save the JPEG image (Middle/Fine) included with the RAW image to your computer by selecting the RAW image shot on your camera and extracting the JPEG image. 1 Select the RAW image from which a JPEG image is to be extracted. (M-19) 2 Click the [Save File] button and select - Canon Digital Rebel | Software Instructions EOS DSD Ver.6 - Page 141
this option when the images selected are saved on a CF card in the camera. This option is only available when the selected images are saved on your Example] field below the M text box. 7 You can specify up to 9 digits for the file number. 8 Specifies the first file number. 3 Working with Images - Canon Digital Rebel | Software Instructions EOS DSD Ver.6 - Page 142
Saving Images Saving Images as an Index File This function combines multiple images into an index image and saves the index on your computer as a single JPEG file. 1 Select images to be saved as an index. (M-19) 2 Click the [Save File] button and select [Save Index] from the menu that appears. \ The - Canon Digital Rebel | Software Instructions EOS DSD Ver.6 - Page 143
this option when the images selected are saved on a CF card in the camera. This option is only available when the selected images are saved on your Example] field below the text box. 6 You can specify up to 9 digits for the file number. 7 Specifies the first file number. Working with Images - Canon Digital Rebel | Software Instructions EOS DSD Ver.6 - Page 144
Transferring Images to Retouching Software This section describes how to transfer images displayed in File Viewer Utility to the retouching software and also describes how to make settings for image transfer. ● In order to transfer images, you will need the retouching software such as Adobe - Canon Digital Rebel | Software Instructions EOS DSD Ver.6 - Page 145
Transferring Images to Retouching Software Transferring Images This section describes how to transfer the images displayed in File Viewer Utility to the retouching software. Although the descriptions given here show how to transfer images to Photoshop Elements 2.0, as an example, you can also - Canon Digital Rebel | Software Instructions EOS DSD Ver.6 - Page 146
Specifying the Preferences You can use the procedure below to specify the settings for image transfer and the processing parameters used for RAW images when images are transferred and saved. 1 Click the [Preferences] button. \ The [Preferences] dialog box appears. 2 Select the [General Settings] tab - Canon Digital Rebel | Software Instructions EOS DSD Ver.6 - Page 147
settings] tab sheet. The settings described here are those shown when [EOS DIGITAL REBEL] / [EOS 300D DIGITAL] is selected in the [Model Name] list box. 3 5 Select [EOS DIGITAL REBEL] / [EOS 300D DIGITAL]. * When images shot on a Canon camera are saved in the selected folder or on a CF card in - Canon Digital Rebel | Software Instructions EOS DSD Ver.6 - Page 148
File] menu. ● To display this dialog box from ImageBrowser, select the [Camera Settings] in the menu that appears by clicking the [SETUP OPTIONS] button in the Camera window, or select the [Canon Camera] menu s [Settings] s [Camera Settings]. See Chapter 5, "Working with Images in ImageBrowser", for - Canon Digital Rebel | Software Instructions EOS DSD Ver.6 - Page 149
and the date and time. You can enter up to 31 characters in [Owner's Name]. M This box shows whether a CF card is loaded in the camera along with the available space on the card and its total capacity. You can also format 3 a CF card from this box. Applies the settings. Applies - Canon Digital Rebel | Software Instructions EOS DSD Ver.6 - Page 150
from your computer by selecting the [from Mac] checkbox. 3 Click the [Apply] button. \ The owner's name, date and time settings are applied to the camera. ● Once you click the [Apply] button, the settings remain effective until you reset the owner's name, date or time. ● Clicking the [OK] button - Canon Digital Rebel | Software Instructions EOS DSD Ver.6 - Page 151
the Camera from Your Computer 4 This chapter describes the operations using the RemoteCapture software, such as remote shooting, timer shooting and interval timer shooting. ● For more information on using RemoteCapture, refer also to the sources listed below. ReadMe: Double-click the [Canon - Canon Digital Rebel | Software Instructions EOS DSD Ver.6 - Page 152
button and select [Quit] from the [File] menu to exit ImageBrowser. 2 Double-click the [Canon Utilities] folder s the [RemoteCapture] folder s [RemoteCapture] to start. \ The [Connect to camera?] dialog box appears. 3 Click the [Connect] button. ● When the [Communication Settings] dialog box appears - Canon Digital Rebel | Software Instructions EOS DSD Ver.6 - Page 153
. Histogram Shows the distribution of the brightness of an image. Image Information Allows you to check the image information details. 4 Operating the Camera from Your Computer Image display area Displays the image selected in the thumbnail view. Comment input box Use this field to type in - Canon Digital Rebel | Software Instructions EOS DSD Ver.6 - Page 154
not ready for shooting (the lens is not attached, etc.), you cannot perform the operation as shown below. Taking Shots from Your Computer 1 Set the camera up ready to shoot. 2 Make various settings. ● For information on how to set the size and image quality, refer to "Shooting window" (M-48). ● See - Canon Digital Rebel | Software Instructions EOS DSD Ver.6 - Page 155
the images and the computer system. • Transfer times are based on Canon testing standards. (Time until the RAW image appears in the Save window shots with the auto focusing, focus manually and then take a shot. ● The test-shot images taken with the camera held vertically are displayed in the normal - Canon Digital Rebel | Software Instructions EOS DSD Ver.6 - Page 156
the [File] menu. \ The [Shooting Settings] dialog box appears, displaying the camera settings used when images are taken. ● Clicking the [OK] button closes the the [File] menu. \ The Printer Setup dialog box appears. 2 Select the printer to be used, specify the print settings and print images. M-52 - Canon Digital Rebel | Software Instructions EOS DSD Ver.6 - Page 157
. 2 Specify the desired settings and click the [OK] button. \ The settings are saved and the [Preferences] dialog box closes to end the procedure. 1 2 4 3 4 5 6 7 8 Operating the Camera from Your Computer M-53 - Canon Digital Rebel | Software Instructions EOS DSD Ver.6 - Page 158
camera. 3 Use this field to enter a file name when saving a captured image. * The file name can consist of up to 16 characters. 4 Sets the number of digits enter [Capture] into [File Prefix] field, [5] into [Number of Digits], and [1] into [Start], sequential file names will be assigned automatically - Canon Digital Rebel | Software Instructions EOS DSD Ver.6 - Page 159
such as White Balance and Exposure Compensation, from your computer remotely. ● Before you make detailed settings, be sure to confirm that the camera is ready for shooting. If the camera is not ready for shooting (the lens is not attached, etc.), you cannot make some of the settings. ● The shooting - Canon Digital Rebel | Software Instructions EOS DSD Ver.6 - Page 160
. (Enabled only when Program AE, Shutter-priority AE, Aperture-priority AE or Automatic Depth-priority AE is selected as the shooting mode on the camera.) 3 Allows you to specify ISO Speed. 4 Allows you to specify the Av (aperture value) and Tv (shutter speed) settings. (The specifiable settings are - Canon Digital Rebel | Software Instructions EOS DSD Ver.6 - Page 161
to perform a range of 5 operations from downloading the camera's images to printing them. ● For more information on using ImageBrowser, refer also to the sources listed below. ReadMe: Double-click the [Canon Utilities] folder s the [ImageBrowser] folder s [ReadMe]. Help: Displayed - Canon Digital Rebel | Software Instructions EOS DSD Ver.6 - Page 162
Double-click the [Canon ImageBrowser] icon. ● Double-click the [Canon ImageBrowser] icon on the desktop or the [Canon Utilities] folder saved folder selected in the Folders area. Click here to connect the camera and display the Camera window. Click here to select all the images. Click here to - Canon Digital Rebel | Software Instructions EOS DSD Ver.6 - Page 163
] list box. Then click the [Set] button. M ● You can also open the Camera window by clicking the [Canon Camera] icon in the Folders area. An image of the camera or CF card will be displayed here. Camera window The [RAW] symbol is displayed for RAW images. No symbol is shown for JPEG images - Canon Digital Rebel | Software Instructions EOS DSD Ver.6 - Page 164
Browser Window appear. ● When the [Communication Settings] dialog box appears, select [USB Port] from the [Port] list box and select the connected camera from the [Detected Camera] list box. Then click the [Set] button. ● ImageBrowser can be started in the same way when a third-party card reader is - Canon Digital Rebel | Software Instructions EOS DSD Ver.6 - Page 165
appears. ● When the [Download images] radio button is selected, click the [Next] button and then proceed as instructed by the on-screen messages. \ The images on the camera are downloaded. ● When you select the [Launch RemoteCapture] radio button, click the [OK] button. \ RemoteCapture starts up - Canon Digital Rebel | Software Instructions EOS DSD Ver.6 - Page 166
In OS 9, use the procedure below to prevent ImageBrowser from starting up automatically when you connect the camera to your computer. 1 Select the Apple menu s [Control Panels] s [Canon ImageBrowser Auto Launch]. \ The [Settings for USB connection] dialog box appears. 2 Uncheck the [The application - Canon Digital Rebel | Software Instructions EOS DSD Ver.6 - Page 167
box appears, select [USB Port] from the [Port] list box and select the connected camera from the [Detected Camera] list box. Then click the [Set] button. ● You can also open the Camera window by clicking the [Canon Camera] icon in the Folders area. ● To display images stored on the computer or on - Canon Digital Rebel | Software Instructions EOS DSD Ver.6 - Page 168
. \ Image downloading begins and the downloaded images appear in the Browser Window. ● You can also download images to the computer by dragging them from the Camera window and dropping them on the Browser area or Folders area. ● To disconnect the - Canon Digital Rebel | Software Instructions EOS DSD Ver.6 - Page 169
as an index or in a tiled layout. ● If you are printing in OS 9 using a Canon printer that supports perforated paper, the [Canon perforated paper printing] radio button is displayed allowing you to print on Canon perforated paper. ● The settings available in step 4 vary depending on type of printing - Canon Digital Rebel | Software Instructions EOS DSD Ver.6 - Page 170
window. \ The [Layout Options] dialog box reappears. 6 Click the [OK] button. \ The Print window appears. 7 Edit the Print window and click the [PRINT] button. \ The Printer Setup dialog box appears. M-66 - Canon Digital Rebel | Software Instructions EOS DSD Ver.6 - Page 171
]. Working with Images in ImageBrowser Resets the layout. Rotates the selected image. Changes the default number of images printed per page. Displays the Printer Setup dialog box. 5 Displays the [Layout Options] dialog box. ● Saving the page layout You can save the page layout as an "Album" by - Canon Digital Rebel | Software Instructions EOS DSD Ver.6 - Page 172
this arrow to change the image size. * Depending on the print mode, you may not be able to change image size or angle. 8 Select the printer to be used, specify the print settings and print images. M-68 - Canon Digital Rebel | Software Instructions EOS DSD Ver.6 - Page 173
and other images. Select this option to automatically correct only images shot with Exif 2.2 5 compliant cameras. 3 Print images. (M-65) Working with Images in ImageBrowser ● Images shot on camera that comply with Exif 2.2 incorporate recorded information on the settings used when the shot was - Canon Digital Rebel | Software Instructions EOS DSD Ver.6 - Page 174
folder tree] is not displayed, the functions such as the camera settings, image rotation, image transfer, index saving, image erasing, [PhotoStitch] in the [Edit] menu. \ PhotoStitch starts up. ● Follow the instructions in the guidance window to merge the images. ● Please refer to the PhotoStitch - Canon Digital Rebel | Software Instructions EOS DSD Ver.6 - Page 175
6M Troubleshooting and Uninstallation This chapter provides a troubleshooting manual and describes the software uninstallation procedures. 6 - Canon Digital Rebel | Software Instructions EOS DSD Ver.6 - Page 176
computer. ("Installing and Removing the Battery" in the Instructions provided with your camera) ● Do you have more than one camera connected to your computer? If you connect more than one camera to the same computer, the driver and camera may not operate normally. ➞ Close the software and disconnect - Canon Digital Rebel | Software Instructions EOS DSD Ver.6 - Page 177
Troubleshooting The software doesn't run properly or doesn't run at all. ● Is the preferences file for the software corrupted? ➞ The preferences file for your software may be damaged. Quit all active programs, delete the [Canon CameraCom Pref] file and the preference files for the software you - Canon Digital Rebel | Software Instructions EOS DSD Ver.6 - Page 178
2 Drag the folder for the software to be uninstalled to the Trash and empty the Trash. ● When uninstalling ImageBrowser for OS 9, you should also drag [Canon ImageBrowser Auto Launch] from the [Control Panels] to the Trash and empty the Trash. ● When you drag the folder to the Trash, take great care - Canon Digital Rebel | Software Instructions EOS DSD Ver.6 - Page 179
the folder to the Trash, take great care not to delete any important images at the same time. ● When uninstallation ends, restart your computer. M-75 Troubleshooting and Uninstallation - Canon Digital Rebel | Software Instructions EOS DSD Ver.6 - Page 180
the White Balance M-29 C Click White Balance Function M-31 Color Temperature M-30 Connecting the Camera to Your Computer M-9 Copying the Processing Parameters .... M-33 D Digital Exposure Compensation M-28 Disabling ImageBrowser Auto Start ...... M-62 Display Mode JPEG Preview M-21 Preview - Canon Digital Rebel | Software Instructions EOS DSD Ver.6 - Page 181
File Viewer Utility Main Window ........ M-15 ImageBrowser Browser Window M-58 Camera Window M-59 RemoteCapture Save Window M-49 Shooting Window M-48 Specifying Software M-40 U Uninstalling Photoshop Elements 2.0 M-75 Software M-74 Index M 6 Troubleshooting and Uninstallation M-77 - Canon Digital Rebel | Software Instructions EOS DSD Ver.6 - Page 182
, Minato-ku, Tokyo 108-8011, Japan • This Instructions booklet is current as of August 2003. For information on using the camera with system accessories introduced after this date, contact your nearest Canon Service Center. • The camera's specifications and physical appearance are subject to change
-
 1
1 -
 2
2 -
 3
3 -
 4
4 -
 5
5 -
 6
6 -
 7
7 -
8
-
9
-
10
-
11
-
12
-
13
-
14
-
15
-
16
-
17
-
18
-
19
-
20
-
21
-
22
-
23
-
24
-
25
-
26
-
27
-
28
-
29
-
30
-
31
-
32
-
33
-
34
-
35
-
36
-
37
-
38
-
39
-
40
-
41
-
42
-
43
-
44
-
45
-
46
-
47
-
48
-
49
-
50
-
51
-
52
-
53
-
54
-
55
-
56
-
57
-
58
-
59
-
60
-
61
-
62
-
63
-
64
-
65
-
66
-
67
-
68
-
69
-
70
-
71
-
72
-
73
-
74
-
75
-
76
-
77
-
78
-
79
-
80
-
81
-
82
-
83
-
84
-
85
-
86
-
87
-
88
-
89
-
90
-
91
-
92
-
93
-
94
-
95
-
96
-
97
-
98
-
99
-
100
-
101
-
102
-
103
-
104
-
105
-
106
-
107
-
108
-
109
-
110
-
111
-
112
-
113
-
114
-
115
-
116
-
117
-
118
-
119
-
120
-
121
-
122
-
123
-
124
-
125
-
126
-
127
-
128
-
129
-
130
-
131
-
132
-
133
-
134
-
135
-
136
-
137
-
138
-
139
-
140
-
141
-
142
-
143
-
144
-
145
-
146
-
147
-
148
-
149
-
150
-
151
-
152
-
153
-
154
-
155
-
156
-
157
-
158
-
159
-
160
-
161
-
162
-
163
-
164
-
165
-
166
-
167
-
168
-
169
-
170
-
171
-
172
-
173
-
174
-
175
-
176
-
177
-
178
-
179
-
180
-
181
-
182
 |
 |
Software
EOS DIGITAL SOLUTION DISK
Ver. 6
Please read these instructions carefully before using
the EOS REBEL/300D software.
This guide should be kept in a safe place so that it
can be used for future reference.
English Edition
´
INSTRUCTIONS
Macintosh
Windows