Canon Elura 20MC Elura 10 and Elura 20MC Instruction Manual - Page 109
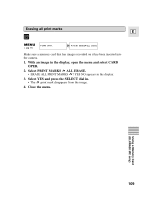
With an image in the display, open the menu and select CARD, OPER., Select PRINT MARKS, ALL ERASE.,
 |
View all Canon Elura 20MC manuals
Add to My Manuals
Save this manual to your list of manuals |
Page 109 highlights
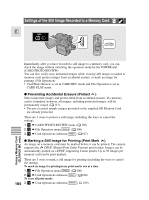
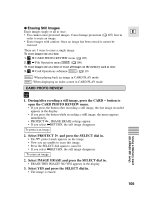
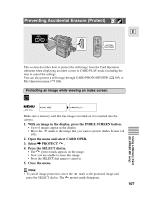
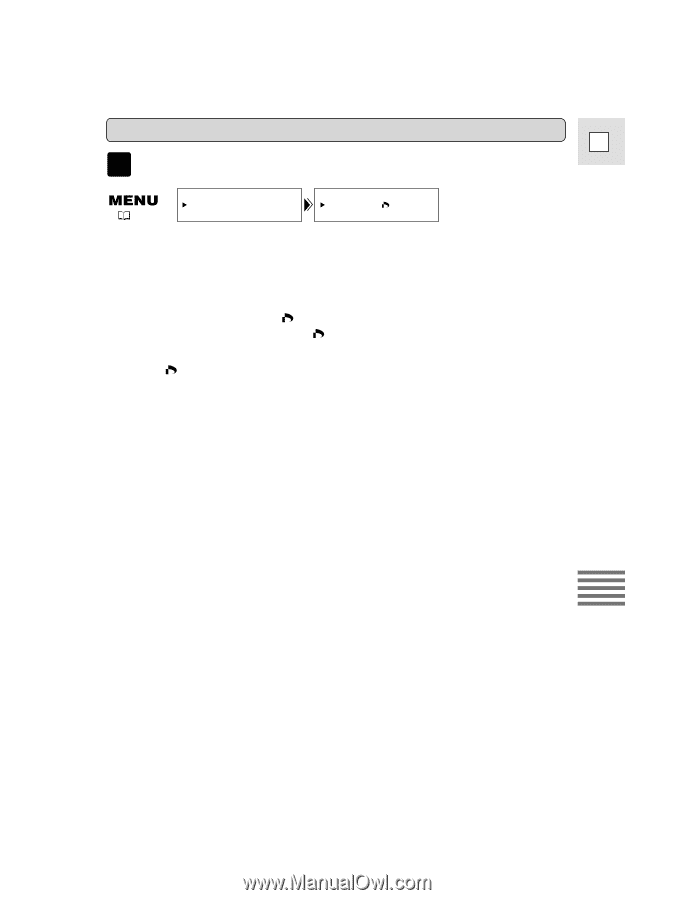
Erasing all print marks E CARD PLAY ( 35) CARD OPER. PRINT MARKS ALL ERASE Make sure a memory card that has images recorded on it has been inserted into the camera. 1. With an image in the display, open the menu and select CARD OPER. 2. Select PRINT MARKS ALL ERASE. • ERASE ALL PRINT MARKS ? YES NO appears in the display. 3. Select YES and press the SELECT dial in. • The print mark disappears from the image. 4. Close the menu. Using a Memory Card (ELURA20 MC only) 109
-
 1
1 -
2
-
3
-
4
-
5
-
6
-
7
-
8
-
9
-
10
-
11
-
12
-
13
-
14
-
15
-
16
-
17
-
18
-
19
-
20
-
21
-
22
-
23
-
24
-
25
-
26
-
27
-
28
-
29
-
30
-
31
-
32
-
33
-
34
-
35
-
36
-
37
-
38
-
39
-
40
-
41
-
42
-
43
-
44
-
45
-
46
-
47
-
48
-
49
-
50
-
51
-
52
-
53
-
54
-
55
-
56
-
57
-
58
-
59
-
60
-
61
-
62
-
63
-
64
-
65
-
66
-
67
-
68
-
69
-
70
-
71
-
72
-
73
-
74
-
75
-
76
-
77
-
78
-
79
-
80
-
81
-
82
-
83
-
84
-
85
-
86
-
87
-
88
-
89
-
90
-
91
-
92
-
93
-
94
-
95
-
96
-
97
-
98
-
99
-
100
-
101
-
102
-
103
-
 104
104 -
 105
105 -
 106
106 -
 107
107 -
 108
108 -
 109
109 -
 110
110 -
 111
111 -
 112
112 -
 113
113 -
 114
114 -
115
-
116
-
117
-
118
-
119
-
120
-
121
-
122
-
123
-
124
-
125
-
126
-
127
-
128
-
129
-
130
-
131
-
132
-
133
-
134
-
135
-
136
-
137
-
138
-
139
-
140
-
141
-
142
-
143
-
144
-
145
-
146
-
147
-
148
-
149
-
150
-
151
-
152
 |
 |
109
E
Using a Memory Card
(ELURA20 MC only)
CARD
PLAY
Make sure a memory card that has images recorded on it has been inserted into
the camera.
1.
With an image in the display, open the menu and select CARD
OPER.
2.
Select PRINT MARKS
ALL ERASE.
•
ERASE ALL PRINT MARKS
? YES NO appears in the display.
3.
Select YES and press the SELECT dial in.
• The
print mark disappears from the image.
4.
Close the menu.
PRINT MARKS
ALL ERASE
CARD OPER.
(
35)
Erasing all print marks