Canon Elura 20MC Elura 10 and Elura 20MC Instruction Manual - Page 66
Attach the microphone to the adapter bracket., Attach the adapter bracket to the docking unit.,
 |
View all Canon Elura 20MC manuals
Add to My Manuals
Save this manual to your list of manuals |
Page 66 highlights
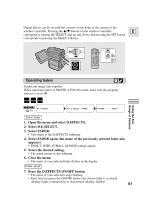
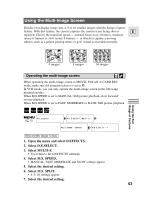
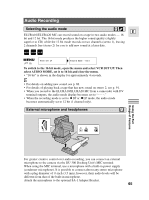
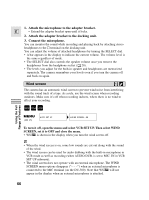
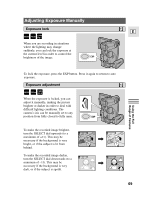
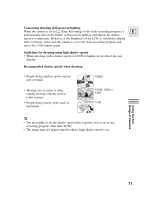
1. Attach the microphone to the adapter bracket. E • Extend the adapter bracket open until it locks. 2. Attach the adapter bracket to the docking unit. 3. Connect the microphone. You can monitor the sound while recording and playing back by attaching stereo headphones to the H terminal on the docking unit. You can adjust the volume of attached headphones by turning the SELECT dial. • A bar appears in the display to indicate the current volume. The volume level is the same regardless of mode. • The SELECT dial also controls the speaker volume once you remove the headphones from the headphone socket ( 28). • The levels you adjust for the built-in speaker and headphones are memorized separately. The camera remembers your levels even if you turn the camera off and back on again. Wind screen The camera has an automatic wind screen to prevent wind noise from interfering with the sound track of a tape. As a rule, use the wind screen when recording outdoors. Make sure it's off when recording indoors, where there is no wind to affect your recording. MOVIE P.SCAN VCR Using the Full Range of Features ( 35) VCR SET UP WIND SCREEN••ON To turn it off, open the menu and select VCR SET UP. Then select WIND SCREEN, set it to OFF and close the menu. • WS | is shown in the display when you turn the wind screen off. • When the wind screen is on, some low sounds are cut out along with the sound of the wind. • The wind screen can be used for audio dubbing with the built-in microphone in VCR mode as well as recording (when AUDIO DUB. is set to MIC. IN in VCR SET UP submenu). • The wind screen does not operate with an external microphone. The WIND SCREEN menu options disappear ("- - -") when an external microphone is connected to the MIC terminal (on the DU-300). Note that WS | will not appear in the display when an external microphone is attached. 66
-
 1
1 -
2
-
3
-
4
-
5
-
6
-
7
-
8
-
9
-
10
-
11
-
12
-
13
-
14
-
15
-
16
-
17
-
18
-
19
-
20
-
21
-
22
-
23
-
24
-
25
-
26
-
27
-
28
-
29
-
30
-
31
-
32
-
33
-
34
-
35
-
36
-
37
-
38
-
39
-
40
-
41
-
42
-
43
-
44
-
45
-
46
-
47
-
48
-
49
-
50
-
51
-
52
-
53
-
54
-
55
-
56
-
57
-
58
-
59
-
60
-
 61
61 -
 62
62 -
 63
63 -
 64
64 -
 65
65 -
 66
66 -
 67
67 -
 68
68 -
 69
69 -
 70
70 -
 71
71 -
72
-
73
-
74
-
75
-
76
-
77
-
78
-
79
-
80
-
81
-
82
-
83
-
84
-
85
-
86
-
87
-
88
-
89
-
90
-
91
-
92
-
93
-
94
-
95
-
96
-
97
-
98
-
99
-
100
-
101
-
102
-
103
-
104
-
105
-
106
-
107
-
108
-
109
-
110
-
111
-
112
-
113
-
114
-
115
-
116
-
117
-
118
-
119
-
120
-
121
-
122
-
123
-
124
-
125
-
126
-
127
-
128
-
129
-
130
-
131
-
132
-
133
-
134
-
135
-
136
-
137
-
138
-
139
-
140
-
141
-
142
-
143
-
144
-
145
-
146
-
147
-
148
-
149
-
150
-
151
-
152
 |
 |