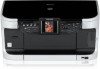
Canon PIXMA MP800 Service Manual - Page 25
Operation panel removal
 |
View all Canon PIXMA MP800 manuals
Add to My Manuals
Save this manual to your list of manuals |
Page 25 highlights
(2) Operation panel removal (I) Remove the panel cover L and R. - Insert a flat-blade screwdriver into a space between the panel cover and the scanner unit, and slowly push the cover up to remove it. - For claws, see the photos below (5 claws each). (II) Remove the panel board. - Remove the 4 screws (in the blue circles in the photo below) from the panel board. - Release the 2 claws (in the yellow circles in the photo), and raise the panel board. - While paying attention to the 3 locations at the top of the panel board (in the green circles in the photo) , turn the panel board over. 1-20
-
 1
1 -
2
-
3
-
4
-
5
-
6
-
7
-
8
-
9
-
10
-
11
-
12
-
13
-
14
-
15
-
16
-
17
-
18
-
19
-
 20
20 -
 21
21 -
 22
22 -
 23
23 -
 24
24 -
 25
25 -
 26
26 -
 27
27 -
 28
28 -
 29
29 -
 30
30 -
31
-
32
-
33
-
34
-
35
-
36
-
37
-
38
-
39
-
40
-
41
-
42
-
43
-
44
-
45
-
46
-
47
-
48
-
49
-
50
-
51
-
52
-
53
-
54
-
55
-
56
-
57
-
58
-
59
-
60
-
61
-
62
 |
 |

(2)
Operation panel removal
(I)
Remove the panel cover L and R.
- Insert a flat-blade screwdriver into a space between the panel cover and the scanner unit, and slowly push the cover up to
remove it.
- For claws, see the photos below (5 claws each).
(II)
Remove the panel board.
- Remove the 4 screws (in the blue circles in the photo below) from the panel board.
- Release the 2 claws (in the yellow circles in the photo), and raise the panel board.
- While paying attention to the 3 locations at the top of the panel board (in the green circles in the photo) , turn the panel
board over.
1-20