Canon RM-9 V1.0 Network Video Recording Software RM Series Administrator s Man - Page 79
Using the Storage Server for Motion Detection, Click [Motion Detection Recording] in the recording
 |
View all Canon RM-9 V1.0 manuals
Add to My Manuals
Save this manual to your list of manuals |
Page 79 highlights
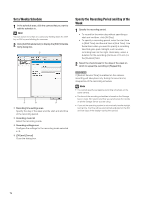
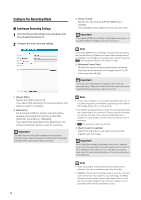
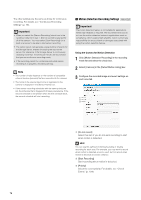
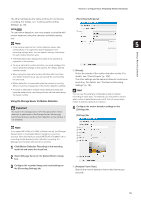
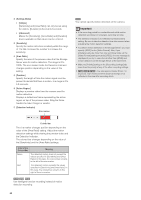
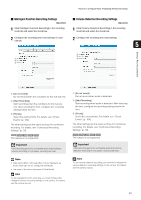
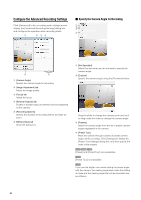
Record on a Regular Basis (Repeating Weekly Schedules) The other settings are the same as those for continuous recording. For details, see "Continuous Recording Settings" (p. 76). [Recording Settings] tab To use motion detection, you must create a schedule with ➀ motion detection using the camera's schedule setting tool. Note 5 • If the camera supports four motion detection areas, tabs named [Area 1] through [Area 4] are displayed in the recording settings area. You can specify settings individually for each motion detection area. Setting a Recording Schedule • The [Area Name] box displays the name of the area that is registered in the camera. • To use a camera for motion detection, you must configure the motion detection settings on the camera. For details, see the camera manual. • When using the camera for motion detection with more than one motion detection area, you can specify the event priority for each area. • Motion detection is suspended when the camera is panning, tilting or zooming, irrespective of the motion detection settings. ➀ [Priority] Select the priority of the motion detection events. For details, see "Check Events" (p. 104). The other settings are the same as those for continuous recording. For details, see "Continuous Recording Settings" (p. 76). • If motion is detected in multiple motion detection areas that have the same priority, recording will start with the area having the lowest number. Using the Storage Server for Motion Detection Hint You can use this setting to individually enable or disable recording for each area. For example, you may want to record when motion is detected around a vault, but not record when motion is detected around an entrance. Important The load on the Storage Server CPU increases when motion detection is performed on the Storage Server. We strongly recommend that you use the motion detection on the camera, if it is available. 4 Configure the motion detection settings on the [Settings] tab. [Settings] tab Note If you select [MPEG-4] or [H.264] in [Video Format], the [Storage Server] option in the [Detect Motion Using] box cannot be selected. Note also that if you select [MPEG-4] or [H.264] in other recording modes besides motion detection recording, the [Storage Server] option still cannot be selected. 1 Click [Motion Detection Recording] in the recording mode list and select the check box. 2 Select [Storage Server] in the [Detect Motion Using] box. 3 Configure the recorded image and event settings on the [Recording Settings] tab. ➆ ➀ [Analysis Frame Rate] Specify the motion detection frame rate (frames per second). 79
-
 1
1 -
2
-
3
-
4
-
5
-
6
-
7
-
8
-
9
-
10
-
11
-
12
-
13
-
14
-
15
-
16
-
17
-
18
-
19
-
20
-
21
-
22
-
23
-
24
-
25
-
26
-
27
-
28
-
29
-
30
-
31
-
32
-
33
-
34
-
35
-
36
-
37
-
38
-
39
-
40
-
41
-
42
-
43
-
44
-
45
-
46
-
47
-
48
-
49
-
50
-
51
-
52
-
53
-
54
-
55
-
56
-
57
-
58
-
59
-
60
-
61
-
62
-
63
-
64
-
65
-
66
-
67
-
68
-
69
-
70
-
71
-
72
-
73
-
 74
74 -
 75
75 -
 76
76 -
 77
77 -
 78
78 -
 79
79 -
 80
80 -
 81
81 -
 82
82 -
 83
83 -
 84
84 -
85
-
86
-
87
-
88
-
89
-
90
-
91
-
92
-
93
-
94
-
95
-
96
-
97
-
98
-
99
-
100
-
101
-
102
-
103
-
104
-
105
-
106
-
107
-
108
-
109
-
110
-
111
-
112
-
113
-
114
-
115
-
116
-
117
-
118
-
119
-
120
-
121
-
122
-
123
-
124
-
125
-
126
-
127
-
128
-
129
-
130
-
131
-
132
-
133
-
134
-
135
-
136
-
137
-
138
 |
 |
