Canon Vb-C60 NETWORK CAMERA VB-C60 Start Guide - Page 49
Ceiling-Mounting with Ceiling Mount Cover SS60-S-VB/SS60-B-VB Option, WARNING
 |
UPC - 013803118063
View all Canon Vb-C60 manuals
Add to My Manuals
Save this manual to your list of manuals |
Page 49 highlights
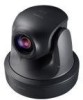
Step4 Camera Installation Using a Tripod The screw hole for tripod mounting is on the bottom of the camera. Always use a tripod mounting screw that is less than 5.5 mm (0.22 in.) in length. The use of screws Note 5.5 mm (0.22 in.) long or longer could damage the camera. Also, the tripod seat used should be at least 30 mm (1.18 in.) in diameter. 30mm (1.18inch) or wider 5.5mm (0.22inch) or shorter Tripod mounting screw Initial Setting and Installation Ceiling-Mounting with Ceiling Mount Cover SS60-S-VB/SS60-B-VB (Option) Follow the steps below to mount a camera on the ceiling. Install the camera securely. Carefully read and observe the precautions in "Before Installation" ( → P.2-14). Note a WARNING: Please contact the dealer where you purchased the camera, for installation and checkups. ● The place or ceiling, to which a camera is installed, should be strong enough to bear the weight of the camera plus its optional products, including Ceiling Mount Cover and Indoor Dome Housing. Be sure to reinforce the ceiling as needed. ● Please be sure to regularly check for rust on screws and brackets and for screw loose, to avoid injuries or damages to the camera caused by camera falling. ● It is not recommended to install the camera to places with heavy vibration. It may cause mechanical problems. ● When wiring cables, pay much attention not to damage the indoor wiring or piping. Side View of mounting Roof space Safety Wire Fix to an anchor or structure Ceiling Bracket LAN cable Ceiling board VB-C60 2-15
-
 1
1 -
2
-
3
-
4
-
5
-
6
-
7
-
8
-
9
-
10
-
11
-
12
-
13
-
14
-
15
-
16
-
17
-
18
-
19
-
20
-
21
-
22
-
23
-
24
-
25
-
26
-
27
-
28
-
29
-
30
-
31
-
32
-
33
-
34
-
35
-
36
-
37
-
38
-
39
-
40
-
41
-
42
-
43
-
 44
44 -
 45
45 -
 46
46 -
 47
47 -
 48
48 -
 49
49 -
 50
50 -
 51
51 -
 52
52 -
 53
53 -
 54
54 -
55
-
56
-
57
-
58
-
59
-
60
-
61
-
62
-
63
-
64
 |
 |
