Canon Vb-C60 NETWORK CAMERA VB-C60 Start Guide - Page 50
Drill two mounting screw holes and one cable hole in the ceiling
 |
UPC - 013803118063
View all Canon Vb-C60 manuals
Add to My Manuals
Save this manual to your list of manuals |
Page 50 highlights
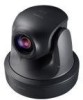
Step4 Camera Installation 1. Screw the Ceiling Bracket to a camera with supplied four screws 2. Determine the mounting position using supplied Template Determine and mark the mounting screw and cable hole positions using a pencil, with considering the camera direction. Direction the camera is facing Distance between screws: 157mm (6.18inch) Screw holes for M4.0 screws 3. Drill two mounting screw holes and one cable hole in the ceiling When using an AC adapter (option), be sure to drill a cable hole to be large enough Note for a ferrite core of the cable. 2-16
-
 1
1 -
2
-
3
-
4
-
5
-
6
-
7
-
8
-
9
-
10
-
11
-
12
-
13
-
14
-
15
-
16
-
17
-
18
-
19
-
20
-
21
-
22
-
23
-
24
-
25
-
26
-
27
-
28
-
29
-
30
-
31
-
32
-
33
-
34
-
35
-
36
-
37
-
38
-
39
-
40
-
41
-
42
-
43
-
44
-
 45
45 -
 46
46 -
 47
47 -
 48
48 -
 49
49 -
 50
50 -
 51
51 -
 52
52 -
 53
53 -
 54
54 -
 55
55 -
56
-
57
-
58
-
59
-
60
-
61
-
62
-
63
-
64
 |
 |

2-16
1.
Screw the Ceiling Bracket to a camera with supplied four screws
2.
Determine the mounting position using supplied Template
Determine and mark the mounting screw and cable hole positions using a pencil, with
considering the camera direction.
3.
Drill two mounting screw holes and one cable hole in the ceiling
Note
When using an AC adapter (option), be sure to drill a cable hole to be large enough
for a ferrite core of the cable.
Step4 Camera Installation
Distance between screws: 157mm (6.18inch)
Screw holes for M4.0 screws
Direction the camera is facing