Canon Vb-C60 NETWORK CAMERA VB-C60 Start Guide - Page 52
Attach Ceiling Mount Cover to the camera
 |
UPC - 013803118063
View all Canon Vb-C60 manuals
Add to My Manuals
Save this manual to your list of manuals |
Page 52 highlights
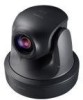
Step4 Camera Installation 7. Attach Ceiling Mount Cover to the camera Align the (o) mark on the cover with the (|) mark on the back of the camera, and then rotate the cover clockwise to the (|) mark. 2 1 Make sure that the Ceiling Mount Cover is attached securely. Note If the cables cannot be fit in the roof space, because the ceiling is concrete for example, Tip or they cannot be in the Ceiling Mount Cover, cut the notch of the Ceiling Mount Cover with a plier to provide a notch to pass the cables through. In this case, attach the Ceiling Mount Cover first, then connect the cables. 8. After the installation, reboot the camera to initialize the camera position (→ dOperation Guide P.1-44). Installation is now complete. 2-18
-
 1
1 -
2
-
3
-
4
-
5
-
6
-
7
-
8
-
9
-
10
-
11
-
12
-
13
-
14
-
15
-
16
-
17
-
18
-
19
-
20
-
21
-
22
-
23
-
24
-
25
-
26
-
27
-
28
-
29
-
30
-
31
-
32
-
33
-
34
-
35
-
36
-
37
-
38
-
39
-
40
-
41
-
42
-
43
-
44
-
45
-
46
-
 47
47 -
 48
48 -
 49
49 -
 50
50 -
 51
51 -
 52
52 -
 53
53 -
 54
54 -
 55
55 -
 56
56 -
 57
57 -
58
-
59
-
60
-
61
-
62
-
63
-
64
 |
 |

2-18
7.
Attach Ceiling Mount Cover to the camera
Align the (o) mark on the cover with the (|) mark on the back of the camera, and then rotate the
cover clockwise to the (|) mark.
Tip
If the cables cannot be fit in the roof space, because the ceiling is concrete for example,
or they cannot be in the Ceiling Mount Cover, cut the notch of the Ceiling Mount
Cover with a plier to provide a notch to pass the cables through. In this case, attach
the Ceiling Mount Cover first, then connect the cables.
8.
After the installation, reboot the camera to initialize the camera position (
→
d
Operation Guide P.1-44).
Installation is now complete.
Step4 Camera Installation
Note
Make sure that the Ceiling Mount Cover is attached securely.
1
2