Canon ZR-850 ZR850 ZR830 Manuals - Page 42
Display Setup, Normal]
 |
UPC - 013803078152
View all Canon ZR-850 manuals
Add to My Manuals
Save this manual to your list of manuals |
Page 42 highlights
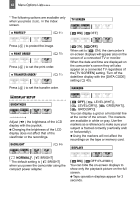
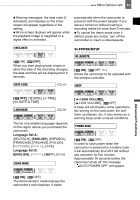
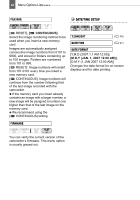
42 Menu Options Lists * The following options are available only when you press FUNC. in the index screen. TV SCREEN PROTECT* ( 61) [ ON], [ OFF] Press ( ) to protect the image. PRINT ORDER* ( 75) Press ( ) to set the print order. TRANSFER ORDER* ( 71) Press ( ) to set the transfer order. Display Setup (LCD Brightness, Language, etc.) DISPLAY SETUP BRIGHTNESS Adjust ( ) the brightness of the LCD display with the joystick. Changing the brightness of the LCD display does not affect that of the viewfinder or the recordings. BACKLIGHT ( 24) [ ON], [ OFF] When set to [ ON], the camcorder's on-screen displays will appear also on the screen of a connected TV or monitor. When the date and time are displayed on the camcorder's screen they will also appear on a connected TV regardless of the [TV SCREEN] setting. Turn off the date/time display with the [DATA CODE] setting ( 43). MARKERS [ OFF], [ LEVEL(WHT)], [ LEVEL(GRY)], [ GRID(WHT)], [ GRID(GRY)] You can display a grid or a horizontal line at the center of the screen. The markers are available in white or gray. Use the markers as a reference to make sure your subject is framed correctly (vertically and/ or horizontally). Using the markers will not affect the recordings on the tape or memory card. DISPLAYS [ NORMAL]*, [ BRIGHT] * The default setting is [ BRIGHT] when you power the camcorder using the compact power adapter. [ ON], [ OFF] You can hide the on-screen displays to show only the playback picture on the full screen. Tape operation displays appear for 2 seconds.
-
 1
1 -
2
-
3
-
4
-
5
-
6
-
7
-
8
-
9
-
10
-
11
-
12
-
13
-
14
-
15
-
16
-
17
-
18
-
19
-
20
-
21
-
22
-
23
-
24
-
25
-
26
-
27
-
28
-
29
-
30
-
31
-
32
-
33
-
34
-
35
-
36
-
 37
37 -
 38
38 -
 39
39 -
 40
40 -
 41
41 -
 42
42 -
 43
43 -
 44
44 -
 45
45 -
 46
46 -
 47
47 -
48
-
49
-
50
-
51
-
52
-
53
-
54
-
55
-
56
-
57
-
58
-
59
-
60
-
61
-
62
-
63
-
64
-
65
-
66
-
67
-
68
-
69
-
70
-
71
-
72
-
73
-
74
-
75
-
76
-
77
-
78
-
79
-
80
-
81
-
82
-
83
-
84
-
85
-
86
-
87
-
88
-
89
-
90
-
91
-
92
-
93
-
94
-
95
-
96
-
97
-
98
 |
 |
