Casio XJ-560 Owners Manual - Page 56
View Custom Logo, To con custom logo settings, To view the current custom logo
 |
View all Casio XJ-560 manuals
Add to My Manuals
Save this manual to your list of manuals |
Page 56 highlights
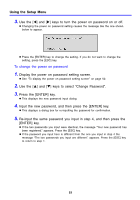
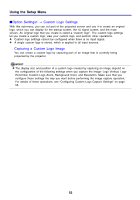
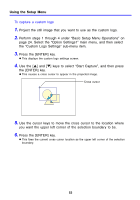
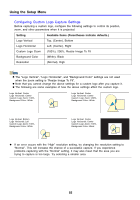
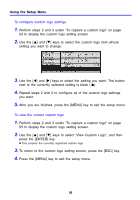
Using the Setup Menu To configure custom logo settings 1. Perform steps 2 and 3 under "To capture a custom logo" on page 53 to display the custom logo setting screen. 2. Use the [S] and [T] keys to select the custom logo item whose setting you want to change. 3. Use the [W] and [X] keys to select the setting you want. The button next to the currently selected setting is black ( z). 4. Repeat steps 2 and 3 to configure all of the custom logo settings you want. 5. After you are finished, press the [MENU] key to exit the setup menu. To view the current custom logo 1. Perform steps 2 and 3 under "To capture a custom logo" on page 53 to display the custom logo setting screen. 2. Use the [S] and [T] keys to select "View Custom Logo", and then press the [ENTER] key. z This projects the currently registered custom logo. 3. To return to the custom logo setting screen, press the [ESC] key. 4. Press the [MENU] key to exit the setup menu. 56
-
 1
1 -
2
-
3
-
4
-
5
-
6
-
7
-
8
-
9
-
10
-
11
-
12
-
13
-
14
-
15
-
16
-
17
-
18
-
19
-
20
-
21
-
22
-
23
-
24
-
25
-
26
-
27
-
28
-
29
-
30
-
31
-
32
-
33
-
34
-
35
-
36
-
37
-
38
-
39
-
40
-
41
-
42
-
43
-
44
-
45
-
46
-
47
-
48
-
49
-
50
-
 51
51 -
 52
52 -
 53
53 -
 54
54 -
 55
55 -
 56
56 -
 57
57 -
 58
58 -
 59
59 -
 60
60 -
 61
61 -
62
-
63
-
64
-
65
-
66
-
67
-
68
-
69
-
70
-
71
-
72
-
73
-
74
-
75
-
76
-
77
-
78
 |
 |
