Casio XJ-560 Owners Manual - Page 70
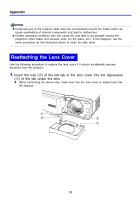
Cleaning the Projector, Cleaning the Lens, Cleaning Intake and Exhaust Vents
 |
View all Casio XJ-560 manuals
Add to My Manuals
Save this manual to your list of manuals |
Page 70 highlights
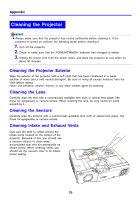
Appendix Cleaning the Projector z Always make sure that the projector has cooled sufficiently before cleaning it. If the projector is turned on, perform the following steps before cleaning it. 1. Turn off the projector. 2. Check to make sure that the POWER/STANDBY indicator has changed to amber. 3. Unplug the power cord from the power outlet, and allow the projector to cool down for about 60 minutes. Cleaning the Projector Exterior Wipe the exterior of the projector with a soft cloth that has been moistened in a weak solution of water and a mild neutral detergent. Be sure to wring all excess moisture from the cloth before wiping. Never use benzene, alcohol, thinner, or any other volatile agent for cleaning. Cleaning the Lens Carefully wipe the lens with a commercially available lens cloth or optical lens paper, like those for eyeglasses or camera lenses. When cleaning the lens, be very careful to avoid scratching it. Cleaning the Sensors Carefully wipe the sensors with a commercially available lens cloth or optical lens paper, like those for eyeglasses or camera lenses. Cleaning Intake and Exhaust Vents Dust and dirt tend to collect around the intake vents located on the bottom of the projector. Because of this, you should use a vacuum cleaner to clean away accumulated dust and dirt periodically as shown below. When cleaning vents, you should set the vacuum clear to its lowest power setting. 70
-
 1
1 -
2
-
3
-
4
-
5
-
6
-
7
-
8
-
9
-
10
-
11
-
12
-
13
-
14
-
15
-
16
-
17
-
18
-
19
-
20
-
21
-
22
-
23
-
24
-
25
-
26
-
27
-
28
-
29
-
30
-
31
-
32
-
33
-
34
-
35
-
36
-
37
-
38
-
39
-
40
-
41
-
42
-
43
-
44
-
45
-
46
-
47
-
48
-
49
-
50
-
51
-
52
-
53
-
54
-
55
-
56
-
57
-
58
-
59
-
60
-
61
-
62
-
63
-
64
-
 65
65 -
 66
66 -
 67
67 -
 68
68 -
 69
69 -
 70
70 -
 71
71 -
 72
72 -
 73
73 -
 74
74 -
 75
75 -
76
-
77
-
78
 |
 |
