Cisco WAE-674-K9 Hardware Installation Guide - Page 36
Aligning the Slide Rails, Step 2
 |
UPC - 882658200076
View all Cisco WAE-674-K9 manuals
Add to My Manuals
Save this manual to your list of manuals |
Page 36 highlights
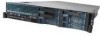
Installing the Wide Area Application Engine Chapter 3 Installing the Wide Area Application Engine Step 2 Align the slide rail with the front mounting flange. Use the score mark on the slide rail (labeled 1 in Figure 3-3) to align the slide rail. Push outward on the slide rail latch to close the latch and secure the slide rail. Do the same for the front of the other slide rail. Align the slide rail with the rear mounting flange. The slide rail occupies the full height of the device. Close the latches to secure the rear of both the slide rails. Note Make sure that the slide rails are securely seated on the mounting flanges. When the slide is secure, the slide rail pins protrude from the slide rails. Figure 3-3 Aligning the Slide Rails 2 1 134571 1 Slide rail score mark 2 Slide rail pins Step 3 Extend the slide rails fully from the rack until the slide rails lock. Align the tabs on the slide rails (labeled 1 in Figure 3-4) with the matching inserts on the appliance and lower the appliance onto the slide rails. Note Make sure that each slide rail tab is inserted in the matching insert on the appliance and that the appliance is resting on the top edge of the slide rail. Cisco Wide Area Application Engine 7341, 7371, and 674 Hardware Installation Guide 3-6 OL-15012-02
-
 1
1 -
2
-
3
-
4
-
5
-
6
-
7
-
8
-
9
-
10
-
11
-
12
-
13
-
14
-
15
-
16
-
17
-
18
-
19
-
20
-
21
-
22
-
23
-
24
-
25
-
26
-
27
-
28
-
29
-
30
-
 31
31 -
 32
32 -
 33
33 -
 34
34 -
 35
35 -
 36
36 -
 37
37 -
 38
38 -
 39
39 -
 40
40 -
 41
41 -
42
-
43
-
44
-
45
-
46
-
47
-
48
-
49
-
50
-
51
-
52
-
53
-
54
-
55
-
56
-
57
-
58
-
59
-
60
-
61
-
62
-
63
-
64
-
65
-
66
-
67
-
68
-
69
-
70
-
71
-
72
-
73
-
74
-
75
-
76
-
77
-
78
-
79
-
80
-
81
-
82
-
83
-
84
-
85
-
86
-
87
-
88
-
89
-
90
-
91
-
92
-
93
-
94
-
95
-
96
-
97
-
98
-
99
-
100
-
101
-
102
-
103
-
104
-
105
-
106
-
107
-
108
-
109
-
110
-
111
-
112
-
113
-
114
-
115
-
116
-
117
-
118
-
119
-
120
-
121
-
122
-
123
-
124
-
125
-
126
-
127
-
128
-
129
-
130
-
131
-
132
-
133
-
134
-
135
-
136
-
137
-
138
-
139
-
140
-
141
-
142
-
143
-
144
-
145
-
146
-
147
-
148
-
149
-
150
-
151
-
152
 |
 |
