Compaq 400338-001 Compaq Server Console Switch User Guide - Page 129
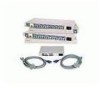
kit, Compaq Server Console Switch, language selection
 |
UPC - 743172745156
View all Compaq 400338-001 manuals
Add to My Manuals
Save this manual to your list of manuals |
Page 129 highlights
H hardware installation 2-1 reset switch 1-2 settings, saving on 2-Port 5-19 heel straps, using B-2 height 2-Port unit D-1 4- and 8-Port units D-2 help resources xii help, opening online 4-3 I installation 2-Port 0U 2-2, 2-5 4-Port and 8-Port side-mount 0U 2-5 cage nut in rear of rack 2-10 checklist 2-1 hardware 2-1 side-mount, securing 2-8 K keyboard conventions, OSD 4-3 enabled/disabled 4-32 LED settings, viewing 4-32 locking 4-25 locking on 2-Port unit 5-15 port mode, viewing 4-32 resetting 4-11 resetting on 2-Port unit 5-19 set for simultaneous control See broadcast settings, saving See Snapshot button type, viewing 4-32 typematic rate, viewing 4-32 kit, Compaq Server Console Switch, contents 2-1 Index L language selection 4-1 left mouse button, function 4-2 M Main screen description 4-5 functions 4-5 making connections under power 3-10 master/remote 3-11 menu attributes, changing on 2-Port unit 5-7 Menu button 4-7 menu option, selecting 4-3 menu overview 4-4 Modify button 4-12 monitor blanking 4-26 blanking on 2-Port unit 5-17 settings, establishing 4-8 type, modifying 4-12 type, using default 4-12 mouse conventions, OSD 4-2 enabled/disabled 4-32 locking 4-25 resetting 4-11 resetting on 2-Port unit 5-19 resolution, viewing 4-32 sample rate, viewing 4-32 set for simultaneous control See broadcast settings, saving See Snapshot button type, viewing 4-32 mouse button left, function 4-2 right, function 4-2 mouse compliance statement A-5 Compaq Server Console Switch User Guide Index-3
-
 1
1 -
2
-
3
-
4
-
5
-
6
-
7
-
8
-
9
-
10
-
11
-
12
-
13
-
14
-
15
-
16
-
17
-
18
-
19
-
20
-
21
-
22
-
23
-
24
-
25
-
26
-
27
-
28
-
29
-
30
-
31
-
32
-
33
-
34
-
35
-
36
-
37
-
38
-
39
-
40
-
41
-
42
-
43
-
44
-
45
-
46
-
47
-
48
-
49
-
50
-
51
-
52
-
53
-
54
-
55
-
56
-
57
-
58
-
59
-
60
-
61
-
62
-
63
-
64
-
65
-
66
-
67
-
68
-
69
-
70
-
71
-
72
-
73
-
74
-
75
-
76
-
77
-
78
-
79
-
80
-
81
-
82
-
83
-
84
-
85
-
86
-
87
-
88
-
89
-
90
-
91
-
92
-
93
-
94
-
95
-
96
-
97
-
98
-
99
-
100
-
101
-
102
-
103
-
104
-
105
-
106
-
107
-
108
-
109
-
110
-
111
-
112
-
113
-
114
-
115
-
116
-
117
-
118
-
119
-
120
-
121
-
122
-
123
-
 124
124 -
 125
125 -
 126
126 -
 127
127 -
 128
128 -
 129
129 -
 130
130 -
 131
131 -
 132
132
 |
 |
