Craftsman 536.270320 Owners Manual - Page 16
TO CHANGE, MULCHER, PLATE, How To Remove, Mulcher, Plate, How To Install, The Mulcher
 |
View all Craftsman 536.270320 manuals
Add to My Manuals
Save this manual to your list of manuals |
Page 16 highlights
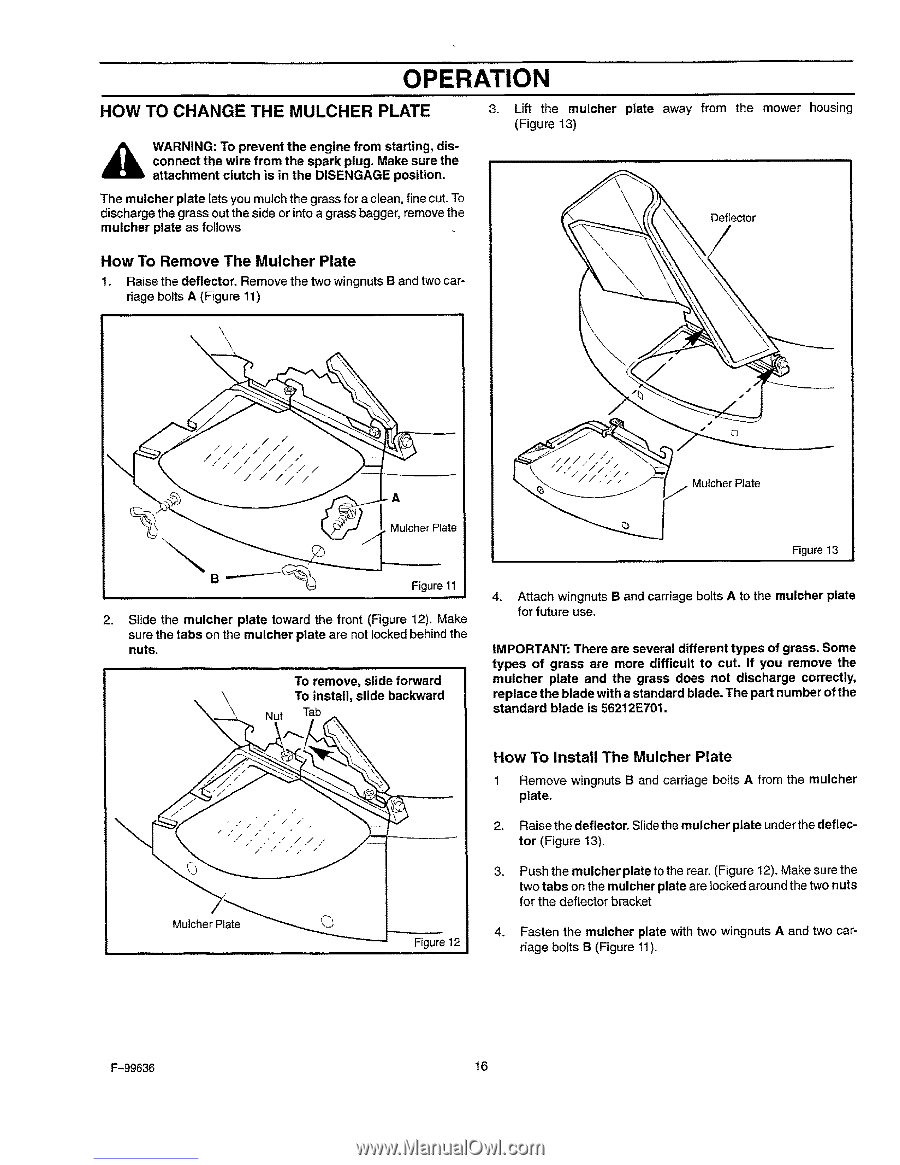
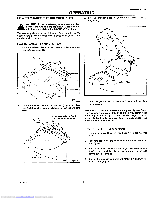
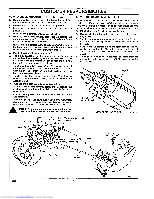
OPERATION HOW TO CHANGE THE MULCHER PLATE 3. Lift the mulcher plate away from the mower housing (Figure I3) ,_ WcoAnRnNecINt Gth:eTwoirperefvroemnt tthhee sepnagrikneplfurogm. Msatkaertisnugr,e dthise- attachment clutch is in the DISENGAGE position. The mulcher plate lets you mulch the grass for a clean, fine cut. To discharge the grass out the side or into a grass bagger, remove the mulcher plate as follows How To Remove The Mulcher Plate 1. Raise the deflector. Remove the two wingnuts B and two carriage bolts A (Figure 11) \ \ Deflector \ Mutcher Plate Mufchef Plate Figure 13 2. Slide the mulcher plate toward the front (Figure 12). Make sure the tabs on the mufcher plate are not locked behind the nuts. To remove, slide forward \ To install, slide backward Nut 4. Attach wingnuts B and carriage bolts A to the mulcher plate for future use. IMPORTANT: There are several different types of grass. Some types of grass are more difficult to cut. If you remove the mulcher plate and the grass does not discharge correctly, replace the blade with a standard blade. The part number of the standard blade is 56212E701. Mulcher Plate Figure 12 How To Install The Mulcher Plate 1 Remove wingnuts B and carriage bolts A from the mulcher plate. 2. Raise the deflector. Slidethe mulcher plate under the deflector (Figure 13). 3. Push the mulcher plate to the rear. (Figure 12). Make sure the two tabs on the mulcher plate are lockedaround the two nuts for the deflector bracket 4. Fasten the mulcher plate with two wingnuts A and two cardage bolts B (Figure 11). F-99636 16 Downloaded from www.Manualslib.com manuals search engine
-
 1
1 -
2
-
3
-
4
-
5
-
6
-
7
-
8
-
9
-
10
-
 11
11 -
 12
12 -
 13
13 -
 14
14 -
 15
15 -
 16
16 -
 17
17 -
 18
18 -
 19
19 -
 20
20 -
 21
21 -
22
-
23
-
24
-
25
-
26
-
27
-
28
-
29
-
30
-
31
-
32
-
33
-
34
-
35
-
36
-
37
-
38
-
39
-
40
-
41
-
42
-
43
-
44
-
45
-
46
-
47
-
48
-
49
-
50
-
51
-
52
-
53
-
54
-
55
-
56
-
57
-
58
-
59
-
60
 |
 |