Creative MicroPhoto User Guide
Creative MicroPhoto - ZEN MicroPhoto - Digital Player Manual
 |
UPC - 054651135192
View all Creative MicroPhoto manuals
Add to My Manuals
Save this manual to your list of manuals |
Creative MicroPhoto manual content summary:
- Creative MicroPhoto | User Guide - Page 1
- Creative MicroPhoto | User Guide - Page 2
Technology Ltd. All rights reserved. The Creative logo, and Creative MediaSource are trademarks or registered trademarks of Creative Technology Ltd. in the United States and/or other countries. Microsoft, Windows, Windows Media, Outlook and the Windows logo are registered trademarks of Microsoft - Creative MicroPhoto | User Guide - Page 3
Zen MicroPhoto at a Glance 6 Zen MicroPhoto 6 Turning Zen MicroPhoto on and off 10 Vertical Touch Pad 10 Main Menu 11 Now Playing screen 12 Main Applications 13 Creative Media Explorer 13 Creative MediaSource Player/Organizer 13 Creative Media Toolbox 14 Accessories 16 Earphones 16 - Creative MicroPhoto | User Guide - Page 4
player information 41 Viewing and managing photos 41 Storing Photos and Data Files in Zen MicroPhoto . 43 Using your Zen MicroPhoto as a Removable Disk in Windows XP, Windows 2000 or Windows Me 43 Changing the amount of hard disk space in Removable Disk mode 46 Stopping Zen MicroPhoto Properly - Creative MicroPhoto | User Guide - Page 5
the display duration 53 Setting the display contrast 54 Setting the Idle Sleep time 54 Enabling the Snooze Timer 54 Changing the menu language 55 Resetting Zen MicroPhoto 55 Adding and removing main menu items 55 Frequently Asked Questions 57 Safety Information 65 General Specifications 66 - Creative MicroPhoto | User Guide - Page 6
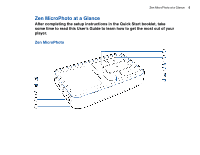
Zen MicroPhoto at a Glance 6 Zen MicroPhoto at a Glance After completing the setup instructions in the Quick Start booklet, take some time to read this User's Guide to learn how to get the most out of your player. Zen MicroPhoto - Creative MicroPhoto | User Guide - Page 7
Zen MicroPhoto at a Glance 7 Next/Fast-Forward button Press this button to go the next track. Press and hold this button to move forward within a track. Options - Creative MicroPhoto | User Guide - Page 8
cable to your computer's USB port. To charge your player without using the computer, purchase the Zen MicroPhoto Power Adapter or Universal Travel Adapter. For more information on this and other Zen MicroPhoto accessories, visit www.creative.com. Microphone Make instant recordings with this built-in - Creative MicroPhoto | User Guide - Page 9
fixed spots on your Zen MicroPhoto OLED display interfering with your use, contact Customer Support Services. You can find Customer Support Services information in the Installation and Applications CD. Go to d:\support\\\support.chm. (replace d:\ with the drive letter of your CD - Creative MicroPhoto | User Guide - Page 10
, slide the Power switch towards the Power it there until the OLED display lights up. 2 To turn off Zen MicroPhoto, slide the Power switch towards the Power it there until Shutting down... appears. Vertical Touch Pad icon and hold icon and hold Move your thumb - Creative MicroPhoto | User Guide - Page 11
Zen MicroPhoto at a Glance 11 Main Menu Press and hold the Menu/Back button to view Zen MicroPhoto's main menu. Move your thumb up and down the Vertical Touch Pad to scroll through menu items, and press the Menu/Back button to return to the previous menu or screen. - Creative MicroPhoto | User Guide - Page 12
at the top right corner of the OLED display indicate Zen MicroPhoto's current settings and battery status. NOTE When you see the Now Playing screen, firmly tap the Vertical Touch Pad to view the Selected Music screen. The Selected Music screen displays your list of music tracks pre-selected for - Creative MicroPhoto | User Guide - Page 13
in Zen MicroPhoto, in a Windows Explorer environment. Use Creative Media Explorer, if you: ■ are new to MP3 and WMA ripping and want to build up a library ■ prefer to manage your Zen MicroPhoto as a removable disk drive To start Creative Media Explorer, click the Zen MicroPhoto Media Explorer My - Creative MicroPhoto | User Guide - Page 14
. Auto Organizer ■ Organizes and renames your music using ID3 tag categories, for example, genre or artist. Auto Tag Cleaner ■ Updates your music's ID3 tags using Disc Recognition Service (DRS) from CDDB, Inc. Tag Format Converter ■ Converts non-English ID3 tags for proper display in Zen MicroPhoto. - Creative MicroPhoto | User Guide - Page 15
Zen MicroPhoto at a Glance 15 Audio Converter ■ Converts your audio files from one format to another, for example, WAV to MP3. This application is only available with Creative MediaSource installed. - Creative MicroPhoto | User Guide - Page 16
Accessories 16 Accessories Zen MicroPhoto comes with some of the accessories described below. Accessories that are not included with your player are available from your Creative Labs dealer or at our online store at www.creative.com. Earphones Zen MicroPhoto's earphones feature dynamic bass response - Creative MicroPhoto | User Guide - Page 17
Cradle Use Zen MicroPhoto's cradle with the belt clip for handsfree support. Accessories 17 - Creative MicroPhoto | User Guide - Page 18
Accessories 18 You can also use Zen MicroPhoto's cradle with the stand to rest Zen MicroPhoto on your desk. - Creative MicroPhoto | User Guide - Page 19
Pouch Zen MicroPhoto's protective pouch keeps Zen MicroPhoto snug and safe. Accessories 19 - Creative MicroPhoto | User Guide - Page 20
Neckstrap With Zen MicroPhoto's neckstrap, your music collection goes wherever you go. Accessories 20 NOTE Zen MicroPhoto's neckstrap is available only in selected countries. - Creative MicroPhoto | User Guide - Page 21
Accessories 21 Wired Remote Control Zen MicroPhoto's wired remote control gives you easy access to basic playback functions. Connect the wired remote control to Zen MicroPhoto's Headphone jack. NOTE Zen MicroPhoto's wired remote control is available separately in selected countries. - Creative MicroPhoto | User Guide - Page 22
track. Press and hold this button to move forward within a track. Headphone jack Connect Zen MicroPhoto's earphones to this jack. MODE button Press this button to switch between the Now Playing and FM Radio modes. Lock switch Slide to the Lock position to disable the controls on the wired remote - Creative MicroPhoto | User Guide - Page 23
Transferring content from your computer 23 Transferring content from your computer About Content Types Your Zen MicroPhoto is capable of playing different types of content, including audio tracks in the MP3, WAV or WMA formats, and photos in the JPEG (JPG) format. Getting Content You can acquire - Creative MicroPhoto | User Guide - Page 24
files, make sure your player is connected to your computer as shown below. To rip music from your CD collection 1 Double-click the My Computer icon on your desktop. 2 Click the Zen MicroPhoto Media Explorer icon . 3 Click the Rip Audio CDs button . 4 Follow the instructions on the screen. If you are - Creative MicroPhoto | User Guide - Page 25
Media button . 4 Follow the instructions on the screen. To copy data files using Creative Media Explorer 1 Double-click the My Computer icon on your desktop. 2 Click the Zen MicroPhoto Media Explorer icon . 3 Click the Transfer Documents button . Locate your data files and copy them to your player - Creative MicroPhoto | User Guide - Page 26
Creative MediaSource Player/Organizer or Creative Media Explorer. 3 Select My Computer and Zen MicroPhoto as the devices you want to synchronize, and then click Next. 4 Select the Audio, Organizer data or Pictures check box, and then click the Sync Now button. 5 Follow the instructions on the screen - Creative MicroPhoto | User Guide - Page 27
your computer 27 Disconnecting your player When you have finished transferring files, disconnect Zen MicroPhoto. DO NOT disconnect your player if you see the left picture below on the OLED display. Track or data file transfer is in progress and disconnecting your player may damage the content being - Creative MicroPhoto | User Guide - Page 28
Playing and Managing your player 28 Playing and Managing your player After transferring music or photos to Zen MicroPhoto, read on to learn how to get the most out of your player. Adjusting volume In the Now Playing screen, move your thumb up and down the Vertical Touch Pad to adjust the volume. To - Creative MicroPhoto | User Guide - Page 29
Playing and Managing your player 29 To lock Zen MicroPhoto Slide the Power switch towards the Lock Playing screen. icon. The Locked icon appears on the Now - Creative MicroPhoto | User Guide - Page 30
Playing and Managing your player 30 To lock the Zen MicroPhoto wired remote control (available separately) Slide the Lock switch towards the Lock icon. - Creative MicroPhoto | User Guide - Page 31
tracks you have organized into lists) on Zen MicroPhoto, or transferred playlists from Creative MediaSource Player/Organizer, you can search for music tracks screen. Firmly tap the Vertical Touch Pad when viewing the Now Playing screen to view the Selected Music screen. The Selected Music screen - Creative MicroPhoto | User Guide - Page 32
Touch Pad when viewing the Now Playing screen to view the Selected Music screen. The Selected Music screen shows you your list of selected music tracks. Selecting tracks with Zen MicroPhoto's DJ Instead of selecting tracks yourself, you can let Zen MicroPhoto's DJ pick out tracks for you. 1 Press - Creative MicroPhoto | User Guide - Page 33
player 33 6 Select Rarely Heard to let Zen MicroPhoto's DJ play rarely played tracks. Managing the list of selected tracks Tracks you have selected for playback can be viewed and managed in the Selected Music screen Pad. The Selected Music screen appears. 4 Press Now Playing screen. Shuffling and - Creative MicroPhoto | User Guide - Page 34
Managing your player 34 1 Press the Menu/Back button. The main menu appears. 2 Select Play Mode. 3 Select one of the following items in the Play Mode screen: ■ Normal Plays your selected tracks in sequential order. ■ Repeat Track Repeats the current track. When you select this play mode, screen - Creative MicroPhoto | User Guide - Page 35
Playing and Managing your player 35 1 In the Now Playing screen, press the Options button and select Seek Set Bookmark screen appears. 2 Select a bookmark number. Your bookmark is assigned to the selected bookmark number. If all 10 bookmark numbers have been assigned, you can replace an existing - Creative MicroPhoto | User Guide - Page 36
■ Make sure your earphones are connected to your player when scanning for radio stations. The earphone cable acts as an antenna for radio reception. ■ If you're using the Zen MicroPhoto wired remote control (available separately), you can press the MODE button to switch between the Now Playing and - Creative MicroPhoto | User Guide - Page 37
Playing and Managing your player 37 5 To fine tune or manually scan for a radio station, press the Play/Pause button to switch to the manual tuning view. Manual tuning view Preset information disappears in the manual tuning view. 6 Press the Next/Fast-Forward radio frequency. button or Previous/ - Creative MicroPhoto | User Guide - Page 38
Playing and Managing your player 38 Deleting radio presets 1 Press the Menu/Back button. The main menu appears. 2 Select FM Radio. 3 Press the Next/Fast-Forward you want to delete. - Creative MicroPhoto | User Guide - Page 39
on page 40. NOTE Make sure your earphones are connected to your player when recording radio broadcasts. The earphone cable acts as an antenna for to start recording. TIP For a clear recording, make sure you place Zen MicroPhoto as close as possible to what you want to record. 4 While recording - Creative MicroPhoto | User Guide - Page 40
Delete Playlist, Delete Album, Delete Artist, Delete Genre or Delete Track. For more song management tasks, connect your player to your computer and use Creative MediaSource Player/Organizer. Viewing track information To view detailed information about a track, such as its duration, scroll to the - Creative MicroPhoto | User Guide - Page 41
the total number of tracks, in the Information screen. 1 Press the Menu/Back button. The main menu appears. 2 Select System Information. Viewing and managing photos With Zen MicroPhoto's high-capacity storage, you can store thousands of photos in your player, and even set up a slideshow, so that - Creative MicroPhoto | User Guide - Page 42
Playing and Managing your player 42 To change the slideshow timer 1 Press the Menu/Back button. The main menu appears. 2 Select System Photo Settings Slide Timer. The current slideshow timing - Creative MicroPhoto | User Guide - Page 43
when you set up the Zen MicroPhoto software on your computer. For more information, refer to Creative Media Explorer's online Help. If you are using a shared computer in school or at the office without Windows XP (Service Pack 1 or higher) and Windows Media Player 10 installed, you can still - Creative MicroPhoto | User Guide - Page 44
Storing Photos and Data Files in Zen MicroPhoto 44 4 Connect Zen MicroPhoto to your computer using the supplied USB cable. - Creative MicroPhoto | User Guide - Page 45
the drag-and-drop method in Windows Explorer to copy files to and from Zen MicroPhoto. 6 When you have finished copying files, safely disconnect Zen MicroPhoto using the Safely Remove Hardware icon on the Taskbar. To safely disconnect your player, see "Stopping Zen MicroPhoto Properly" on page 47. - Creative MicroPhoto | User Guide - Page 46
to the Now Playing screen if the USB cable is still connected to it. NOTE ■ Data files saved in the Removable Disk Mode hard disk space cannot be viewed or managed with Creative Media Explorer. ■ Similarly, data files transferred to Zen MicroPhoto using Creative Media Explorer cannot be viewed or - Creative MicroPhoto | User Guide - Page 47
decrease the amount of hard disk space in Removable Disk mode. TIP ■ Creative Removable Disk Manager is included with your player and is automatically installed when you set up the Zen MicroPhoto software on your computer. ■ To start Creative Removable Disk Manager, click Start → Programs or All - Creative MicroPhoto | User Guide - Page 48
Explorer or Creative Media Source Player/Organizer. 3 Select the My Computer and Zen MicroPhoto as the devices you want to synchronize, and then click Sync Now. 4 Select the information you want to import from Microsoft Outlook, and then click the Next button. 5 Follow the instructions on the screen - Creative MicroPhoto | User Guide - Page 49
Using Zen MicroPhoto's Organizer Features 49 Viewing the calendar 1 Press the Menu/Back button. The main menu appears. 2 Select Extras Organizer Calendar. 3 Use the Next/Fast Forward and - Creative MicroPhoto | User Guide - Page 50
MicroPhoto Zen MicroPhoto's settings can be adjusted to suit your needs. Adjusting Vertical Touch Pad settings You can change the Vertical Touch Pad's sensitivity, and turn the Vertical Touch Pad's clicking sound on or off. 1 Press the Menu/Back button. The main menu appears. 2 Select System Player - Creative MicroPhoto | User Guide - Page 51
and time are displayed. 3 To adjust time, date and alarm settings, press the Options Alarm. button and select Set Using Zen MicroPhoto's equalizer (EQ) EQ is Zen MicroPhoto's collection of equalizer settings that enhance the sound of your music. You can select equalizer settings to suit the genre - Creative MicroPhoto | User Guide - Page 52
Personalizing Zen MicroPhoto 52 3 Select one of the EQ menu items. When an EQ setting is selected, appears on the Now Playing screen. To create a customized equalizer setting 1 In the EQ screen, select Custom EQ. Each slider on the Custom EQ screen represents successively higher frequencies that can - Creative MicroPhoto | User Guide - Page 53
Settings Bass Boost: On. Labeling Zen MicroPhoto with your name 1 Press the Menu/Back button. The main menu appears. 2 Select System Player Settings Owner. 3 Spell out button. The main menu appears. 2 Select System Player Settings Display Timer. 3 Use the Vertical Touch Pad to scroll to the display - Creative MicroPhoto | User Guide - Page 54
Enabling the Snooze Timer You can specify a fixed period of time before Zen MicroPhoto automatically turns off. This feature helps you conserve battery power. 1 Press the Menu/Back button. The main menu appears. 2 Select System Player Settings Snooze Timer. 3 Use the Vertical Touch Pad to scroll to - Creative MicroPhoto | User Guide - Page 55
Resetting Zen MicroPhoto You can reset Zen MicroPhoto Reset Settings. Adding and removing main menu items You can personalize the main menu by adding and removing menu items. For example, if you usually search for songs by album, you can add Albums to the main menu so you can access the Albums screen - Creative MicroPhoto | User Guide - Page 56
Personalizing Zen MicroPhoto 56 5 Use the Vertical Touch Pad to change the position of the highlighted menu item. 6 To revert to the default menu settings, press the Options Menu. button and select Default - Creative MicroPhoto | User Guide - Page 57
firmware updates to improve Zen MicroPhoto's functionality, go to www.creative.com, select your region and then select Support Downloads. What are the minimum system requirements for setting up Zen MicroPhoto's software? ■ Microsoft® Windows® XP Professional x64 Edition or Windows XP (Service - Creative MicroPhoto | User Guide - Page 58
to Zen MicroPhoto, you can use Creative MediaSource Player/Organizer or Creative Media Explorer. Can I use the player for portable data storage? Yes, you can. For more information, see "Storing Photos and Data Files in Zen MicroPhoto" on page 43. I have to recharge Zen MicroPhoto's battery quite - Creative MicroPhoto | User Guide - Page 59
does it mean? Your computer is actively managing your player. Warning: DO NOT disconnect your player while your computer is still actively managing it. Your computer is not actively managing your player. To use your player, disconnect it from your computer. You are upgrading your player's firmware. - Creative MicroPhoto | User Guide - Page 60
complete. Reset your player for the new firmware to take effect. For more information, see "How do I reset Zen MicroPhoto?" on page 61. There was an unexpected power loss during audio file transfer. Use your player only after this library rebuilding is completed. Your hard disk drive is updating the - Creative MicroPhoto | User Guide - Page 61
Customer Support Services. The firmware is corrupted. Reload the firmware, download a newer firmware version or contact Customer Support Services. How do I reset Zen MicroPhoto? You can solve most problems with Zen MicroPhoto by resetting it. 1 Turn off Zen MicroPhoto. 2 Slide open the battery cover - Creative MicroPhoto | User Guide - Page 62
icon and hold it there while you reinsert the battery. The Recovery Mode screen appears when Zen MicroPhoto turns on. 5 Four menu items are available in the Recovery Mode screen: Clean Up, Format All, Reload Firmware and Reboot. 6 To clean up your player's hard disk drive, select Clean Up. - Creative MicroPhoto | User Guide - Page 63
formatting your player. Selecting Reload Firmware erases your player's firmware. DO NOT select the Reload Firmware option unless you have downloaded a newer firmware version for Zen MicroPhoto, or have been advised to do so by the Creative Customer Services center. My Zen MicroPhoto wired remote - Creative MicroPhoto | User Guide - Page 64
Frequently Asked Questions 64 Where can I get more information on Creative products? Visit www.creative.com and select your region or country for updates and downloads relating to all Creative products. - Creative MicroPhoto | User Guide - Page 65
read the Warranty available with your product. ■ Do not dismantle or attempt to repair your player, battery or power adapter. Refer all servicing to Creative or authorized repair agents. ■ Do not expose your player or battery to temperatures outside the range of 0°C to 45°C (32°F to 113°F). ■ Do not - Creative MicroPhoto | User Guide - Page 66
■ 115 g (4.1 oz) with battery Power Source ■ Battery: 1 x Rechargeable Lithium Ion battery ■ USB bus powered when connected to Stereo and Mono Up to 32 preset stations FM region support International: 87.5 MHz ~ 108.0 MHz, 100 kHz intervals MP3 Playback Performance ■ Signal-to-Noise Ratio: Up to - Creative MicroPhoto | User Guide - Page 67
USB 2.0 (High speed) USB 1.1 (Full speed) Display ■ 128 x 128 pixel OLED display (262K color) Firmware Support ■ Upgradable via USB (firmware upgrades are available from www.creative.com) Earphone Specifications ■ Frequency Range: 20 Hz ~ 20 KHz ■ Sensitivity: 111 dB ±5 dB (I/P Level:1 mW
-
 1
1 -
 2
2 -
 3
3 -
 4
4 -
 5
5 -
 6
6 -
 7
7 -
8
-
9
-
10
-
11
-
12
-
13
-
14
-
15
-
16
-
17
-
18
-
19
-
20
-
21
-
22
-
23
-
24
-
25
-
26
-
27
-
28
-
29
-
30
-
31
-
32
-
33
-
34
-
35
-
36
-
37
-
38
-
39
-
40
-
41
-
42
-
43
-
44
-
45
-
46
-
47
-
48
-
49
-
50
-
51
-
52
-
53
-
54
-
55
-
56
-
57
-
58
-
59
-
60
-
61
-
62
-
63
-
64
-
65
-
66
-
67
 |
 |
