D-Link DHP-W306AV Product Manual - Page 13
Hardware Installation - For Wireless Router - reset d link
 |
UPC - 790069339226
View all D-Link DHP-W306AV manuals
Add to My Manuals
Save this manual to your list of manuals |
Page 13 highlights
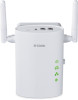
Section 1 - Product Overview Hardware Installation - For Wireless Router Note: A minimum of two PowerLine AV Adapters are required to create a network in order for your product to work properly. Scenario 1: If you "DO NOT" have an existing PowerLine network and would like to add a DHP-W306AV, we recommend purchasing D-Link's PowerLine AV Network Starter Kit (DHP-307AV) in order to create a PowerLine network. Step 1 Plug the PowerLine AV Adapter into a power outlet near your router as illustrated in Room 1. If you have a pair, plug the second PowerLine AV Adapter into a power outlet in a different room of your home as shown in Figure 1, Room 2. Note: Power source is confirmed when the green LED Power Indicator on the PowerLine AV Network Adapter is illuminated. Step 2 Connect the Ethernet cable to the PowerLine AV Adapter, and connect the other end of the Ethernet cable to the router's LAN as illustrated in Room 1. If you have a pair, connect the second Ethernet cable to the second PowerLine AV adapter. Next, connect then other end of to the PC as illustrated in Room 2. Note: Connection to an Ethernet-enabled device is confirmed when the green LED Ethernet Indicator on the PowerLine AV Network Adapter is illuminated. Room 2 DHP-W306AV Room 3 Room 1 Wireless Router Modem 1 2 LAN 3 4 RESET INTERNET USB 5V - - - 3A INTERNET Figure 1 Step 3 Plug the DHP-W306AV Extender into a power outlet in a different area of your home. Turn on the DHP-W306AV Extender by pushing the power button located on the side of this unit. Connect one end of the included Ethernet cable to the Ethernet port on the DHP-W306AV and attach the other end of the Ethernet cable to the PC as illustrated in Room 3. D-Link DHP-W306AV User Manual 13
-
 1
1 -
2
-
3
-
4
-
5
-
6
-
7
-
 8
8 -
 9
9 -
 10
10 -
 11
11 -
 12
12 -
 13
13 -
 14
14 -
 15
15 -
 16
16 -
 17
17 -
 18
18 -
19
-
20
-
21
-
22
-
23
-
24
-
25
-
26
-
27
-
28
-
29
-
30
-
31
-
32
-
33
-
34
-
35
-
36
-
37
-
38
-
39
-
40
-
41
-
42
-
43
-
44
-
45
-
46
-
47
-
48
-
49
-
50
-
51
-
52
-
53
-
54
-
55
-
56
-
57
-
58
-
59
-
60
-
61
-
62
-
63
-
64
-
65
-
66
-
67
-
68
-
69
-
70
-
71
-
72
-
73
-
74
-
75
 |
 |
