D-Link DHP-W306AV Product Manual - Page 40
Logs, Activity, Debug Information, Attacks, Dropped
 |
UPC - 790069339226
View all D-Link DHP-W306AV manuals
Add to My Manuals
Save this manual to your list of manuals |
Page 40 highlights
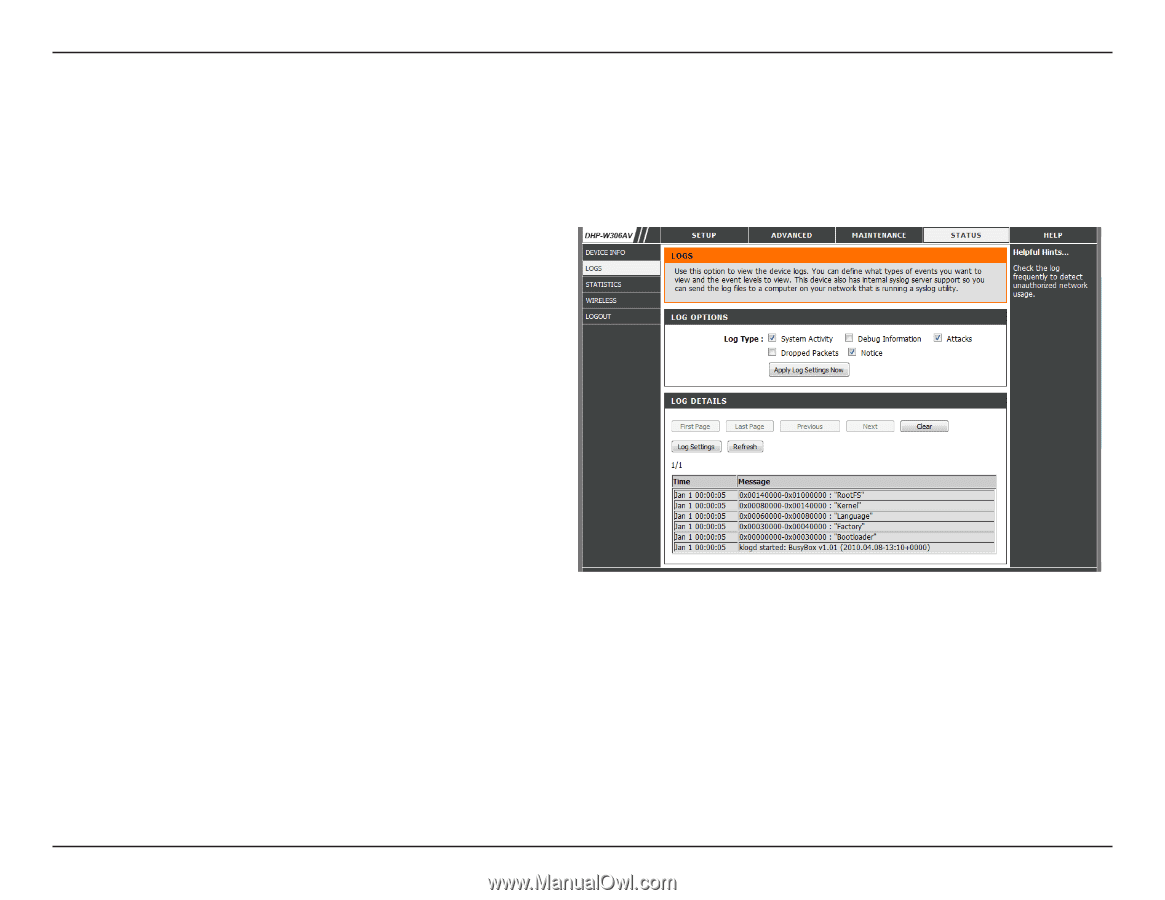
Section 3 - Configuration Logs The DHP-W306AV keeps a running log of events and activities occurring on the AP. If the AP is rebooted, the logs are automatically cleared. You can save the log files under Log Settings. Log Options: You can select the types of messages that you would like to display from the log: System Activity, Debug Information, Attacks, Dropped Packets, and Notice. Select the types you want to view and click Apply Log Settings Now. First Page: This button directs you to the first page of the log. Last Page: This button directs you to the last page of the log. Previous: This button directs you to the previous page of the log. Next: This button directs you to the next page of the log. Clear: This button clears all current log content. Log Settings: This button opens a new menu where you can configure the log settings. Refresh: This button refreshes the log. D-Link DHP-W306AV User Manual 40
-
 1
1 -
2
-
3
-
4
-
5
-
6
-
7
-
8
-
9
-
10
-
11
-
12
-
13
-
14
-
15
-
16
-
17
-
18
-
19
-
20
-
21
-
22
-
23
-
24
-
25
-
26
-
27
-
28
-
29
-
30
-
31
-
32
-
33
-
34
-
 35
35 -
 36
36 -
 37
37 -
 38
38 -
 39
39 -
 40
40 -
 41
41 -
 42
42 -
 43
43 -
 44
44 -
 45
45 -
46
-
47
-
48
-
49
-
50
-
51
-
52
-
53
-
54
-
55
-
56
-
57
-
58
-
59
-
60
-
61
-
62
-
63
-
64
-
65
-
66
-
67
-
68
-
69
-
70
-
71
-
72
-
73
-
74
-
75
 |
 |