D-Link DNR-312L User Manual - Page 12
Rear Panel (Connections
 |
View all D-Link DNR-312L manuals
Add to My Manuals
Save this manual to your list of manuals |
Page 12 highlights
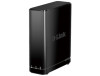
Section 1 - Product Overview Rear Panel (Connections) Cooling Fan Power Button Gigabit Ethernet Port HDMI Port USB Ports Audio In/Out Power Port COMPONENT Cooling Fan Power Button USB Ports Audio In/Out Gigabit Ethernet Port HDMI Port Power Port Reset Button D-Link DNR-312L User Manual Reset Button DESCRIPTION The cooling fan cools the hard drives. Press the power button to turn the NVR on. Press and hold for five seconds to turn off. Connect a USB thumb drive or external hard drive (with external power supply) for extra storage. Connect a USB mouse to control the interface when connected to a TV or monitor via HDMI. Connect a microphone to the Audio In port for two-way communication with your camera(s). Connect external speakers to the Audio Out port for audio playback. Note: Your camera(s) must support these features. Connect the device to your router or switch using an Ethernet cable. Connect to your TV or monitor using an HDMI cable. Connect the supplied power adapter to this port. Press and hold for 10 seconds to reset the NVR back to the factory default settings. 8
-
 1
1 -
2
-
3
-
4
-
5
-
6
-
 7
7 -
 8
8 -
 9
9 -
 10
10 -
 11
11 -
 12
12 -
 13
13 -
 14
14 -
 15
15 -
 16
16 -
 17
17 -
18
-
19
-
20
-
21
-
22
-
23
-
24
-
25
-
26
-
27
-
28
-
29
-
30
-
31
-
32
-
33
-
34
-
35
-
36
-
37
-
38
-
39
-
40
-
41
-
42
-
43
-
44
-
45
-
46
-
47
-
48
-
49
-
50
-
51
-
52
-
53
-
54
-
55
-
56
-
57
-
58
-
59
-
60
-
61
-
62
-
63
-
64
-
65
-
66
-
67
-
68
-
69
-
70
-
71
-
72
-
73
-
74
-
75
-
76
-
77
-
78
-
79
-
80
-
81
-
82
-
83
-
84
-
85
-
86
-
87
-
88
-
89
 |
 |
