D-Link DNR-312L User Manual - Page 14
Setup Wizard - Windows Users
 |
View all D-Link DNR-312L manuals
Add to My Manuals
Save this manual to your list of manuals |
Page 14 highlights
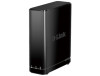
Section 2 - Installation Setup Wizard - Windows Users The following instructions explain how to set up the NVR with the Setup Wizard, using your Windows computer. If you are using a Mac, skip to "Setup Wizard - Mac Users" on page 11. Note: Make sure you install all cameras on the network before initiating the DNR-312L setup. Step 1: Insert the DNR-312L installation CD into the CD-ROM drive. If the CD Autorun function does not automatically start on your computer, click Start > Run. In the run box, type D:\autorun.exe (where D: represents the drive letter of your CD-ROM drive) and click OK. Note: If you do not have the CD, go to http://www.mydlink.com/support. Click the Storage tab and select your product to download the Setup Wizard. Step 2: From the Welcome screen, click the Start button to start the Setup Wizard, and follow the instructions to set up your NVR. Proceed to "Step 1 - Install a Hard Drive and Connect" on page 12. If you just need to add cameras to your previously configured DNR-312L, click the Skip button. Refer to "Camera Search" on page 52 for instructions about adding cameras. Note: The computer used to access the NVR web-based configuration interface must be on the same subnet as the NVR. If your network is using a DHCP server, the NVR will automatically be in the same subnet. D-Link DNR-312L User Manual 10
-
 1
1 -
2
-
3
-
4
-
5
-
6
-
7
-
8
-
 9
9 -
 10
10 -
 11
11 -
 12
12 -
 13
13 -
 14
14 -
 15
15 -
 16
16 -
 17
17 -
 18
18 -
 19
19 -
20
-
21
-
22
-
23
-
24
-
25
-
26
-
27
-
28
-
29
-
30
-
31
-
32
-
33
-
34
-
35
-
36
-
37
-
38
-
39
-
40
-
41
-
42
-
43
-
44
-
45
-
46
-
47
-
48
-
49
-
50
-
51
-
52
-
53
-
54
-
55
-
56
-
57
-
58
-
59
-
60
-
61
-
62
-
63
-
64
-
65
-
66
-
67
-
68
-
69
-
70
-
71
-
72
-
73
-
74
-
75
-
76
-
77
-
78
-
79
-
80
-
81
-
82
-
83
-
84
-
85
-
86
-
87
-
88
-
89
 |
 |
